

6.7 Cummins EGR Maintenance: Reliability Guide
The Problem: The $8,000 Mistake Nobody Warns 6.7L Cummins Owners About
The 2007.5–2024 Ram 6.7L Cummins has earned a reputation as one of the most durable diesel platforms, combining strong torque capability with long service life when properly maintained.
The EGR system, on the other hand, is a complex emissions component designed to reduce NOx — and as it ages, it can introduce maintenance concerns that affect engine reliability.
Here is what that means in practice. The EGR cooler cycles between ambient and 900+°F every time you drive. Soot packs the narrow passages. Coolant flow slows. The cooler cracks internally. In severe cases, internal cooler leaks can introduce coolant into the combustion chamber — potentially causing hydrolocked cylinders, bent connecting rods, and repairs exceeding $8,000.
The EGR valve, meanwhile, cakes up with carbon until it no longer seals. Exhaust gas flows continuously into the intake at idle — rough running, surging, reduced power — and the valve position sensor keeps reporting normal operation until it finally throws a code months later.
Then there is the throttle butterfly — designed to partially close when EGR flow is called for — that becomes a potential failure point if the EGR system configuration is changed. If that butterfly closes at highway speed, it can restrict airflow — potentially causing a sudden loss of power, drivability issues, or fault codes before the driver can react.
These components are interconnected, and a problem in one area can increase stress on the others. This guide covers what a complete solution looks like, what the parts cost versus the repairs they prevent, how to install them yourself, and the mistakes that turn a Saturday job into a flatbed ride.
🔎 Signs Your 6.7 Cummins May Have EGR Problems
EGR system issues on the 6.7L Cummins rarely appear as a single obvious symptom. More often, they develop as a combination of subtle changes that owners may overlook as normal aging — until a larger repair is required.
Common symptoms that may indicate EGR system concerns include:
✓ Coolant level slowly dropping — A minor but consistent loss of coolant with no visible external leak may point to internal EGR cooler seepage.
✓ White exhaust smoke at startup or under load — Coolant entering the combustion chamber through a compromised EGR cooler can produce persistent white vapor beyond normal cold-start condensation.
✓ Frequent or extended regeneration cycles — Increased soot loading, driving conditions, or emissions system issues may contribute to more frequent regeneration events.
✓ Elevated exhaust gas temperatures — EGR system issues can affect combustion characteristics and may contribute to abnormal EGT readings under certain operating conditions.
✓ Rough idle or surging at low RPM — A carbon-contaminated EGR valve that does not seal properly can cause inconsistent idle quality and low-speed drivability concerns.
✓ Check engine light with EGR-related DTCs — Codes such as P0401 (EGR flow insufficient), P0403/P0404 (EGR control-related faults), or other EGR efficiency-related codes may appear before more serious system issues develop.
✓ Intake runner carbon buildup — During inspection or maintenance, excessive oily carbon deposits in the intake tract can indicate long-term EGR system buildup.
If your truck is showing two or more of these signs, the EGR system deserves closer attention — ideally before the issue develops into a more expensive repair.
🔍 Why One Component Isn’t Enough — The Cascade Problem
These components are interconnected, and a failure in one area can increase stress on related components — which is why replacing only part of the system rarely solves the problem long-term.
In cases of internal EGR cooler leakage, coolant may enter the intake stream and mix with existing soot deposits, forming a wet sludge that cakes onto the EGR valve. The valve, now coated in coolant-soaked carbon, no longer seals. It sticks open. Hot exhaust gas flows continuously into the intake at idle and low RPM — conditions the engine was never designed to handle. Combustion temperatures climb. The ECM requests more EGR flow to bring NOx down. The already-leaking cooler cycles harder. The throttle valve, which the ECM is now activating more frequently to manage the degraded EGR flow, wears its actuator motor faster.
Problems in one component can contribute to additional stress on related components. Replacing just the EGR cooler while leaving a heavily carbon-coated valve in place means the new cooler operates under similar thermal and flow conditions. Similarly, replacing only the EGR valve while a cooler is showing signs of internal degradation may expose the new valve to the same deteriorating conditions. Leaving the throttle butterfly in the intake with no EGR circuit present introduces its own set of potential concerns — electronic actuator faults, corroded connectors, or residual command signals can cause unexpected positioning.
A complete solution addresses all three failure points in one service interval. Not because it is convenient, but because leaving the third component unaddressed can allow another potential failure point to remain. In many cases, repeat repairs occur when related components are inspected or addressed separately instead of evaluated as a complete system.
🔬 What Separates Quality Components From Lower-Cost Alternatives
Not all EGR hardware is made to the same standard. The difference between a component designed for long-term durability and one that may need replacement sooner is visible in the materials, the manufacturing process, and the quality control — not in the product photo on a listing page. Here is what to look for across each component type.
EGR Cooler Upgrade Kit
| Feature | Seguler Solution | Lower-Cost Alternatives |
|---|---|---|
| Cooler block-off material | Aluminum + stainless steel dual-material | Mild steel with basic coating |
| Gasket type | Multi-layer, exhaust-temp rated | Single-layer paper/composite — blowout risk |
| Coolant circuit design | Faster recirculation than factory routing | Basic plugs — can trap coolant in dead ends |
| Fitment | Vehicle-specific, pre-drilled factory bolt pattern |
Universal/semi-universal, slotted holes need modification |
| Included components | Complete: plates, fittings, throttle valve parts, all hardware | Bare minimum: plate and bolts only |
Throttle Valve Replacement
| Feature | Seguler Solution | Lower-Cost Alternatives |
|---|---|---|
| Construction | Fully TIG-welded, pressure-tested |
MIG or bead-welded — may not be tested |
| Material |
Machined aluminum flanges, consistent surface finish |
Cast or rough-machined — potential sealing irregularities |
| Bolt pattern accuracy | CNC-cut factory bolt pattern — drop-in fit |
Jig-drilled, wider tolerance — may need bolt-hole elongation |
| Internal diameter | Matched to intake runner ID | May neck down at weld joints, creating turbulence |
DPF / Catalyst Replacement Pipe
| Feature | Seguler Solution | Lower-Cost Alternatives |
|---|---|---|
| Material grade | T-409 stainless, consistent 1.5mm wall | Aluminized or thinner-gauge — rust at weld seams |
| Weld quality | Continuous TIG, back-purged | Intermittent/MIG — potential pinhole leaks |
| Hanger design |
Factory-position welded, uses stock rubber mounts |
Clamp-on universal — needs adjustment, may rattle |
| Fitment | Two-piece slip-fit for installation adjustment |
One-piece — demands exact alignment, no wiggle room |
These differences may not show up on day one — but they will at 20,000 miles, or the first time you pull a trailer up a 6% grade in 95°F heat. A blown gasket dumps exhaust gas into the engine bay. A boost leak from an untested throttle tube causes turbo overspeed, wearing the bearings with no warning light. A failed hanger drops a pipe onto the driveshaft at highway speed. The cost difference is measured in dollars at purchase. The difference during a failure is measured in towing bills and engine damage.
Cost Comparison: DIY Components vs Complete Solution vs Dealer Repair
We compared three approaches: a complete matched solution, individual components sourced separately, and dealer replacement.
Estimated dealer costs vary by dealership, region, and vehicle configuration. Current product pricing is available on Seguler.com.
Complete EGR Maintenance Solution
| Component | Product | Price |
|---|---|---|
| EGR Cooler + Valve Kit (2010–2024) | Seguler SG-ER-0092 | $89.99 |
| Throttle Valve Tube (2007–2024) | Seguler SG-ER-0072 | $31.99 |
| 4" DPF/CAT Replacement Pipe (2013–2018) | Seguler SG-DP-0213 | $192.31 |
| Total | — | $314.29 |
Individual Lower-Cost Components
| Component | Typical Price Range |
|---|---|
| EGR cooler upgrade (budget) | $35–65 |
| EGR valve replacement (budget) | $18–30 |
| DPF replacement pipe (aluminized) | $90–150 |
| Total | $143–245 |
The price difference is real — but the installer becomes responsible for verifying compatibility between components. Matched components from one manufacturer that have been pressure-tested are not the same as three individual components from three different sources, and the compatibility test happens on your truck, at your expense.
Dealer Replacement
We compared three approaches: a complete matched solution, individual components sourced separately, and factory dealer replacement.
Estimated dealer costs vary by dealership, region, labor rates, and vehicle configuration.
Factory Dealer Replacement
| Component | Part | Dealer Price |
|---|---|---|
| EGR cooler (factory) | Mopar OEM | $800–1,500 |
| EGR valve assembly | Mopar OEM | $400–700 |
| DPF assembly | Mopar OEM | $1,800–3,000 |
| Labor (EGR + DPF, 10–14h @ $150/hr) | — | $1,500–2,100 |
| Total | — | $4,500–7,300 |
Dealer replacement restores the factory emissions system but can involve significant parts and labor costs as vehicles age. For higher-mileage 6.7L Cummins trucks, factory repairs can represent a substantial maintenance investment.
The Real Comparison
| Approach | Cost | What You Get |
|---|---|---|
| Seguler EGR Maintenance Solution | $314.29 |
Matched components, one install, addresses key EGR and DPF maintenance points |
| Mixed-brand aftermarket components | $143–245 |
Mixed brands, variable compatibility, no pressure-testing guarantee |
| Dealer OEM replacement | $4,500–7,300 |
Factory parts, factory design, same failure modes |
The ~$170 difference between a matched Seguler solution and piecing together the lowest-cost individual components buys tested components from a single source and a pipe with consistent wall thickness. The difference versus dealer repair represents a different approach focused on aftermarket maintenance and component replacement. Parts pricing varies by supplier, vehicle configuration, and market conditions.
What Are You Really Paying For?
Here is the math, component by component.
The EGR cooler ($89.99 upgrade vs. $800–$1,500 dealer replacement)
The factory cooler is a brazed heat exchanger with hundreds of narrow passages. Over time, repeated EGR cycles can contribute to carbon buildup inside the cooler passages — reducing heat transfer efficiency, creating hot spots, and increasing stress on the brazed joints. In severe cases, internal cooler leaks can allow coolant to enter the combustion chamber, potentially leading to expensive engine repairs. Replacing the cooler before failure costs $89.99. Waiting until a failure occurs can result in significantly higher repair costs.
The throttle valve ($31.99 to address a potential single-point failure)
On a stock truck, the throttle butterfly is electronically actuated. When the EGR system is removed, that butterfly should never move — but actuators fail, harnesses chafe, and residual signals can partially close a butterfly that no longer serves a purpose. At 2,000+ RPM under load, a closing butterfly severely restricts intake airflow — potentially causing a sudden loss of power, drivability issues, or fault conditions with no advance warning. At $31.99, replacing a butterfly valve with a solid TIG-welded tube is one of the most cost-effective reliability upgrades available for a modified 6.7L.
The DPF Replacement Pipe ($192.31) Helps Reduce Regeneration-Related Oil Dilution
Every active DPF regeneration uses additional fuel injection to raise exhaust temperatures and burn trapped soot inside the DPF. Under certain driving conditions — especially frequent short trips or interrupted regeneration cycles — some fuel can pass the piston rings and contribute to crankcase oil dilution over time.
Fuel dilution reduces oil viscosity and weakens the protective film strength that bearings, turbochargers, and other high-load engine components depend on. Diesel fuel is not designed to provide the same lubrication properties as engine oil, which is why maintaining proper oil condition is critical for long-term 6.7L Cummins reliability.
The factory DPF system creates additional exhaust restriction and requires repeated regeneration cycles to maintain emissions performance. A properly configured DPF replacement pipe helps reduce this restriction and lowers the regeneration-related stress placed on the engine system.
At $192.31, this upgrade helps reduce strain on expensive engine and turbocharger components while supporting long-term 6.7L Cummins durability.
Many diesel technicians regularly encounter maintenance challenges on high-mileage 6.7L Cummins platforms. The components you install today can help reduce unnecessary stress and support reliable performance for years to come.
The Complete EGR Maintenance Solution — Three Components That Work Together
Each Seguler component addresses a specific failure point in the factory EGR architecture. All three are designed to be installed in the same session — one coolant drain, one teardown, one calibration load.
Seguler 2010-2024 6.7L Dodge Ram Cummins Diesel EGR Valve Cooler Delete Kit
The EGR Throttle Valve Cooler Delete Kit is designed for 2010–2024 6.7L Cummins diesel trucks to address common maintenance concerns associated with the factory EGR and throttle valve system. By simplifying the factory airflow path, it helps reduce potential restrictions caused by soot buildup, carbon deposits, and EGR-related components that can affect long-term engine airflow efficiency.
Over time, EGR components can contribute to intake contamination, airflow limitations, and increased maintenance needs, especially on trucks used for towing, heavy loads, or frequent operation. This upgrade helps create a cleaner and more consistent airflow system, supporting improved engine response, reduced EGR-related concerns, and more reliable operation for Ram 2500 and 3500 Cummins applications.
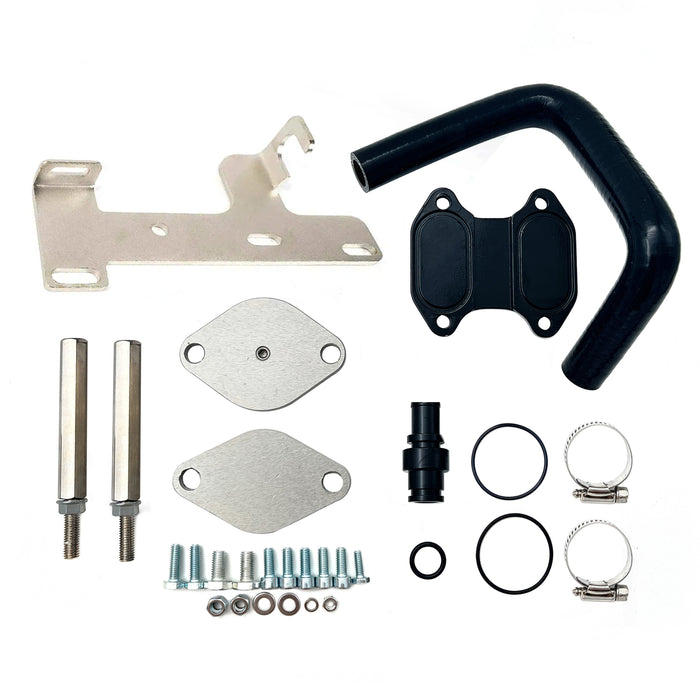
- Material & Application: Constructed from aluminum alloy and silicone for off-road use, completely replacing the stock EGR valve and EGR cooler without requiring extra parts.
- Soot & Gas Elimination: Eliminates soot buildup and clogged EGR valves, and prevents hot exhaust gases from being re-routed back into the motor.
- Cooling Optimization: Coolant temperatures run cooler because fluid bypasses the EGR cooler, recirculating through the engine faster and more efficiently than the stock system.
- Vehicle Fitment: Designed specifically for 2010-2024 6.7L Ram Cummins 2500 and 3500 diesel trucks.
For 2010–2024 6.7L Cummins Ram owners looking to address common EGR-related maintenance concerns, the EGR Throttle Valve Cooler Delete Kit provides a complete approach to improving airflow consistency and simplifying the factory EGR system layout. It is designed for trucks used in towing, heavy-duty work, and daily driving where long-term reliability and efficient engine operation are important.
By addressing multiple EGR-related components together, this solution helps reduce potential airflow restrictions, minimize carbon buildup concerns, and support a cleaner intake system. Combined with proper calibration and other airflow upgrades, it provides a practical option for owners focused on improving the overall reliability and performance of their Cummins diesel platform.
2007-2024 6.7L Dodge Ram Cummins Diesel EGR Valve Delete Kit
The EGR Valve Delete Kit is designed for 2007–2018 6.7L Ram Cummins diesel trucks to address common airflow restrictions associated with the factory EGR valve system. By eliminating the factory valve restriction point, it helps maintain a cleaner and more consistent airflow path, reducing the potential for carbon buildup and airflow disruption caused by exhaust gas recirculation components.
Over time, soot accumulation and EGR valve operation can affect intake airflow efficiency, throttle response, and overall engine performance. This upgrade helps simplify the intake system, reduce EGR-related maintenance concerns, and support more consistent engine operation under towing, heavy-load, and daily driving conditions. Designed for Ram 2500 and 3500 Cummins applications, it works well as part of a complete airflow improvement solution alongside exhaust and intake upgrades.
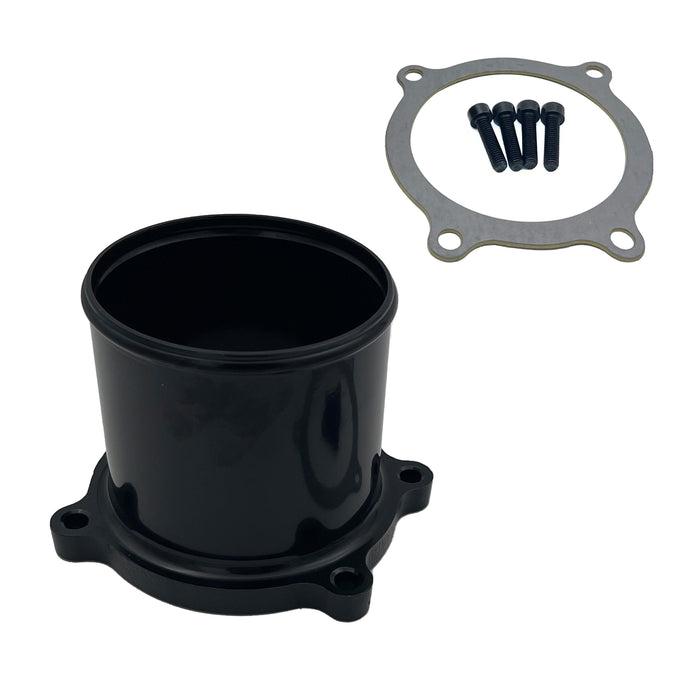
- Material & Construction: Crafted from aluminum, fully TIG welded, and pressure-tested for high-temperature and corrosion resistance.
- Airflow & Performance: Increases engine airflow, reduces turbulence, and removes the factory butterfly valve to allow more air into the engine while preventing accidental throttle closure.
- System Integration: Works with the EGR system to help recycle waste gas and reduce exhaust emissions.
- Vehicle Fitment: Designed for 2007-2024 6.7L Dodge RAM Cummins 2500/3500 diesel turbo trucks to improve engine efficiency and reliability.
For 2007–2018 6.7L Ram Cummins owners dealing with EGR-related airflow concerns, carbon buildup, or long-term maintenance challenges, the EGR Valve Delete Kit provides a practical solution to simplify the intake system and support more consistent engine operation. Combined with proper tuning and other airflow upgrades, it helps create a more efficient setup for towing, heavy-duty use, and long-term diesel ownership.
Seguler 2013-2018 6.7L Ram Cummins Turbo 4" Exhaust Tube Pipe
The 4" Exhaust Tube Pipe is designed for 2013–2018 6.7L Ram Cummins diesel trucks to improve exhaust flow efficiency and reduce restriction throughout the exhaust system. By providing a smoother exhaust path, it helps reduce backpressure, improve turbocharger response, and support better airflow during towing, heavy loads, and daily driving conditions. The optimized exhaust flow helps the engine breathe more efficiently and supports more consistent performance under demanding operation.
Factory exhaust systems are engineered for emissions compliance and general operation, but exhaust restrictions can become a concern as mileage increases or when trucks are used for towing and heavy-duty applications. The 4" Exhaust Tube Pipe provides an upgraded solution for owners looking to improve exhaust efficiency, reduce heat buildup associated with restricted airflow, and maintain reliable diesel performance. Designed for 2013–2018 6.7L Ram Cummins applications, it helps support improved airflow and a more efficient exhaust system setup.
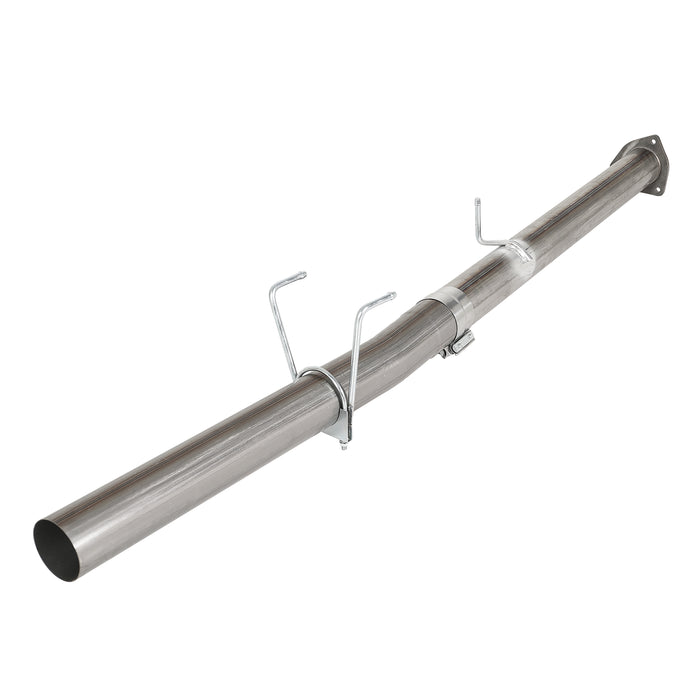
- Material & System: Constructed from T409 stainless steel featuring a 4.0" DPF and CAT delete exhaust system.
- Maintenance & Reliability: Eliminates the need for regular DPF maintenance and removes the risk of DPF failure to avoid expensive engine repairs.
- Performance Boost: Maximizes exhaust flow and reduces backpressure to improve motor performance, power, and torque for competition applications.
- Vehicle Fitment: Designed specifically for 2013-2018 Dodge Ram 2500 and 3500 6.7L Cummins diesel trucks.
Upgrade your 2013–2018 6.7L Ram Cummins exhaust system with this 4" Exhaust Tube Pipe designed to improve airflow, reduce backpressure, and support better overall diesel performance. Whether used for towing, daily driving, or heavy-duty applications, it provides the improved exhaust efficiency and reliability that Cummins owners expect from a performance-focused upgrade.
⚠️ CRITICAL CALIBRATION WARNING — READ THIS BEFORE INSTALLING ANY COMPONENT
It bears repeating: these are not simple bolt-on modifications. EGR cooler removal alters the coolant circuit and removes the exhaust gas recirculation path. Throttle valve replacement removes an electronically-controlled intake butterfly. DPF and catalyst replacement alters the exhaust system monitoring architecture.
Your truck’s ECM monitors all of these systems continuously — EGR valve position, EGR temperature, DPF pressure differential, exhaust gas temperature at multiple points, and SCR NOx efficiency. Changing the hardware without updating the ECM calibration will trigger an immediate cascade of diagnostic trouble codes, forced derate / limp mode that limits engine RPM to approximately 1,200, and potentially permanent DTCs that require a dealer-level scan tool to clear.
A compatible calibration that accounts for all removed or modified components is MANDATORY for these parts. DO NOT START THE ENGINE before the appropriate calibration is loaded to the ECM.
Load the calibration first. Then install the hardware. Installing the hardware first and loading the calibration later will trigger fault codes that may require dealer intervention to clear. The correct sequence is: read the existing ECM file, load the new calibration file that accounts for EGR, DPF, and SCR removal, confirm the flash completed successfully, then begin the physical installation.
Bottom line: calibration before hardware. Always.
Installation Overview
The EGR cooler, EGR valve, and throttle valve on the 6.7L Cummins are all accessible from above — none of these components require removing the intake manifold. The DPF/catalyst assembly is underneath. Combined installation is a full weekend for a first-timer with basic mechanical skills, or a single day of shop labor if you have the work done professionally. Doing all three together means one coolant drain, one teardown session, one calibration session.
EGR Cooler + EGR Valve Upgrade Kit Installation (SG-ER-0092)
The EGR cooler on the 6.7L sits in the engine valley, accessible from above once the plastic engine cover, EGR crossover pipe, and surrounding components are removed. This kit does not require removing the intake manifold, the fuel rail, or the injection lines. A methodical owner with basic hand tools and a full Saturday can complete this installation.
Before You Start
It bears repeating: this is not a simple bolt-on modification. EGR cooler removal alters the coolant circuit. Your truck’s ECM monitors EGR system parameters continuously — EGR valve position, EGR temperature, EGR flow rate, and coolant temperature correlation. Changing the hardware without updating the ECM calibration will trigger check-engine lights, derate / limp mode, and potentially permanent diagnostic trouble codes.
A compatible calibration that accounts for the removed EGR cooler and EGR valve is MANDATORY for this kit. DO NOT START THE ENGINE before the appropriate calibration is installed.
- Disconnect both batteries before beginning any electrical work.
- Drain coolant from the radiator petcock into a clean, labeled container.
- Label every connector as you disconnect it. The 6.7L engine harness has multiple identical-looking 2-pin and 3-pin connectors — mixing them up at reassembly means hours of diagnostic guesswork.
- Some electrical connectors have a locking plate. Slide it to the unlock position before pulling the connector.
Tools needed: socket set (8mm, 10mm, 11mm, 14mm, 15mm), flathead screwdriver, pick set, coolant drain pan, replacement coolant.
Step 1 — Remove the plastic engine cover secured by four 8mm bolts. The dipstick must be removed to slide the cover off.
Step 2 — Loosen the two V-clamps on the EGR crossover pipe (11mm socket). Remove the 10mm center bolt securing the tube to the support bracket, and disconnect the sensor plug. Lift the crossover pipe out. Disconnect the electrical connector on the EGR valve — slide the locking plate to unlock before pulling.
Step 3 — Remove the EGR valve held by four 10mm bolts. Clean all old gasket material from the intake elbow mounting surface with a plastic scraper. Stuff clean rags into each open port to prevent debris from entering the intake.
Step 4 — Pull the electrical connector off the back of the throttle valve (driver’s side, below the intake elbow). Slide the locking plate to unlock first. Install the intake block-off plate with the provided bolts. Confirm both O-rings are fully seated in their grooves before tightening.
Step 5 — Remove the heat shield from the EGR bypass valve (three 10mm nuts, two 8mm bolts). Remove the four 10mm bolts holding the exhaust bypass in place — the bypass comes out with the EGR servo motor attached. Remove the five 10mm bolts securing the servo mounting bracket. Lift the servo assembly and exhaust bypass out together. Remove the crankcase breather tube crossing the top of the EGR cooler. Disconnect both coolant lines to the EGR cooler — expect residual coolant. Remove the O-ring from the coolant line fitting on the block side.
Step 6 — Remove the four 10mm EGR cooler mounting bolts, two 15mm nuts at the exhaust manifold (firewall end), and the V-band clamp at the exhaust crossover elbow. Remove the exhaust crossover elbow (two 15mm nuts) and install the small block-off plate (without the pre-drilled port), reusing factory hardware.
Step 7 — Release the radiator cap to relieve residual pressure. Remove the four nuts holding the EGR cooler to its bracket. Pull the cooler up and forward out of the engine valley. Remove the cooler mounting bracket (two 14mm bolts to the engine block). Install the larger block-off plate (with pre-drilled port) on the exhaust manifold using factory hardware. Re-install the crankcase breather tube. Connect the two coolant ports using the new coolant hose and adapter from the kit — secure with supplied hose clamps.
Step 8 — Replace the third intake manifold bolt from the rear with the vertical support bolt (provided). Install the support bracket: thread the M10 bolt into the support bolt, secure the transmission dipstick tube with the 1/4-20 bolts/nuts/washers. The bracket also holds the coolant hose connector — do not overtighten. Refill the cooling system to factory spec, start the engine and run until the thermostat opens and coolant circulates. Top off as needed. Check for coolant leaks at all hose connections and exhaust leaks at both block-off plates with the engine running.
Estimated time: 6–8 hours for first-time installation.
Throttle Valve Replacement Tube Installation (SG-ER-0072)
If you are already doing the EGR cooler upgrade, the throttle valve is right there — bolted to the intake side, directly in the path of the components you are removing. It adds roughly 30 minutes to the job. If you are doing the throttle valve replacement separately from the EGR cooler, it is a 1–2 hour job that does not require draining coolant or removing the intake manifold — just the intake plumbing.
Before You Start
The throttle valve body contains an electronic actuator that the ECM uses to control the intake throttle position. When the throttle valve is replaced with a straight-flow tube, the actuator connector will be left unplugged. If the ECM calibration has already been updated for EGR removal, the ECM will recognize the missing actuator as expected and will not trigger a fault. If the calibration still expects an active throttle valve, an open-circuit fault will set immediately.
Verify your calibration supports throttle valve removal before installing this component. If you are doing this alongside the EGR cooler kit (SG-ER-0092), load the EGR calibration first — the throttle valve is accounted for in the same calibration.
Tools needed: 8mm socket or wrench, flathead screwdriver (for hidden screws), intercooler boot removal tool (optional but helpful).
Step 1 — Use an 8mm socket or wrench to remove the connector bracket and heat shield covering the throttle valve. The heat shield is a metal plate that sits on top of the valve body — it must come off to access the mounting bolts.
Step 2 — Release the clamp on the intercooler tube and separate the boot from the throttle valve body. The boot may be stuck from heat cycling — twist it gently rather than prying, or you risk tearing the rubber.
Step 3 — Remove the four 8mm bolts securing the throttle valve body. Two bolts are visible on top. Two are hidden underneath — you will need to reach below the valve body to access them. A flathead screwdriver helps to feel for the bolt heads if they are not immediately visible. Disconnect the valve body and the electronic actuator connector.
Step 4 — Install the straight-flow replacement tube using the four hexagonal bolts with washers provided in the kit. Hand-start each bolt to avoid cross-threading, then torque to specification in a cross pattern. The flange surface is the same bolt pattern as the factory valve body — the replacement tube drops into place without modification.
Step 5 — Reconnect the intercooler tube and tighten the clamp. Make sure the boot is fully seated on the replacement tube flange before tightening — a partially-seated boot will blow off under boost.
Step 6 — Reinstall the heat shield and the connector bracket over the replacement tube. Secure the unused throttle valve actuator connector to the bracket or wire harness with a zip tie — a dangling connector will rub against moving parts or melt on the exhaust manifold.
Step 7 — Before starting the engine, pressurize the intake with a boost leak tester at 20–25 PSI and spray soapy water on the intercooler boot connections and the replacement tube flanges. Bubbles mean a leak. Fix it now — a boost leak that is silent at idle will trigger an underboost code on your first test drive.
Estimated time: 1–2 hours standalone; 30 minutes if done during EGR cooler installation.
4" DPF/Catalyst Replacement Pipe Installation (SG-DP-0213)
The DPF and catalyst assembly on the 2013–2018 Ram runs from the downpipe to the factory exhaust aft of the transmission. Installation is accessible from underneath with the truck on jack stands or a lift.
Before You Start
This pipe replaces the factory DPF and catalyst — components that the ECM monitors through multiple sensors: DPF pressure differential, exhaust gas temperature (EGT) at three points, and SCR NOx efficiency. Installing the pipe before loading a compatible calibration will cause the ECM to see zero pressure differential across a DPF it still expects to be present. That triggers an immediate cascade of fault codes — P2459 (DPF regeneration frequency), P2002 (DPF efficiency below threshold), and potentially a forced reduced-power mode that limits engine RPM to approximately 1,200.
A calibration that accounts for DPF and SCR removal is MANDATORY for this pipe. DO NOT START THE ENGINE before the appropriate calibration is installed.
- Load the DPF/SCR-compatible calibration to the ECM before installing the pipe — not after.
- The DPF and catalyst assembly combined weighs roughly 80 pounds. A transmission jack or a second set of hands is not optional.
- Apply penetrating oil to the downpipe flange bolts and the rear clamp bolt the night before. These fasteners live in road spray and road salt and may be seized.
Tools needed: socket set (10mm–15mm), penetrating oil, exhaust hanger removal tool, anti-seize compound.
Step 1 — Disconnect all sensors and the DEF injector connection from the downpipe, SCR, and DPF assembly. Unscrew the bolts at the flange connecting the downpipe to the DPF, and loosen the clamp at the rear of the exhaust. Remove the DPF and SCR assembly from the vehicle — combined weight is roughly 80 pounds. Use a transmission jack or have a second person help lower it.
Step 2 — Install pipe section #1 by loosely connecting the flanged end to the downpipe flange. Do not fully tighten the flange bolts yet. Insert the welded hanger on pipe #1 into the factory rubber isolator on the frame.
Step 3 — Slide the exhaust clamps onto pipe #1 and pipe #2 before joining the sections — the clamp must be in place on the pipe before the joint is assembled. Install pipe #2 onto the end of pipe #1 and into the inlet of the factory exhaust assembly. The inner bend on pipe #2 must face the truck frame. If installed with the bend facing outward, the pipe will contact the driveshaft or transmission crossmember under load.
Step 4 — Install the hanger bracket and clamp (#3 fixture) at the SCR mounting bracket location. This bracket uses the same double-hanger mounting points as the factory SCR assembly — align the hanger pins with the OEM rubber isolators.
Step 5 — Adjust the entire exhaust system for even clearance at all points — check clearances at the crossmember, transmission pan, driveshaft, and frame rails. Once clearances are confirmed, tighten all connections and clamps from front to back, starting at the downpipe flange and working rearward. Apply anti-seize to all clamp bolts. Load the DPF and SCR calibration to the ECM. Start the engine and check for exhaust leaks at every slip joint. Recheck all clamps after the first full heat cycle — stainless steel expands and clamps can loosen slightly.
Estimated time: 1–2 hours.
🛠 Key Installation Techniques — What Experienced Diesel Techs Know
These techniques separate a clean installation that runs for years from one that comes back on a tow truck. Most of these are not in the factory service manual — they come from diesel techs who have done this job dozens of times and learned what works the hard way.
Technique 1: O-Ring Seating on the Intake Block-Off Plate
The intake block-off plate included in the EGR cooler kit has two O-rings — one on each port. These O-rings create the seal between the block-off plate and the intake elbow surface. Before tightening the mounting bolts, visually confirm that both O-rings are fully seated in their grooves. A partially-seated O-ring will pinch when the plate is tightened — the pinch point becomes a boost leak that gets worse as manifold pressure increases. Apply a thin film of engine oil to each O-ring before installation. The oil helps the O-ring slide into the groove rather than roll or twist during bolt tightening.
Technique 2: V-Band Clamp Reinstallation on the EGR Crossover Pipe
When removing the EGR crossover pipe in Step 2, the V-band clamps will come loose. Note their orientation before removal — the clamp nut should face a direction you can reach with a socket after reassembly, not buried against the firewall or the valve cover. When reinstalling (if the crossover pipe is going back on as part of a different configuration), seat the V-band clamp evenly around the flanges before tightening. Tighten gradually while tapping the clamp lightly with a dead-blow hammer — this helps the clamp find its natural seat on the flange lips. An unevenly seated V-band clamp will leak exhaust gas directly into the engine bay.
Technique 3: The Coolant Bleed Procedure After EGR Cooler Removal
After refilling the cooling system, do not start the engine and walk away. The EGR cooler removal changes the coolant flow path, and the new circuit can trap air at the thermostat housing. Start the engine with the radiator cap off and let it idle. The thermostat will open at roughly 190°F. You will see the coolant level in the radiator drop suddenly as the thermostat opens and coolant circulates through the block. Add coolant immediately until the level stabilizes. Replace the cap, bring the engine to operating temperature, and let it cool completely. Recheck the level in the radiator — not just the overflow bottle. The overflow bottle can read full while the radiator is still low. A low radiator on a modified cooling circuit means the rear cylinders run hotter than the front, and you will not know it until a head gasket lets go.
Technique 4: Boost Leak Testing Before the Test Drive
Before you start the engine for the first time after reassembly, pressurize the intake system with a boost leak tester. Cap the intake at the turbo inlet, apply regulated shop air at 20–25 PSI through the tester, and listen. Every connection you touched — intercooler boots, intake block-off plate, throttle valve tube flange, EGR block-off plates — needs to hold pressure without a hiss. Spray soapy water on every joint. Bubbles mean a leak. A small boost leak that you cannot hear at idle becomes a major leak at 35 PSI of boost under load. The turbo overspeeds to compensate for lost pressure, the ECM sees unexpected MAF readings, and you get a P0299 underboost code on your first test drive. Ten minutes with a boost leak tester saves hours of diagnostic frustration.
Technique 5: Sensor Connector Sealing
Every sensor connector you unplugged — EGR temperature, DPF pressure, MAF, IAT, cam position, crank position — needs a thin coat of dielectric grease inside the connector boot before reassembly. The engine valley on a 6.7L sees heat, vibration, and moisture from road spray and coolant drips. An ungreased connector will corrode at the pins. A corroded cam sensor connector causes intermittent no-start conditions that only happen when the engine is hot — the worst possible diagnostic scenario because it never fails when you are at home with tools. Grease every connector. It takes five minutes and costs less than a dollar.
Technique 6: The First Heat Cycle Re-Torque
After the first full heat cycle — bring the engine to operating temperature, let it cool completely to ambient — re-torque the DPF pipe clamps and re-check the exhaust block-off plate bolts. Stainless steel expands significantly during the first heat cycle, and a clamp that was tight when cold will have loosened slightly after one hot run. The exhaust block-off plate gaskets also compress during the first heat cycle — check the bolts for any that have backed off. Do not skip this step. The second heat cycle will not re-tighten anything — it will only make the leak worse.
🚫 Seven Expensive Mistakes 6.7L Owners Make During EGR Work
Mistake 1: Upgrading the EGR Cooler Without Addressing the Throttle Valve
This is the most common oversight on 6.7L EGR jobs. The EGR cooler is removed, the block-off plate is installed, coolant lines are plugged — and the factory throttle valve body stays in place with its butterfly still intact. The logic goes: if the calibration no longer commands EGR flow, the butterfly will never move. Logic is not a warranty. Electronic actuators fail. Connectors corrode. Residual signals fire. If that butterfly moves toward the closed position on a truck that no longer has an EGR circuit to pull air through, airflow is severely restricted — potentially causing reduced power, drivability issues, or fault codes. Replace the throttle body with a straight-flow tube. At $31.99, this is not a corner worth cutting.
Mistake 2: Leaving Old Gasket Material on the Intake Elbow Surface
The EGR valve and intake elbow mounting surfaces must be completely clean before installing the block-off plates. If you leave any old gasket material on the surface, the new block-off plate will not sit flat — and the uneven pressure will create an exhaust leak or boost leak at the flange. Use a plastic scraper, not a metal one. A metal scraper can gouge the aluminum sealing surface, and a gouge is harder to fix than leftover gasket material. Stuff clean rags into every open port before scraping — gasket debris that falls into the intake will get pulled into a cylinder on startup.
Mistake 3: Forgetting the Dipstick Before Removing the Engine Cover
Step 1 of the EGR cooler installation says to remove the plastic engine cover. The dipstick passes through the engine cover — if you try to lift the cover without pulling the dipstick first, you will either break the cover, bend the dipstick tube, or both. The dipstick tube on the 6.7L is a press-fit into the block. Bending it means a new tube and an oil leak at the block fitting — both are easily avoided by pulling the dipstick before the cover.
Mistake 4: Not Bleeding the Cooling System After EGR Cooler Removal
After refilling the coolant, do not start the engine with the radiator cap on and walk away. The EGR cooler removal changes the coolant flow path, and the new circuit traps air at the thermostat housing. Start the engine with the radiator cap off. The thermostat opens at roughly 190°F — the coolant level in the radiator will drop suddenly as coolant circulates through the block. Add coolant immediately. Replace the cap, bring the engine to operating temperature, let it cool completely, then recheck the level in the radiator — not just the overflow bottle. The overflow bottle reads full while the radiator is still low. A low radiator means the rear cylinders run hotter than the front.
Mistake 5: Leaving the Throttle Valve Connected Without Support
After installing the intake block-off plate, the throttle valve electrical connector is unplugged but still present in the engine bay. If you leave that connector dangling, it will rub against the serpentine belt, melt on the exhaust manifold, or get caught in the cooling fan. Zip-tie the unused connector securely to the main wiring harness or a fixed bracket. A dangling connector that shorts to ground can blow a fuse for a completely unrelated circuit — and you will spend hours chasing an electrical problem that has nothing to do with the EGR work.
Mistake 6: Installing the DPF Replacement Pipe Without Loading Calibration First
A DPF replacement pipe changes the exhaust path physically — but the ECM is still looking for DPF pressure differential, exhaust temperature sensor readings, and SCR system status. If you install the pipe and start the truck without loading the matching calibration, the ECM will see zero pressure differential across a DPF that its programming still expects to exist. That triggers a cascade of DTCs — P2459 (DPF regeneration frequency), P2002 (DPF efficiency below threshold), and potentially a forced limp mode that limits engine RPM to 1,200. Load the calibration before you install the pipe, not after you have already triggered a permanent code.
Mistake 7: Not Catching Trapped Coolant When Disconnecting EGR Cooler Lines
The EGR cooler on the 6.7L holds trapped coolant even after the radiator is drained. When you disconnect the coolant lines at the cooler in Step 5, another pint or more will dump — into the engine valley and down the back of the block. That coolant finds its way into electrical connectors at the back of the engine that are nearly impossible to reach without removing the transmission. Place a dedicated drain pan under the cooler before disconnecting the lines. After reassembly, spray electrical contact cleaner into any connector that got wet. A corroded cam sensor or crank sensor connector will strand you just as effectively as a major engine failure.
❓ Frequently Asked Questions
Q: Is a complete EGR maintenance solution street-legal?
These components modify the factory emissions control system. EGR system modification alters the vehicle’s certified emissions configuration. These parts are intended for off-road and competition use. Verify applicable federal, state, and local regulations before installation. Some jurisdictions require emissions inspections that check for EGR system presence and function.
Q: Do I need a calibration or tune after installing these components?
Yes. The ECM continuously monitors EGR valve position, EGR temperature sensors, DPF pressure differential, and SCR NOx efficiency. Changing the hardware without updating the ECM calibration will trigger check-engine lights, derate/limp mode, and permanent diagnostic trouble codes. A compatible calibration that accounts for the removed or modified components is mandatory — load it before starting the engine.
Q: Can I install just the EGR cooler upgrade and skip the throttle valve replacement?
Technically yes — but it is the single most common oversight on 6.7L EGR jobs. The throttle valve actuator can fail independently of whether the EGR cooler was replaced. If the butterfly closes on a truck that no longer has an EGR circuit to pull air through, it can restrict intake airflow — potentially causing reduced power, drivability issues, or fault codes. At $31.99, the throttle valve replacement is the lowest-cost component in the solution and helps remove a potential single-point failure in the intake system.
Q: Will my check engine light come on after installation?
Only if the ECM calibration has not been updated. With the correct calibration loaded before starting the engine, the ECM accounts for the modified EGR and DPF sensor readings and does not trigger warning lights. Install the calibration before installing the hardware.
Q: How long does the full three-component installation take?
Plan for a full weekend as a first-time DIY installer — roughly 6–8 hours for the EGR cooler and throttle valve (both accessible from above without removing the intake manifold) plus 1–2 hours for the DPF pipe underneath. Professional shop installation is typically a single day since a lift and experience significantly reduce the DPF removal time.
Q: Will my MPG improve?
Some owners report measurable improvement, particularly on trucks that were running a heavily loaded DPF before the pipe was installed. A DPF with significant ash accumulation at high mileage increases exhaust backpressure, which means the engine works harder to push exhaust out — and consumes more fuel doing it. Removing that restriction can reduce pumping losses. Gains vary by driving style, load, and the condition of the DPF being replaced. Do not expect dramatic numbers; expect an engine that breathes and runs more efficiently.
Q: Does this affect my factory warranty?
Modifying emissions control systems can affect warranty coverage for related components. Under the Magnuson-Moss Warranty Act, a manufacturer must prove that a modification caused a specific failure to deny warranty coverage on that failure. However, emissions system modifications are treated differently from general aftermarket modifications. Consult your warranty terms and consider your coverage period before modifying emissions equipment.
Q: Will my truck pass a state emissions inspection after installation?
If your jurisdiction requires a visual inspection of emissions control equipment — including EGR cooler, EGR valve, throttle valve, and DPF — these components will not pass. If your jurisdiction only performs an OBD-II plug-in test and the calibration is properly configured, the ECM should not report emissions-related fault codes. Know your local inspection requirements before modifying anything.
Q: Can I do this installation myself with basic tools?
The EGR cooler and throttle valve are accessible from above without removing the intake manifold — basic hand tools (8mm–15mm sockets, flathead screwdriver) are sufficient, though a methodical approach and a full Saturday are required. The DPF pipe is underneath and primarily exhaust fasteners, but the assembly weighs roughly 80 pounds and is awkward solo without a transmission jack. If any part of the job is outside your comfort zone, a diesel shop can complete all three components in a single day on a lift.
Q: Do I need to save the factory parts after removal?
Only if your jurisdiction requires periodic emissions inspections, you plan to sell the truck to a buyer in a state with emissions testing, or you want the option to return to stock. The removed EGR cooler and DPF are bulky and heavy. If none of those scenarios apply, you are under no obligation to keep them.
Q: Why pay $314 for three Seguler components when lower-cost options total $143–245?
The difference is matched compatibility, manufacturing consistency, and warranty coverage. When you buy the EGR cooler upgrade, throttle valve replacement, and DPF pipe from one source, they were designed to work on the same engine platform with the same calibration requirements. Sourcing three individual components from different marketplaces means the compatibility testing falls to the installer — a throttle valve tube with a minor boost leak or a DPF pipe with inconsistent wall thickness may not reveal itself until you are 200 miles into a trip.
Q: What 6.7L Ram model years do these components fit?
The EGR cooler upgrade kit (SG-ER-0092) fits 2010–2024 model years. The throttle valve replacement (SG-ER-0072) fits 2007–2024. The DPF replacement pipe (SG-DP-0213) fits 2013–2018. These ranges overlap — so a 2013–2018 truck can run all three, while earlier or later trucks may use a subset. Verify compatibility for your specific year and configuration before ordering.
Protect the Engine, Not Just the Emissions Equipment
Major engine repairs can quickly become a significant expense compared with preventive maintenance. The EGR cooler ($89.99), throttle valve replacement ($31.99), and DPF replacement pipe ($192.31) together cost less than one tow bill from a roadside EGR cooler failure. They cost less than one DPF cleaning at a dealership. They cost less than the labor to diagnose a fuel-diluted oil analysis result that traces back to interrupted regen cycles.
These three components address a common failure chain. The EGR cooler leaks coolant. The DPF clogs as ash accumulates and regeneration cycles become less effective. The throttle valve actuator fails from heat cycles and vibration. Fixing one while ignoring the other two leaves two failure points — and a truck that is one failed component away from being right back on a flatbed.
The approach that works: install the EGR cooler upgrade kit to reduce EGR-related maintenance concerns and improve long-term system reliability. Install the throttle valve replacement tube so the actuator cannot fail in a partially-closed position at highway speed. Install the DPF replacement pipe so your oil is no longer exposed to diesel fuel from regeneration cycles. Load the appropriate ECM calibration before starting the engine. Check every clamp, fitting, and connector. Then drive the truck.
Ready to address the complete EGR system on your 6.7L Ram? Explore the full maintenance solution at seguler.com.
- EGR Cooler + Valve Kit (SG-ER-0092) → — 2010–2024 Ram 2500/3500
- Throttle Valve Replacement Tube (SG-ER-0072) → — 2007–2024 Ram 2500/3500
- 4" DPF Replacement Pipe (SG-DP-0213) → — 2013–2018 Ram 2500/3500
Each component is available individually or as a combined solution — order everything together for a single disassembly session and one calibration session.
Installation involves modification of emissions control systems. These components are intended for off-road and competition use. Verify applicable regulations in your jurisdiction before installation.
Featured collection
-
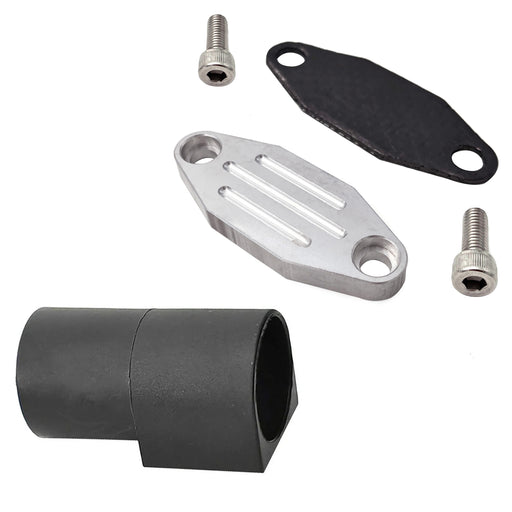
Seguler 1986-1995 Ford F150 F250 F350 Mustang Trucks EGR Simulator Eliminator / Block Off Plate Kit
SEGULEROriginal price $79.99 - Original price $79.99Original price$79.99$79.99 - $79.99Current price $79.99Block Off Plate Material: Aluminum alloy. Easy installation,and convenient to use. Made of CNC milled from aircraft grade Billet aluminum. Will N...
View full details -

Seguler 2011-2023 6.7L Ford Powerstroke Diesel EGR Delete Kit
SEGULEROriginal price $109.99 - Original price $109.99Original price$109.99$109.99 - $109.99Current price $109.99FITMENT 2011-2023 6.7L Ford Powerstroke F-250 F-350 F-450 F-550 Super Duty V8 Diesel. compatible with both standard Pickups and commercial Cab &...
View full details -
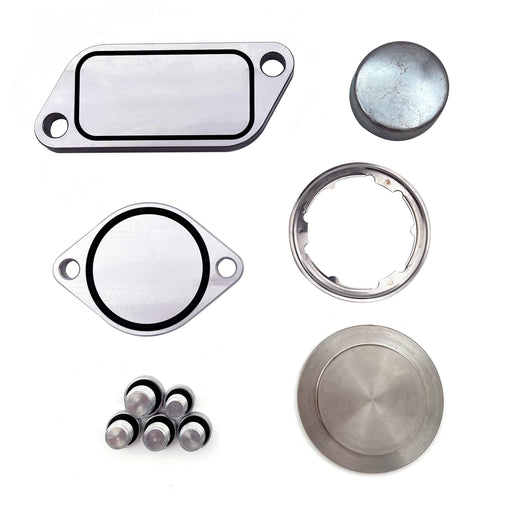
For 2010-Present Stage 2 ISX 15 CM2250 CM2350 EGR Delete Kit
SEGULEROriginal price $59.99 - Original price $59.99Original price$59.99$59.99 - $59.99Current price $59.99FITMENT 2010-Present Cummins Volvo, Peterbilt, Mack, International, Freightliner, Kenworth with the ISX15 CM2250 / CM2350 engines. DESCRIPTION P...
View full details -
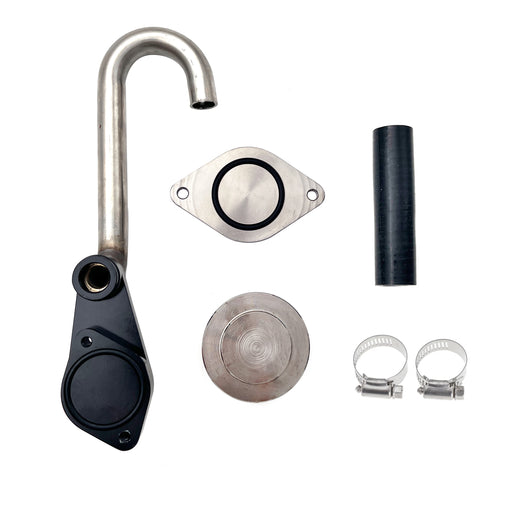
Seguler 2003-2007 6.0L FORD Powerstroke Diesel EGR Cooler Delete Kit
SEGULEROriginal price $56.14 - Original price $56.14Original price$56.14$56.14 - $56.14Current price $56.14FITMENT 2003-2007 6.0L Ford F-250 Ford F-350 F-450 F-550 Super Duty. 2003-2007 6.0L Ford Excursion SUV (Diesel Models Only). 2005-2010 Ford E-Se...
View full details -
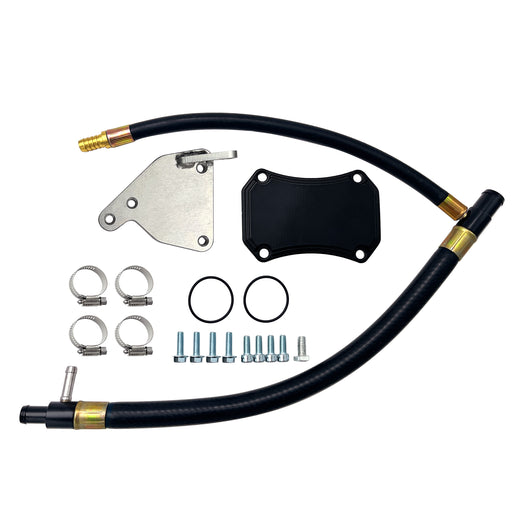
For 2011-2016 6.6L GMC Chevy Duramax Diesel LML EGR Valve Cooler Delete Kit
SEGULEROriginal price $66.49 - Original price $66.49Original price$66.49$66.49 - $66.49Current price $66.49FITMENT 2011-2016 6.6L Chevy GMC Duramax LML 2500 HD 3500 HD Diesel. DESCRIPTION Product Overview The 2011–2016 LML Duramax uses a complex EG...
View full details -
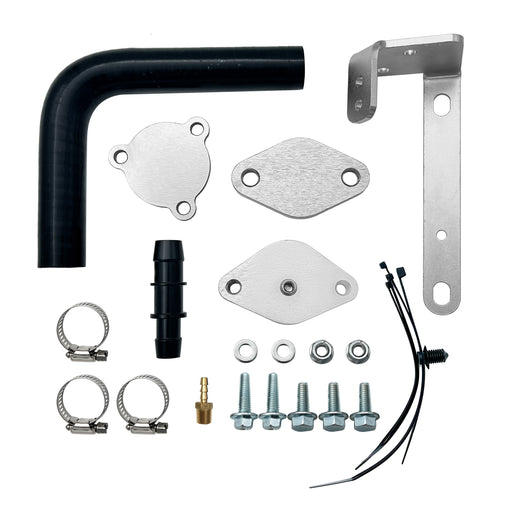
Seguler For 2014-2019 3.0L Dodge Ram 1500 EcoDiesel EGR Valve & Cooler Delete Kit
SEGULEROriginal price $72.99 - Original price $72.99Original price$72.99$72.99 - $72.99Current price $72.99FITMENT 2014-2019 3.0L Dodge Ram 1500 EcoDiesel V6 engine trucks. DESCRIPTION Product Overview Exhaust gas recirculation on 3.0L EcoDiesel V6 ...
View full details -

Seguler 2011-2023 6.7L Ford Powerstroke Diesel EGR Delete Kit
SEGULEROriginal price $85.99 - Original price $85.99Original price$85.99$85.99 - $85.99Current price $85.99FITMENT 2011-2023 6.7L Ford Powerstroke F-250 F-350 F-450 F-550 Super Duty V8 Diesel. compatible with both standard Pickups and commercial Cab &...
View full details -

Seguler 2010-2024 6.7L Dodge Ram Cummins Diesel EGR Valve Cooler Delete Kit
SEGULEROriginal price $89.99 - Original price $89.99Original price$89.99$89.99 - $89.99Current price $89.99FITMENT 2010–2024 6.7L Dodge Ram Cummins 2500 / 3500 Pickup Turbo Diesel. Note: Does NOT fit Chassis Cab 3500 / 4500 / 5500 models. DESCRIPTIO...
View full details -
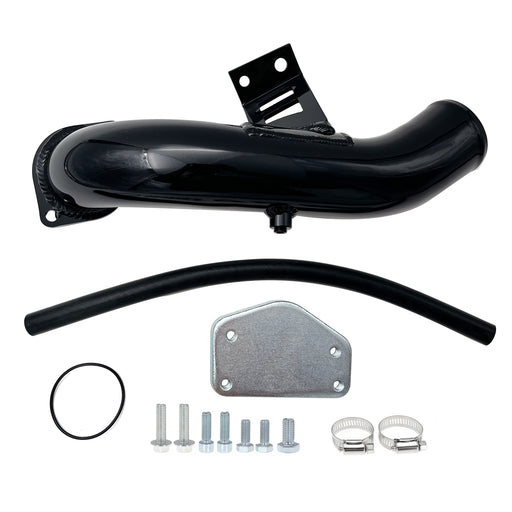
For 2004.5-2005 6.6L Chevy GMC Silverado LLY Duramax Diesel EGR Delete Kit
SEGULEROriginal price $92.99 - Original price $92.99Original price$92.99$92.99 - $92.99Current price $92.99FITMENT 2004.5-2005 6.6L Chevrolet Silverado Duramax LLY 2500HD / 3500 HD. 2004.5-2005 6.6L GMC Sierra Duramax LLY 2500HD / 3500 HD. DESCRIPTION...
View full details -

Seguler 2017-2019 L5P Duramax Diesel 4pcs L5P Can Bus Plugs Connector Replacement
SEGULEROriginal price $75.00 - Original price $75.00Original price$75.00$75.00 - $75.00Current price $75.00FITMENT 2017–2019 Chevrolet Silverado / GMC Sierra Duramax L5P 2500HD & 3500HD Diesel. DESCRIPTION Product Overview Unprotected harness con...
View full details -

Seguler 2020-2023 chevy duramax L5P Diesel Can Bus Plugs Connector
SEGULEROriginal price $80.00 - Original price $80.00Original price$80.00$80.00 - $80.00Current price $80.00FITMENT 2020–2023 Chevrolet Silverado / GMC Sierra Duramax L5P 2500HD & 3500HD Diesel. DESCRIPTION Product Overview Unprotected harness pl...
View full details -
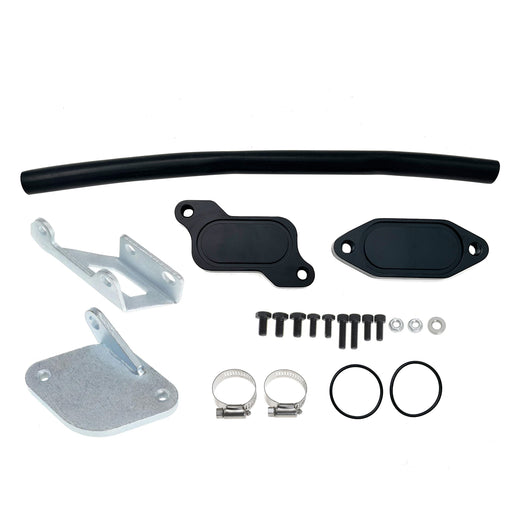
For 2006-2007 6.6L Chevrolet Silverado Classic GMC Duramax LBZ Diesel EGR Valve Cooler Delete Kit
SEGULEROriginal price $63.49 - Original price $63.49Original price$63.49$63.49 - $63.49Current price $63.49FITMENT 2006-2007.4 Chevrolet Silverado Duramax LBZ 2500HD / 3500HD. 2007.4 Chevrolet Silverado Duramax LBZ 2500HD / 3500HD Classic. 2006-2007.4 ...
View full details -

Seguler 2011-2023 6.7L Ford F250 F350 F450 F550 Powerstroke Diesel EGR Valve Delete Cooler Delete Kit
SEGULEROriginal price $55.99 - Original price $55.99Original price$55.99$55.99 - $55.99Current price $55.99FITMENT 2011-2023 6.7L Ford Powerstroke F-250 F-350 F-450 F-550 Super Duty V8 Diesel compatible with both standard Pickups and commercial Cab &a...
View full details -
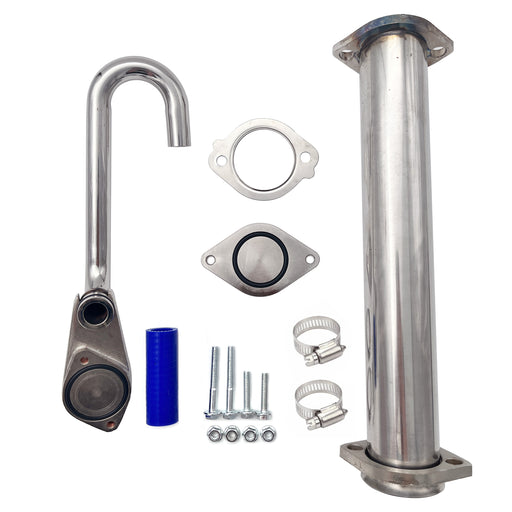
Seguler 2003-2007 6.0L Ford F250 F350 Powerstroke Diesel EGR Basic Cooler Kit
SEGULEROriginal price $79.99 - Original price $79.99Original price$79.99$79.99 - $79.99Current price $79.99FITMENT 2003-2007 6.0L Ford F250 F350 F450 F550 Super Duty Turbo (except 2004 F250 Super Duty). 2003-2005 6.0L Ford Excursion Turbo. 2005 Ford F...
View full details -
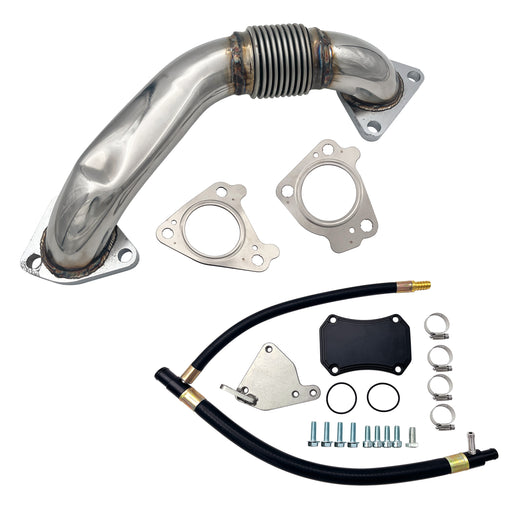
Seguler 2011-2016 6.6L GMC Chevy Duramax Diesel LML Up-Pipe & EGR Valve Cooler Delete Kit
SEGULEROriginal price $173.86 - Original price $173.86Original price$173.86$173.86 - $173.86Current price $173.86FITMENT 2011-2016 6.6L Chevy GMC Duramax LML 2500 HD 3500 HD Diesel. DESCRIPTION Product Overview Direct-injection technology endows GM 5.3L an...
View full details -
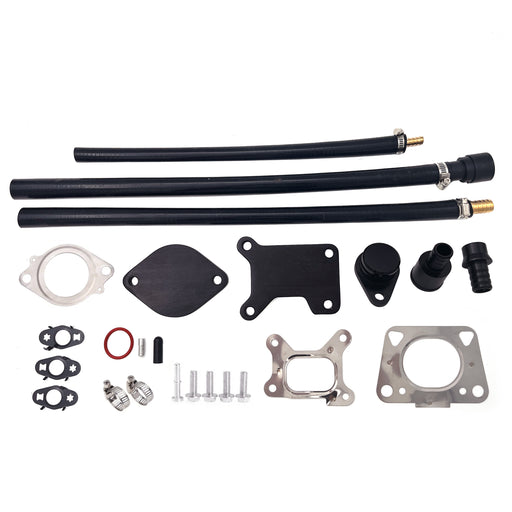
For 2017-2023 6.6L Chevy GMC Duramax L5P diesel EGR Valve Cooler Delete kit
SEGULEROriginal price $131.99 - Original price $131.99Original price$131.99$131.99 - $131.99Current price $131.99FITMENT 2017–2023 6.6L Chevrolet Silverado / GMC Sierra Duramax L5P 2500HD 3500HD Diesel. DESCRIPTION Product Overview Hot soot recirculation ...
View full details -
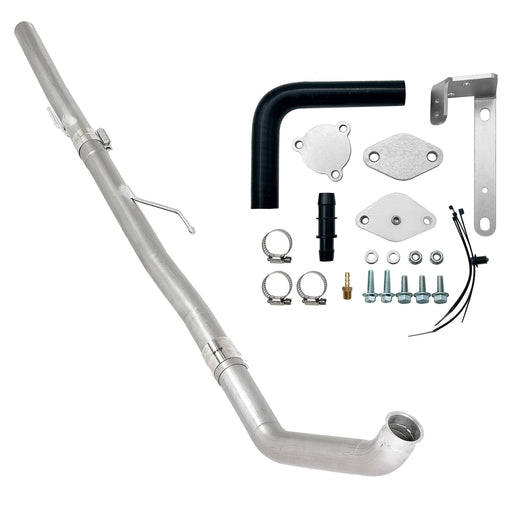
Seguler 3" Ecodiesel DPF Delete Pipe & EGR Delete kit for 2014-2018 3.0L Ram
SEGULEROriginal price $342.00 - Original price $342.00Original price$342.00$342.00 - $342.00Current price $342.00FITMENT 2014–2018 3.0L Dodge Ram 1500 EcoDiesel V6. NOTE: Fit standard Pickup models only (Crew Cab, Quad Cab). Does NOT fit Jeep Grand Cheroke...
View full details -
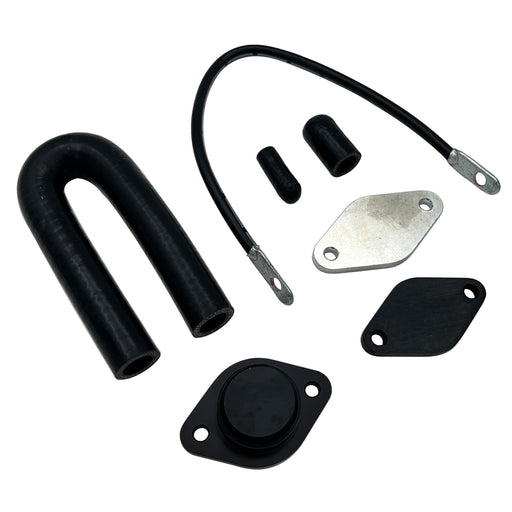
Seguler EGR valve cooler Delete kit for 2020-2022 3.0L Chevy Duramax LM2
SEGULEROriginal price $189.12 - Original price $189.12Original price$189.12$189.12 - $189.12Current price $189.12FITMENT 2020–2022 3.0L Chevrolet Silverado GMC Sierra 1500 LM2 Turbo-Diesel. DESCRIPTION Product Overview Powered by smooth inline-six engine...
View full details -

For 2013-2023 6.7L Dodge Ram Cummins Cab & Chassis EGR Delete Kit Diesel
SEGULEROriginal price $62.99 - Original price $62.99Original price$62.99$62.99 - $62.99Current price $62.99FITMENT 2013–2023 6.7L Ram Cummins 3500 4500 5500 Cab & Chassis / Commercial Trucks. Does NOT fit standard Ram 2500 3500 Pickups. DESCRIPTIO...
View full details -
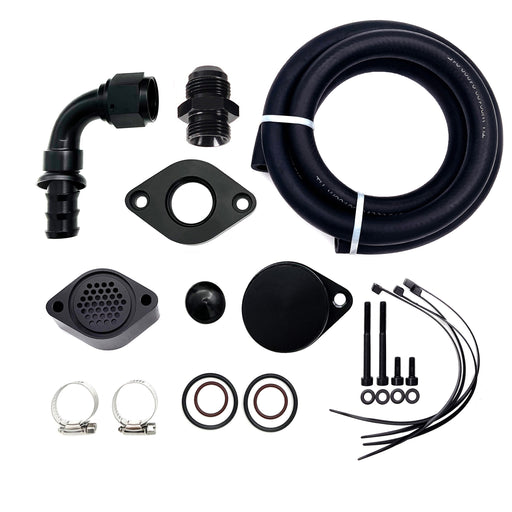
Seguler 2011-2023 6.7L Ford Powerstroke CCV PCV Reroute Engine Ventilation Kit
SEGULEROriginal price $82.99 - Original price $82.99Original price$82.99$82.99 - $82.99Current price $82.99FITMENT 2011-2023 6.7L Ford Powerstroke F-250 F-350 F-450 F-550 Super Duty V8 Diesel. Compatible with both standard Pickups and commercial Cab &...
View full details -
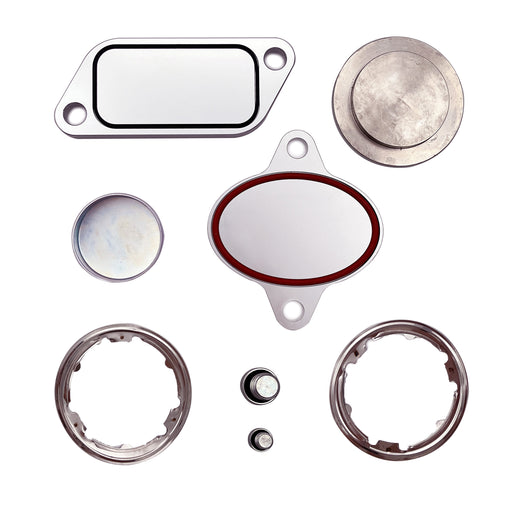
For 2007-2010 Cummins ISX CM871 EGR Plug Kit Stage 2 Plates and Plugs Aluminum
SEGULEROriginal price $67.99 - Original price $67.99Original price$67.99$67.99 - $67.99Current price $67.99FITMENT 2007-2010 Cummins Volvo, Peterbilt, Mack, International, Freightliner, Kenworth with the ISX CM871 Engines. DESCRIPTION Product Overvie...
View full details -
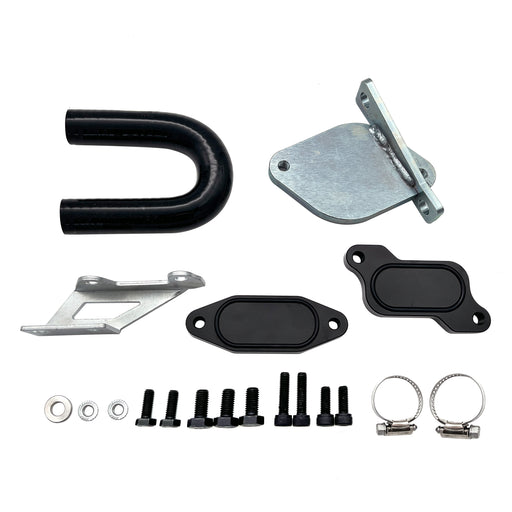
For 2007-2010 6.6L Chevy GMC LMM Duramax EGR Valve Cooler Delete Kit Fit
SEGULEROriginal price $61.99 - Original price $61.99Original price$61.99$61.99 - $61.99Current price $61.99FITMENT 2007.5-2010 6.6L Chevrolet Silverado Duramax LMM 2500HD / 3500HD. 2007.5-2010 6.6L GMC Sierra Duramax LMM 2500HD / 3500HD. Note: Standard...
View full details -
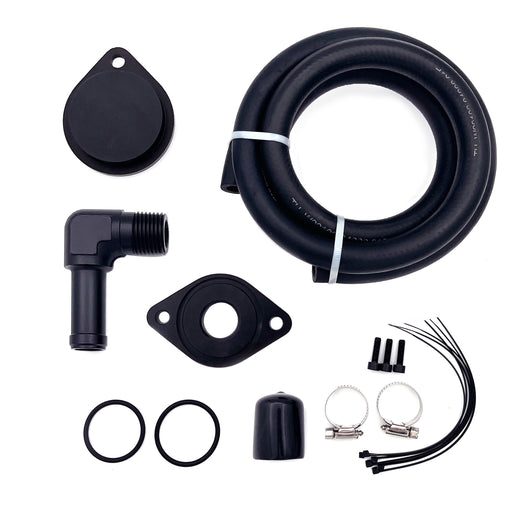
Seguler 2011-2023 Ford 6.7L Powerstroke CCV/PCV Reroute/Delete Engine Ventilation Kit
SEGULEROriginal price $72.00 - Original price $72.00Original price$72.00$72.00 - $72.00Current price $72.00FITMENT 2011-2023 6.7L Ford Powerstroke F-250 F-350 F-450 F-550 Super Duty V8 Diesel. Compatible with both standard Pickups and commercial Cab &...
View full details -
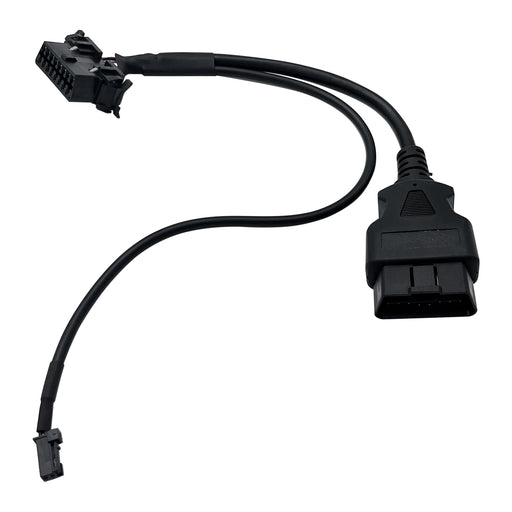
Seguler 2018+ RAM Cummins OBD2 HD Security Gate Bypass Cable
SEGULEROriginal price $45.00 - Original price $45.00Original price$45.00$45.00 - $45.00Current price $45.00FITMENT 2018+ 6.7L Ram Cummins 2500 3500 Turbo Diesel. Designed for Ram pickup trucks equipped with the factory Security Gateway Module. Note: Pl...
View full details -
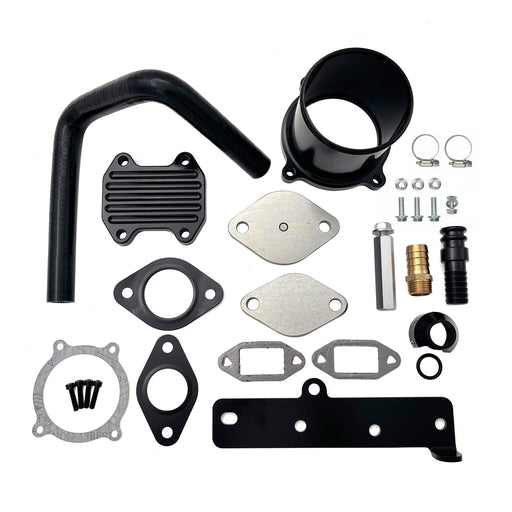
Seguler For 2013-2018 6.7L Dodge RAM 2500 3500 Cummins Diesel EGR Delete Cooler Throttle Valve Delete Kit
SEGULEROriginal price $112.00 - Original price $112.00Original price$112.00$112.00 - $112.00Current price $112.00FITMENT 2013–2018 6.7L Dodge Ram Cummins 2500 & 3500 Pickup Turbo Diesel. Note: Does NOT fit Cab & Chassis (3500 / 4500 / 5500 C&C) m...
View full details


Leave a comment