

2013-2018 6.7 Cummins Upgrade: $690 vs $4,500 Dealer
Protect Your $70K Ram Cummins Diesel Investment With the Right Performance Upgrade
The 2013–2018 6.7L Cummins diesel engine is one of the most capable powertrains in the Ram Heavy Duty lineup, powering Ram 2500 and 3500 trucks built for towing, hauling, and long-term durability. With a strong engine block, proven rotating assembly, and reliable fuel system, these engines are designed to deliver hundreds of thousands of miles when properly maintained.
However, as mileage increases and workloads become more demanding, the factory DPF and EGR systems can become important factors affecting long-term performance and maintenance. The DPF is designed to capture soot and reduce emissions, but repeated regeneration cycles and ash accumulation can increase exhaust restriction over time. Higher backpressure can place additional demand on the turbocharger and exhaust system, especially on trucks used for frequent towing or heavy-duty applications.
The EGR system is designed to reduce emissions by routing cooled exhaust gases back into the intake. Over years of operation, the EGR cooler experiences constant thermal cycling, carbon exposure, and coolant temperature changes. These conditions can increase maintenance concerns as trucks accumulate mileage.
For Ram Cummins owners looking to improve airflow efficiency and address common factory system limitations, a matched DPF/CAT replacement pipe and EGR cooler + throttle valve upgrade package provides a complete approach. By improving exhaust flow and upgrading key intake-side components, these solutions help reduce long-term maintenance concerns and protect your Cummins investment.
🔍 Why the DPF and EGR Are Not Independent Problems
The DPF and EGR systems on the 6.7L Cummins are connected in ways that are not obvious until you trace the full exhaust and intake paths.
The DPF traps soot. To clean itself, it runs an active regeneration cycle — injecting diesel on the exhaust stroke to raise EGTs to 1,100°F and burn off the accumulated soot. This creates two downstream problems. First, fuel dilution of the engine oil, as described above. Second, the EGR system operates using hot exhaust gas from the engine exhaust stream before it reaches downstream aftertreatment components — exhaust gas that is now carrying more heat because the engine is in active regeneration more frequently as the DPF ages and ash accumulates.
The EGR cooler, already cycling through thermal extremes, now sees hotter exhaust gas. Soot loading can accelerate. The cooler may clog faster. Internal hot spots can form. Coolant leaks can begin. As carbon buildup affects EGR valve sealing, exhaust gas may flow continuously into the intake — raising combustion temperatures and creating conditions where the ECM requests even more EGR flow, pushing the entire cycle harder.
This is not a cascade of independent failures. It is an interconnected system where stress in one component increases stress in the others. A comprehensive approach addresses both the exhaust and intake sides — because addressing only one leaves the other operating under conditions it was not designed for.
📊 What This Actually Costs: The Three Approaches Compared
Before getting into specific components, it is worth understanding the cost landscape. There are three ways to address the DPF and EGR systems on a 6.7L Ram, and the numbers differ by thousands of dollars.
Estimated dealer costs vary by dealership, region, and vehicle configuration.
Approach 1: Complete Aftermarket Solution — Matched Components
| Component | Product | Price |
|---|---|---|
| 4" DPF/CAT Replacement Pipe | Seguler SG-DP-0270 | $578.12 |
| EGR Cooler + Throttle Valve Upgrade Kit | Seguler SG-ER-0019 | $112.00 |
| Total | — | $690.12 |
Approach 2: Factory Replacement — OEM Parts & Dealer Repair Costs
| Component | Dealer Price Range |
|---|---|
| DPF assembly (factory) | $1,800–3,000 |
| EGR cooler (factory) | $800–1,500 |
| EGR valve assembly | $400–700 |
| Labor (10–14h) | $1,500–2,100 |
| Total | $4,500–7,300 |
Actual repair costs vary depending on labor rates, location, vehicle condition, and additional repairs required.
OEM Replacement Costs When Purchased Individually
| Component | Best Individual OEM Price | Typical Source |
|---|---|---|
| DPF assembly | $1,800 | Dealer parts counter |
| EGR cooler | $800 | Dealer parts counter |
| EGR valve | $400 | Dealer parts counter |
| Throttle valve body | $350 | Dealer parts counter |
| Total (parts only) | $3,350 | — |
When purchased individually, these OEM components can exceed $3,350 before installation labor. Compared with replacing each factory component separately, the matched Seguler solution provides a complete upgrade path with multiple components included together.
Approach 3: Mixed-Brand Individual Components
Purchasing components separately from different suppliers can reduce the upfront cost, but fitment verification falls on the installer.
DPF/CAT Replacement Pipe — Individual
| Source | Product | Price | Notes |
|---|---|---|---|
| Budget aftermarket | 4" mild-steel straight pipe | $250–350 |
Single pipe, no flange hardware or clamps |
| Mid-range aftermarket |
4" aluminized steel pipe with flange kit |
$380–480 |
Basic gaskets included, no mounting bracket |
| Seguler | SG-DP-0270 T-409 mandrel-bent | $578.12 |
Full hardware: brackets, gaskets & clamps |
EGR Cooler Upgrade Comparison — Individual Solutions
| Source | Product | Price | Notes |
|---|---|---|---|
| Budget aftermarket | Basic EGR cooler block-off kit | $50–80 |
Basic EGR bypass; no throttle valve |
| Mid-range aftermarket |
EGR cooler block-off kit with intake tube |
$85–130 |
May require reuse of factory throttle valve components |
| Seguler |
SG-ER-0019 EGR cooler + throttle valve upgrade kit |
$112.00 |
Complete kit: bypass parts,tube, gaskets & hardware |
Combo Kits (Both Components)
| Source | Contents | Price | Notes |
|---|---|---|---|
| Mixed-brand (low) | Budget pipe + budget EGR block | $300–430 |
Two separate suppliers, no fitment guarantee |
| Mixed-brand (mid) | Mid-range pipe + mid-range EGR kit | $465–610 |
Potentially compatible, installer verifies |
| Seguler | SG-DP-0270 + SG-ER-0019 | $690.12 |
Factory-matched pair, one-source support |
The Real Comparison
| Approach | Cost | What You Get |
|---|---|---|
| Seguler Complete Solution | $690.12 |
Matched 4" T-409 pipe + EGR kit, one installation session, one-source support |
| Dealer OEM replacement | $4,500–7,300 |
OEM parts; factory design; ongoing maintenance |
| Mixed-brand individual | $300–610 | Varied fitment; verify compatibility |
The difference between a matched truck performance enhancement solution and dealer replacement represents a different approach to heavy-duty truck maintenance — one focused on long-term component reliability rather than repeated factory-part intervals.
🔬 What Separates Quality Components From Lower-Cost Alternatives
Not all exhaust and EGR hardware is manufactured to the same standard. The difference between a component designed for long-term reliability and one that may need attention sooner is in the materials, the welds, and the manufacturing process — not in the product photo.
DPF / Catalyst Replacement Pipe
| Feature | Seguler Solution | Lower-Cost Alternatives |
|---|---|---|
| Material | T-409 stainless, 4" mandrel-bent | Aluminized — rusts at weld seams |
| Construction |
One-piece mandrel bend, uniform diameter |
Section-welded, variable diameter |
| Flow | Straight-through, full 4" ID | May neck-down at flanges |
| Fit | 2013–2018 Ram 2500/3500, bolt-on | May need modification |
| Muffler | None — unrestricted straight pipe | May include restrictive baffle |
EGR Cooler + Throttle Valve Upgrade Kit
| Feature | Seguler Solution | Lower-Cost Alternatives |
|---|---|---|
| Plate material | Aluminum alloy, anti-corrosion | Coated mild steel — rusts over time |
| Coolant routing | Standpipe adapter, faster-than-factory flow |
Basic plugs — traps coolant in dead ends |
| Throttle tube | Included, aluminum, direct bolt-on | Sold separately or not included |
| Gaskets | O-ring sealed plates + flange gasket |
Paper/composite — potential leak path |
| Hardware |
Complete: plates, tube, hose, clamps, bolts |
Extra fasteners may be needed |
These differences may not show during installation — but they will at 20,000 miles, or the first time you tow heavy up a grade in summer heat. A rusted-through aluminized pipe leaks exhaust into the cab. A pinholed block-off plate gasket pressurizes the engine valley with hot gas. The cost difference at purchase is measured in dollars. The cost of a failure on the road is measured in towing distance and repair shop availability.
What You Are Actually Paying For
At $690.12 for the complete kit, the Seguler solution delivers more than a replacement part — it provides an upgraded system designed for better airflow, improved efficiency, and long-term reliability. Instead of repeatedly repairing aging factory components, owners invest in a more durable solution built for demanding diesel applications.
The 4" DPF/CAT Replacement Pipe: Designed for Improved Exhaust Flow
The factory DPF system on a 2013–2018 Ram is designed to capture soot, but over time, trapped particles and ash buildup can restrict exhaust flow. As restriction increases, the engine must work harder to push exhaust through the system, which can contribute to higher backpressure, increased exhaust temperatures, and reduced overall efficiency.
The Seguler SG-DP-0270 replaces the restrictive factory assembly with a 4-inch high-flow replacement pipe designed to provide a smoother exhaust path from the downpipe to the factory exhaust connection. Its mandrel-bent design maintains consistent airflow through the bends, helping reduce unnecessary restrictions and allowing exhaust gases to move more freely.
In real-world driving, improved exhaust flow can help reduce strain on the turbocharger and improve throttle response compared with a heavily restricted factory system. Actual results may vary depending on driving habits, vehicle condition, and supporting modifications, but the goal is simple: create a more efficient exhaust path for better overall diesel performance.
The EGR Cooler + Throttle Valve Upgrade Kit: Addressing the Heat and Carbon Loop
The EGR cooler on the 6.7L Cummins is a heat exchanger that uses engine coolant to reduce exhaust gas temperatures before recirculated gases enter the intake system. Over time, carbon buildup can accumulate on the gas side, coolant deposits can form on the liquid side, and repeated thermal cycling between ambient temperatures and high exhaust temperatures can create internal stress points. In severe cases, internal cooler failures can allow coolant to enter the intake stream, creating the potential for serious engine damage.
The Seguler SG-ER-0019 kit replaces the factory EGR cooler and throttle valve components with upgraded bypass hardware, including aluminum alloy block-off plates with O-ring seals and a coolant circuit adapter designed to maintain proper coolant circulation through the modified coolant path. The aluminum construction provides corrosion resistance and long-term durability in the high-temperature engine valley environment. The kit also includes a throttle valve replacement tube — a straight aluminum section that replaces the factory butterfly valve and reduces a potential restriction point in the intake tract.
Together, these two components — the DPF pipe and EGR kit — create a complete upgrade approach: the exhaust side benefits from improved flow efficiency, while the intake side avoids continued exposure to recirculated exhaust gases and associated carbon buildup.
🚨 Common 6.7L Cummins DPF and EGR Warning Signs
Many 6.7L Ram owners first notice their truck is not running the way it used to — not through a check-engine light, but through changes in how it drives day to day. Recognizing these indicators helps determine whether a diesel performance upgrade addresses the actual source of the problem.
Increased regeneration frequency.
A DPF loading with ash requires more frequent active regeneration cycles. Where the truck once went 200–300 miles between regens, it may trigger regeneration much more frequently — sometimes every 50–80 miles depending on driving conditions and duty cycle — a sign the filter is losing capacity.
Reduced throttle response.
As backpressure builds behind a loaded DPF, the turbo spools against increased resistance. The result is a perceptible lag between pedal input and power delivery — particularly noticeable during towing performance demands or when merging onto a highway.
Elevated exhaust gas temperatures under load.
A restricted exhaust path traps heat in the manifold and turbo. Owners towing heavy may observe EGTs climbing faster and staying higher than they did when the truck was newer, even under similar load conditions.
Higher maintenance frequency.
EGR system carbon buildup does not announce itself with a dashboard light — it shows up as progressively shorter oil change intervals (as fuel dilution increases), coolant level drops between service visits, and occasional rough-idle events that come and go without storing a code.
These symptoms do not all appear at once, and they do not always trigger a diagnostic trouble code. That is why many owners discover the extent of the problem only after addressing both the exhaust and intake sides together — and noticing the difference in how the truck drives.
🤔 When Should You Consider a 6.7L Cummins Performance Upgrade?
Not every 6.7L Ram owner needs to address their exhaust and intake systems right now. But certain usage patterns tend to push these components past their service life faster than others.
High mileage. Trucks approaching or exceeding 100,000 miles have accumulated ash in the DPF that active regeneration cannot fully burn off. At this stage, backpressure is measurably higher than when the truck left the factory — and the EGR cooler has cycled through tens of thousands of thermal events.
Towing frequently. Sustained load means sustained EGTs, which means more frequent regeneration cycles and higher thermal stress on the EGR cooler. A truck that tows regularly — whether a fifth-wheel, gooseneck, or heavy equipment trailer — sees these systems working harder than a daily driver that rarely sees a trailer.
Modified truck. If you have already upgraded the intake, turbo, or fuel system, the factory exhaust and EGR components may now be the restriction point in an otherwise optimized airflow path. A performance-oriented intake and turbo will push more air — but the engine can only expel as much exhaust as the DPF allows.
Daily driver with short trips. Trucks that rarely reach full operating temperature are the most vulnerable to DPF-related fuel dilution. Short trips mean interrupted regeneration cycles, and interrupted regens mean unburned diesel accumulating in the oil pan. Over months and years, this cumulative effect can reduce lubrication performance without ever triggering a warning light.
If your truck matches one or more of these profiles, the cost comparison above — $690 for a matched solution versus thousands for repeated dealer service — is worth a closer look.
The Complete Solution — Two Components Working Together
Each Seguler component is designed to address a specific part of the 6.7L Ram system. When combined, these two upgrades create an integrated solution that simplifies installation and provides a more complete approach to improving exhaust flow, system efficiency, and long-term reliability.
Seguler 2013-2018 6.7L Ram Cummins 4" Dp-back DPF Delete pipe
The factory exhaust system on the 2013–2018 6.7L Cummins is designed to meet emissions requirements while balancing daily drivability. However, as mileage increases, the DPF and catalytic converter assembly can accumulate soot and ash, increasing exhaust restriction and backpressure. For trucks used for towing, heavy loads, or long-distance driving, reduced exhaust flow efficiency can place additional demand on the turbocharger and exhaust system.
The Seguler 4" DP-BACK DPF Delete Pipe replaces the factory DPF and catalytic converter section to create a more direct exhaust path from the downpipe to the rear exhaust system. Designed for 2013–2018 6.7L Ram Cummins applications, this upgrade helps reduce factory exhaust restrictions, improve exhaust flow efficiency, and provide a more performance-focused exhaust solution for high-mileage and heavy-duty diesel trucks.
- Material & Construction: Manufactured from T-409 stainless steel featuring mandrel-bent tubing for optimal durability.
- System Design: Features a 4" downpipe-back DPF and CAT delete exhaust system specifically designed for competition applications without a muffler.
- Performance Benefits: Delivers maximum exhaust flow to improve torque, throttle response, and fuel mileage.
- Vehicle Fitment: Designed for 2013-2018 Dodge Ram 2500/3500 6.7L Cummins diesel trucks (excluding commercial Cab & Chassis models and trucks equipped with air suspension).
The 2013–2018 6.7L Ram Cummins was built as a long-lasting heavy-duty diesel platform, but the factory DPF and EGR systems can become increasing maintenance concerns as mileage, towing demands, and operating conditions add up. Addressing these systems together provides a more complete approach than replacing individual components after problems appear.
The Seguler 4" DP-BACK DPF Delete Pipe and EGR Cooler + Throttle Valve Upgrade Kit work together to improve exhaust flow efficiency, reduce long-term maintenance concerns, and support a cleaner operating environment for the engine. With matched components designed for the 6.7L Cummins platform, this upgrade solution helps owners protect their investment and keep their Ram 2500/3500 ready for the demands of towing, hauling, and daily driving.
Seguler 2013-2018 6.7L Dodge RAM 2500 3500 Cummins Diesel EGR Delete Cooler Throttle Valve Delete Kit
The factory EGR system on the 2013–2018 6.7L Cummins is designed to reduce emissions by routing a portion of exhaust gases through a cooled pathway before they enter the intake system. Located in the engine valley, the EGR cooler and throttle valve operate under constant heat cycles and exposure to recirculated exhaust gases. Over time, carbon buildup, thermal stress, and reduced airflow efficiency can become common maintenance concerns on high-mileage trucks, especially those used for towing and heavy-duty applications.
The Seguler EGR Delete Cooler + Throttle Valve Upgrade Kit is designed to replace the factory EGR cooler and throttle valve components with an upgraded bypass solution. By changing the factory exhaust gas recirculation path and intake airflow layout, this upgrade helps reduce carbon exposure inside the intake system, improve airflow efficiency, and address potential restriction points associated with aging factory components on 2013–2018 6.7L Ram Cummins applications.

- Material & Durability: Constructed from aluminum alloy and silicone, offering long-term resistance to corrosion and rust along with excellent heat dissipation.
- System Elimination & Design: Allows the complete removal of the factory EGR valve and EGR cooler to stop exhaust gas recirculation.
- Cooling Efficiency: Engineered to recirculate engine coolant faster and more efficiently than the stock EGR system.
- Vehicle Fitment: Designed specifically for 2013-2018 6.7L RAM 2500, 3500, 4500, and 5500 408ci OHV L6 diesel trucks.
By addressing the factory EGR cooler and throttle valve system together, the EGR Delete Cooler Kit provides a more complete approach to improving the intake side of the 6.7L Cummins platform. Reducing exposure to recirculated exhaust gases and addressing potential airflow restrictions can help create a cleaner, more efficient operating environment for high-mileage and heavy-duty Ram trucks.
When paired with the 4" Dp-back DPF Delete Pipe, this upgrade creates a balanced exhaust and intake solution — improving exhaust flow efficiency while addressing common heat and carbon-related concerns associated with aging factory systems. For Ram 2500 and 3500 Cummins owners who tow, haul, or rely on their trucks daily, this combination provides a practical path toward long-term diesel performance and reliability.
⚠️ CRITICAL CALIBRATION WARNING — READ THIS BEFORE INSTALLING
These are not simple bolt-on modifications. The DPF replacement pipe alters the exhaust monitoring architecture. The EGR kit changes the coolant circuit and reroutes the exhaust gas recirculation path. The throttle valve replacement changes an electronically-controlled intake component.
Your truck’s ECM continuously monitors DPF pressure differential, exhaust gas temperature at multiple points, EGR valve position, EGR temperature, and SCR NOx efficiency. Changing the hardware without updating the ECM calibration will trigger an immediate cascade of diagnostic trouble codes, forced reduced-power mode, and potentially permanent DTCs that require specialized scan tools to clear.
A compatible calibration that accounts for the modified components is mandatory. Do not start the engine before the appropriate calibration is loaded.
Load the calibration first. Install the hardware second. The correct sequence is: read the existing ECM file, load the calibration that accounts for DPF, EGR, and SCR system changes, confirm the flash completed successfully, then begin physical installation.
Bottom line: calibration before hardware. Always.
🛠 DIY Installation: Both Components, One Weekend
The EGR cooler and throttle valve on the 2013–2018 6.7L Ram are accessible from above in the engine valley. The DPF and catalyst assembly is underneath. Combined installation is a full weekend for a first-timer with basic mechanical skills, or a single day of shop labor for someone with a lift.
EGR Cooler + Throttle Valve Upgrade Kit
The EGR cooler sits in the engine valley, accessible from above. The throttle valve assembly (the flapper valve on the intake horn) is on the driver’s side, below the intake elbow. Neither requires removing the intake manifold.
Before You Start
- Disconnect both batteries before any electrical work.
- Release the radiator cap to relieve cooling system pressure. Do not drain the coolant. The EGR components sit above the reservoir level — you will lose a small amount of coolant from the lines and the cooler itself, but draining the system is unnecessary and adds time.
- Place a drain pan under the truck to catch the coolant that will escape when the EGR cooler lines are disconnected.
- Label every connector as you disconnect it. The 6.7L harness has multiple identical-looking connectors — mixing them up means hours of diagnostic guesswork.
- A compatible calibration that accounts for the removed EGR system is mandatory. Load it before starting the engine.
Tools needed: socket set (8mm, 10mm, 11mm, 14mm, 15mm, T35 Torx), flathead screwdriver, pliers, pick set, penetrating oil, emery cloth, silicone sealant, Teflon tape, safety wire, zip ties.
Step 1 — Remove the engine oil dipstick, then the plastic engine cover (four 8mm bolts). Pull the dipstick first — it passes through the cover and can break if forced.
Step 2 — Remove the intake tube: loosen the turbo inlet hose clamp, disconnect the crankcase vent vacuum line (spring-loaded clamp — compress with pliers), unplug the MAF sensor, and pull the tube out.
Step 3 — Remove the EGR crossover tube: loosen two V-band clamps (11mm nuts), remove the heat shield if it blocks access, remove the 10mm center bolt at the front support bracket, disconnect the sensor plug and EGR valve electrical connector (slide locking plate to unlock), lift the crossover tube out.
Step 4 — Remove the EGR valve (four 10mm bolts). Carbon inside is normal on high-mileage engines. Scrape old gasket material from the intake elbow with a plastic scraper — use emery cloth lightly for stubborn residue. Never use a metal scraper. Stuff rags into the open port while cleaning.
🟢 Pro tip — If the removed EGR valve gaskets were loose or torn, there was likely a boost leak. A properly sealed block-off plate will restore intake pressure.
Step 5 — Install the intake block-off plate: apply a thin film of silicone sealant to the gasket side, wipe the intake elbow surface clean with mineral spirits, and torque bolts to 24 Nm (212 in-lb / ~17 ft-lb). Do not overtighten.
Step 6 — Remove the EGR servo and bypass assembly: remove the heat shield (four 10mm bolts), remove the four 10mm bolts holding the exhaust bypass, unbolt the servo mounting bracket, unclip both cables, and lift the assembly out together.
Step 7 — Remove the EGR servo manifold: two 15mm nuts at the exhaust manifold end + V-band clamp. A swivel socket helps reach the tight corner nut at the firewall. Remove the vacuum line, exhaust pressure sensor (7mm), and crankcase vent cover (eight bolts including T35 Torx). Disconnect the coolant line bracket bolt against the EGR cooler.
Step 8 — Remove the EGR cooler: remove four bolts (15mm, two front + two at firewall — use a 10-inch extension for the tight rear corner). Lift the back off the studs first, then wiggle backward. Keep the front of the cooler facing up — this traps coolant inside. Once out, lower the front into the drain pan.
Step 9 — Install the rear block-off plate on the exhaust manifold. Verify the pre-installed plug is tight (use high-heat Loctite if needed). Do not install Allen-head side down — the plug must remain accessible. Torque bolts to 40 ft-lb.
Step 10 — Swap the factory coolant fitting for the kit’s brass fitting. This fitting sits below the reservoir level — coolant will flow. Have the new fitting, Teflon tape, and hose ready before removing the old one (1-inch wrench / ~25mm socket). Wrap threads with Teflon tape and thread in quickly. Do not overtighten.
Step 11 — Connect the coolant hose: slide it over the brass fitting, route to the former EGR cooler position, install the retaining collar, tighten set screws evenly.
🟢 Pro tip — Safety wire the collar: mark set screw contact points, drill shallow divots, reinstall with medium-strength Loctite. Wrap four strands of safety wire around the collar and twist to tension.
Step 12 — Install the support bracket: replace the third intake manifold bolt from the rear with the provided stud. Mount the bracket — orient so the transmission dipstick tube is at the rear, exhaust pressure sensor at the bottom, coolant connector on the back side. Adjust until nothing binds. Torque the bracket bolt to 20 ft-lb.
Step 13 — Remove the factory throttle valve on the intake horn: remove heat shielding (two bolts), unplug the electrical connector, remove four bolts. The bottom rear bolt is countersunk — use a flashlight to locate the smooth head from underneath.
Step 14 — Install the throttle valve replacement horn: the two closer bolt holes go toward the engine. The kit includes grade 8.8 Allen-head bolts (originals are grade 9.8) — either works, but using originals allows standard socket access later.
🟢 Pro tip — If the intake boot resists, pull the hose clamp off first, slide it onto the horn by itself, then work the boot over the horn lip. The clamp slides down once seated.
Step 15 — Zip-tie all unused electrical connectors to the main harness or fixed brackets. A dangling connector can hit the belt, melt on the manifold, or short to ground.
Step 16 — Top up coolant to the full mark. Start the engine at idle. Check for coolant leaks at the brass fitting, hose connections, and collar. Check exhaust leaks at both block-off plates — hold a rag near each plate and listen for ticking or puffing. Test drive. Whistling under throttle = boost leak at intake horn or block-off plate. Exhaust ticking = gasket not seated. Recheck all fasteners after the first full heat cycle.
Estimated time: 6–8 hours for first-time installation.
4" DPF/CAT Replacement Pipe
The DPF and catalyst assembly runs from the downpipe to the factory exhaust aft of the transmission. Installation is from underneath — jack stands or a lift required.
Before You Start
- The DPF and catalyst assembly combined weighs approximately 80 pounds. A transmission jack or a second person is not optional.
- Apply penetrating oil to the downpipe flange bolts and rear clamp bolt the night before. These fasteners live in road spray and salt.
- A calibration that accounts for DPF removal is mandatory. Load it before installing the pipe, not after.
Tools needed: socket set (10mm–15mm), penetrating oil, exhaust hanger removal tool, anti-seize compound.
Step 1 — Disconnect all sensors and the DEF injector from the downpipe, SCR, and DPF assembly. Unbolt the downpipe-to-DPF flange, loosen the rear clamp, and remove the DPF/SCR assembly.
Step 2 — Install pipe section #1: loosely connect the flanged end to the downpipe flange. Insert the welded hanger into the factory rubber isolator. Do not fully tighten.
Step 3 — Slide exhaust clamps onto pipe #1 and pipe #2 before joining. Install pipe #2 into pipe #1 and the factory exhaust inlet. The inner bend must face the truck frame — outward install contacts the driveshaft or crossmember.
Step 4 — Install the hanger bracket at the SCR bracket location, aligning with factory double-hanger points and OEM rubber isolators.
Step 5 — Adjust the system for even clearance at crossmember, transmission pan, driveshaft, and frame rails. Tighten all connections front to back. Apply anti-seize to clamp bolts. Start engine, check for exhaust leaks at every slip joint. Recheck all clamps after the first full heat cycle — stainless expands and clamps loosen slightly.
Estimated time: 1–2 hours.
🚫 Six Common Mistakes During DPF and EGR Work
Mistake 1: Installing the DPF Pipe Before Addressing Calibration Requirements
A DPF replacement pipe changes the factory exhaust configuration, but the ECM may still be configured to monitor factory exhaust system inputs, including DPF-related sensors, exhaust temperature readings, and emissions system parameters. If the hardware is installed without addressing the required calibration changes, the ECM may detect abnormal sensor readings or missing expected system feedback, which can trigger diagnostic trouble codes (DTCs) and potentially reduced-power conditions on some applications. Proper calibration planning should be completed as part of the overall installation process.
Mistake 2: Addressing the EGR Cooler But Leaving the Throttle Valve in Place
An EGR cooler upgrade is installed, the bypass components are in place, and the coolant routing is completed — but the factory throttle valve assembly remains unchanged. While some owners assume the throttle valve is no longer relevant after modifying the EGR system, the factory component can still affect intake airflow management and overall system operation.
The throttle valve contains electronic and mechanical components that can experience wear independently over time. Leaving the factory butterfly valve in place may create a potential airflow restriction point if the valve does not operate as intended. Addressing the throttle valve as part of a complete EGR and intake-side upgrade approach helps ensure the system is optimized as a complete package rather than only modifying one component.
Mistake 3: Leaving Old Gasket Material on the Intake Elbow Surface
Before installing the block-off plates, the EGR valve and intake elbow mounting surfaces should be thoroughly cleaned and free of old gasket material. Leftover gasket residue can prevent proper sealing, creating potential air leaks or exhaust leaks that may affect system performance.
Use a plastic scraper instead of metal tools to avoid damaging aluminum sealing surfaces. Before cleaning any open ports, cover or block them with clean rags to prevent debris from entering the intake system.
Mistake 4: Draining the Entire Cooling System Before EGR Work
Some installation guides recommend draining the cooling system before removing the EGR cooler. However, on the 6.7L Cummins platform, the EGR cooler and associated coolant lines are positioned in a way that typically allows the work to be completed without fully draining the system. Fully draining the cooling system can add unnecessary time and increase the chance of introducing air into the cooling circuit.
Before removal, relieve system pressure, place a drain pan underneath the work area, and prepare for a small amount of coolant loss from disconnected lines and the cooler assembly. The most significant coolant loss typically occurs when removing the factory coolant fitting in the block, so having the replacement fitting ready can help minimize coolant exposure during the swap.
After reassembly, refill the coolant reservoir to the proper level, start the engine, check for leaks, and verify coolant level after the system reaches operating temperature.
Mistake 5: Leaving Unused Electrical Connectors Exposed
After installation, the EGR valve, throttle valve actuator, and DPF sensor connectors are unplugged but still present. If left dangling, they contact the serpentine belt, melt on the exhaust manifold, or get caught in the cooling fan. Zip-tie every unused connector securely to the main harness or a fixed bracket. A connector that shorts to ground can blow an unrelated circuit fuse.
Mistake 6: Skipping the First Heat Cycle Re-Torque
After the first full heat cycle — bring the engine to operating temperature, let it cool completely — re-torque the DPF pipe clamps and re-check all exhaust block-off plate bolts. Stainless steel expands during the first heat cycle, and clamps that were tight when cold loosen slightly after one hot run. Block-off plate gaskets also compress. The second heat cycle will not re-tighten anything — it only makes any leaks worse.
❓ Frequently Asked Questions
Q: What is the goal of a performance-oriented upgrade for the 6.7L Cummins?
This approach focuses on improving airflow efficiency, reducing maintenance concerns, and optimizing the overall operating environment of the engine — specifically by addressing the DPF (which increases exhaust backpressure as it loads with ash) and the EGR system (which routes heat and carbon into the intake). The result is an engine that can breathe, flow, and run more efficiently.
Q: Do I need a calibration or tuner after installing these components?
Yes. The ECM monitors DPF pressure differential, EGR temperature sensors, EGR valve position, and SCR NOx efficiency continuously. Changing the hardware without updating the calibration triggers check-engine lights, reduced-power mode, and potentially permanent DTCs. A compatible calibration is mandatory — load it before starting the engine.
Q: Can I install just the DPF pipe and skip the EGR kit?
Technically yes, but there is a reason the two are often addressed together. The DPF regeneration cycle — which injects diesel on the exhaust stroke to burn off soot — creates hotter exhaust gas that the EGR cooler then processes. A truck running higher EGTs from a loaded DPF puts more thermal stress on the EGR cooler. The two systems are interconnected. Addressing both together means one installation session, one calibration session, and a single coolant top-up afterward.
Q: Is truck performance enhancement the same as a race-only modification?
Performance enhancement is a broad category that includes many types of aftermarket improvements — from filter kits and intake upgrades to exhaust and EGR system modifications. The scope depends on the specific components and the vehicle’s intended use. These particular components are designed for off-road and competition applications. Verify applicable regulations in your jurisdiction.
Q: Will this fit my 2015 Ram 2500 6.7L Cummins?
Yes. This package is designed for 2013–2018 Ram 2500/3500 6.7L Cummins applications. The DPF pipe (SG-DP-0270) is also compatible with 3500 models. The EGR kit (SG-ER-0019) fits 2500 through 5500.
Q: What parts are included in the kit?
The DPF pipe includes the 4" T-409 stainless replacement pipe in two sections, all necessary clamps, hanger bracket, and mounting hardware. The EGR kit includes aluminum block-off plates with O-ring seals, coolant standpipe adapter, throttle valve replacement tube, coolant hose with clamps, support bracket with threaded stud, and all required bolts and fasteners. Both kits ship with everything needed for installation — no additional hardware required.
Q: Is this compatible with towing applications?
Yes. The reduced exhaust backpressure and improved airflow can benefit towing performance by lowering EGTs under sustained load. The T-409 stainless pipe handles the high exhaust temperatures associated with heavy towing without the surface scaling common in aluminized alternatives. Many owners who tow regularly report more consistent power delivery and lower operating temperatures after installing this airflow improvement package.
Q: How long does the complete two-component installation take?
Plan for a full weekend as a first-time DIY installer — roughly 6–8 hours for the EGR kit (accessible from above) plus 1–2 hours for the DPF pipe (underneath). Professional shop installation is typically a single day, since a lift significantly reduces the under-truck portion.
Q: Will my fuel economy improve?
Some owners report measurable improvement, particularly on trucks whose factory DPF had significant ash accumulation. A loaded DPF increases exhaust backpressure, making the engine work harder. Removing that restriction can reduce pumping losses. Fuel economy gains vary by driving style, load, and the condition of the components being replaced.
Q: Will this upgrade approach affect my factory warranty?
Modifying emissions control systems can affect warranty coverage for related components. Under the Magnuson-Moss Warranty Act, a manufacturer must prove a modification caused a specific failure to deny coverage. However, emissions system modifications are treated differently from general aftermarket modifications. Review your warranty terms before modifying emissions equipment. This information is general and not legal advice.
Q: Why pay $690 for a matched Seguler solution when individual components total $300–490?
The difference is matched compatibility, manufacturing consistency, and single-source support. The Seguler DPF pipe and EGR kit are designed for the same vehicle platform with the same calibration requirements. Sourcing individual components from different suppliers — at a combined cost starting around $300 on the low end — means the installer verifies compatibility between them, and a pipe that does not fit or a block-off plate that leaks may not reveal itself until the truck is back on the road.
✅ Bottom Line: Flow Better, Run Cooler, Go Further
The math behind a Cummins reliability upgrade on the 6.7L Ram is straightforward: two factory systems — one that clogs and restricts exhaust flow, one that recirculates heat and carbon into the intake — are replaced with components designed to address their respective failure modes.
The 4" DPF/CAT replacement pipe ($578.12) addresses the exhaust backpressure that can load the turbo, contribute to oil dilution through regeneration-related fuel exposure, and force the engine to work harder at every RPM. The EGR cooler and throttle valve upgrade kit ($112.00) addresses the heat-and-carbon recirculation loop that stresses the intake side of the engine and introduces coolant contamination risk through internal cooler degradation.
Together, they form a comprehensive solution: the exhaust flows freely, the intake stays clean and cool, and the long-term maintenance concerns associated with both systems are addressed. Total cost: $690.12. One installation session. One calibration session. One weekend.
Ready to address both systems on your 6.7L Ram? Explore the complete solution at seguler.com:
- 4" DPF/CAT Replacement Pipe (SG-DP-0270) → — 2013–2018 Ram 2500/3500
- EGR Cooler + Throttle Valve Upgrade Kit (SG-ER-0019) → — 2013–2018 Ram 2500/3500/4500/5500
Installation involves modification of emissions control systems. These components are intended for off-road and competition use. Verify applicable regulations in your jurisdiction before installation.
Featured collection
-
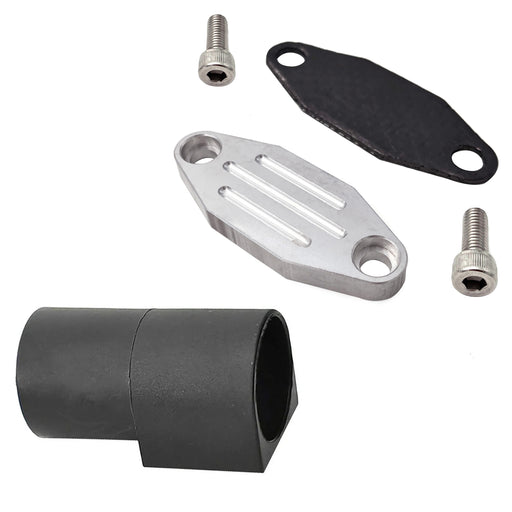
Seguler 1986-1995 Ford F150 F250 F350 Mustang Trucks EGR Simulator Eliminator / Block Off Plate Kit
SEGULEROriginal price $79.99 - Original price $79.99Original price$79.99$79.99 - $79.99Current price $79.99Block Off Plate Material: Aluminum alloy. Easy installation,and convenient to use. Made of CNC milled from aircraft grade Billet aluminum. Will N...
View full details -

Seguler 2011-2023 6.7L Ford Powerstroke Diesel EGR Delete Kit
SEGULEROriginal price $109.99 - Original price $109.99Original price$109.99$109.99 - $109.99Current price $109.99FITMENT 2011-2023 6.7L Ford Powerstroke F-250 F-350 F-450 F-550 Super Duty V8 Diesel. compatible with both standard Pickups and commercial Cab &...
View full details -
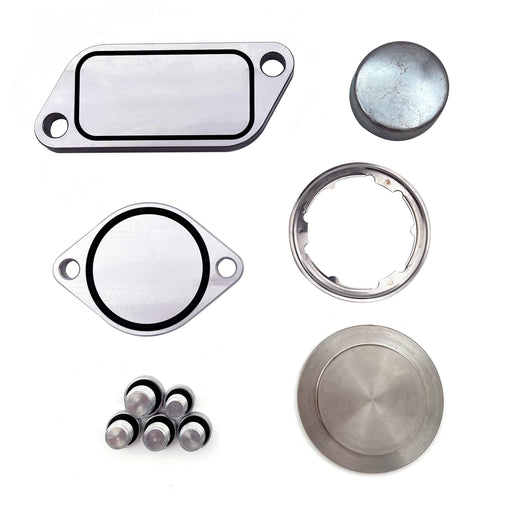
For 2010-Present Stage 2 ISX 15 CM2250 CM2350 EGR Delete Kit
SEGULEROriginal price $59.99 - Original price $59.99Original price$59.99$59.99 - $59.99Current price $59.99FITMENT 2010-Present Cummins Volvo, Peterbilt, Mack, International, Freightliner, Kenworth with the ISX15 CM2250 / CM2350 engines. DESCRIPTION P...
View full details -
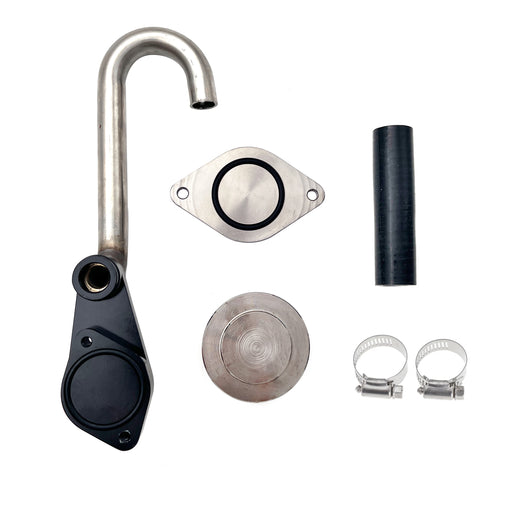
Seguler 2003-2007 6.0L FORD Powerstroke Diesel EGR Cooler Delete Kit
SEGULEROriginal price $56.14 - Original price $56.14Original price$56.14$56.14 - $56.14Current price $56.14FITMENT 2003-2007 6.0L Ford F-250 Ford F-350 F-450 F-550 Super Duty. 2003-2007 6.0L Ford Excursion SUV (Diesel Models Only). 2005-2010 Ford E-Se...
View full details -
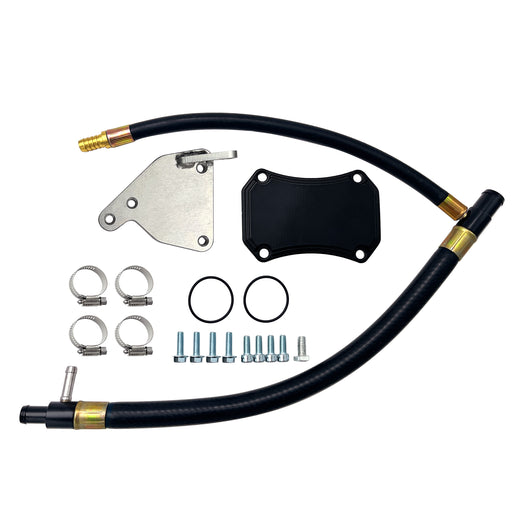
For 2011-2016 6.6L GMC Chevy Duramax Diesel LML EGR Valve Cooler Delete Kit
SEGULEROriginal price $66.49 - Original price $66.49Original price$66.49$66.49 - $66.49Current price $66.49FITMENT 2011-2016 6.6L Chevy GMC Duramax LML 2500 HD 3500 HD Diesel. DESCRIPTION Product Overview The 2011–2016 LML Duramax uses a complex EG...
View full details -
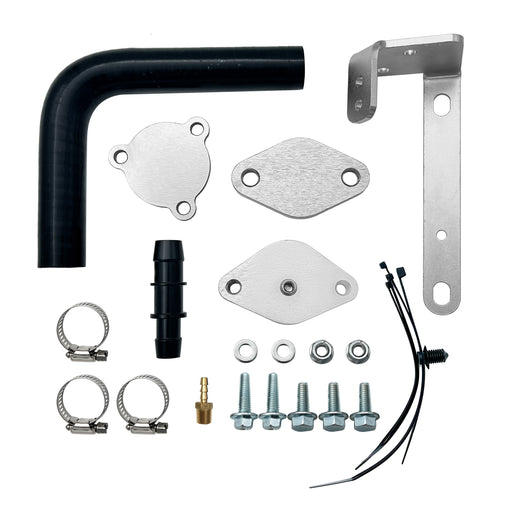
Seguler For 2014-2019 3.0L Dodge Ram 1500 EcoDiesel EGR Valve & Cooler Delete Kit
SEGULEROriginal price $72.99 - Original price $72.99Original price$72.99$72.99 - $72.99Current price $72.99FITMENT 2014-2019 3.0L Dodge Ram 1500 EcoDiesel V6 engine trucks. DESCRIPTION Product Overview Exhaust gas recirculation on 3.0L EcoDiesel V6 ...
View full details -

Seguler 2011-2023 6.7L Ford Powerstroke Diesel EGR Delete Kit
SEGULEROriginal price $85.99 - Original price $85.99Original price$85.99$85.99 - $85.99Current price $85.99FITMENT 2011-2023 6.7L Ford Powerstroke F-250 F-350 F-450 F-550 Super Duty V8 Diesel. compatible with both standard Pickups and commercial Cab &...
View full details -

Seguler 2010-2024 6.7L Dodge Ram Cummins Diesel EGR Valve Cooler Delete Kit
SEGULEROriginal price $89.99 - Original price $89.99Original price$89.99$89.99 - $89.99Current price $89.99FITMENT 2010–2024 6.7L Dodge Ram Cummins 2500 / 3500 Pickup Turbo Diesel. Note: Does NOT fit Chassis Cab 3500 / 4500 / 5500 models. DESCRIPTIO...
View full details -
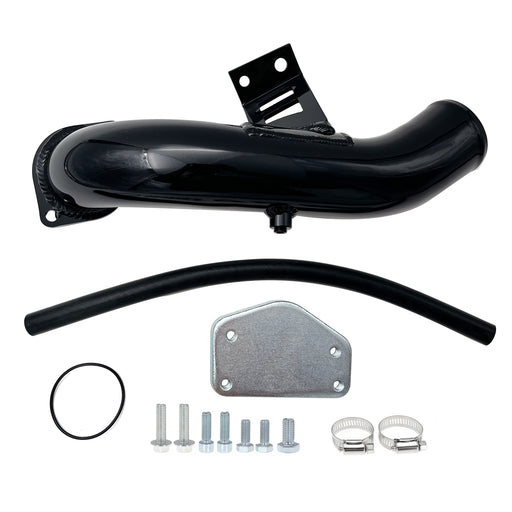
For 2004.5-2005 6.6L Chevy GMC Silverado LLY Duramax Diesel EGR Delete Kit
SEGULEROriginal price $92.99 - Original price $92.99Original price$92.99$92.99 - $92.99Current price $92.99FITMENT 2004.5-2005 6.6L Chevrolet Silverado Duramax LLY 2500HD / 3500 HD. 2004.5-2005 6.6L GMC Sierra Duramax LLY 2500HD / 3500 HD. DESCRIPTION...
View full details -

Seguler 2017-2019 L5P Duramax Diesel 4pcs L5P Can Bus Plugs Connector Replacement
SEGULEROriginal price $75.00 - Original price $75.00Original price$75.00$75.00 - $75.00Current price $75.00FITMENT 2017–2019 Chevrolet Silverado / GMC Sierra Duramax L5P 2500HD & 3500HD Diesel. DESCRIPTION Product Overview Unprotected harness con...
View full details -

Seguler 2020-2023 chevy duramax L5P Diesel Can Bus Plugs Connector
SEGULEROriginal price $80.00 - Original price $80.00Original price$80.00$80.00 - $80.00Current price $80.00FITMENT 2020–2023 Chevrolet Silverado / GMC Sierra Duramax L5P 2500HD & 3500HD Diesel. DESCRIPTION Product Overview Unprotected harness pl...
View full details -
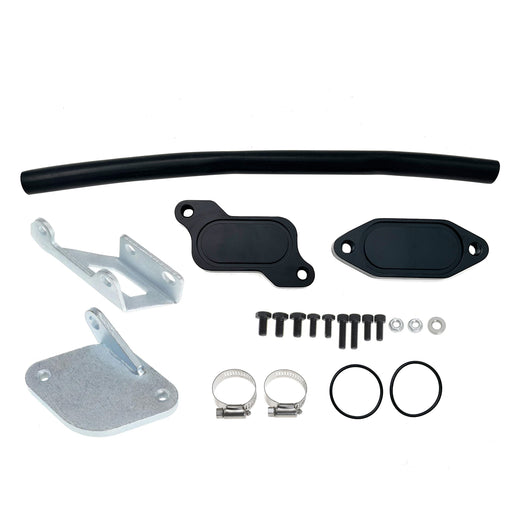
For 2006-2007 6.6L Chevrolet Silverado Classic GMC Duramax LBZ Diesel EGR Valve Cooler Delete Kit
SEGULEROriginal price $63.49 - Original price $63.49Original price$63.49$63.49 - $63.49Current price $63.49FITMENT 2006-2007.4 Chevrolet Silverado Duramax LBZ 2500HD / 3500HD. 2007.4 Chevrolet Silverado Duramax LBZ 2500HD / 3500HD Classic. 2006-2007.4 ...
View full details -

Seguler 2011-2023 6.7L Ford F250 F350 F450 F550 Powerstroke Diesel EGR Valve Delete Cooler Delete Kit
SEGULEROriginal price $55.99 - Original price $55.99Original price$55.99$55.99 - $55.99Current price $55.99FITMENT 2011-2023 6.7L Ford Powerstroke F-250 F-350 F-450 F-550 Super Duty V8 Diesel compatible with both standard Pickups and commercial Cab &a...
View full details -
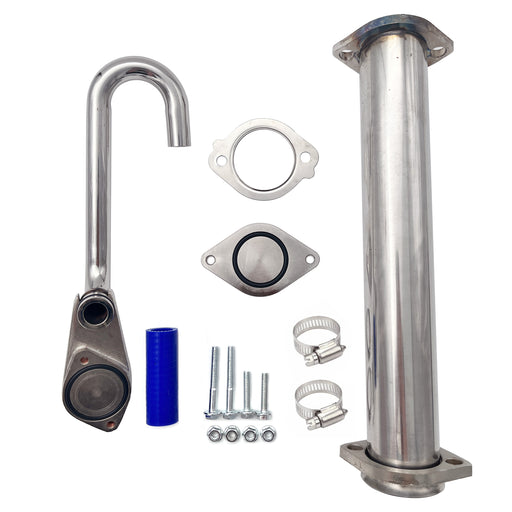
Seguler 2003-2007 6.0L Ford F250 F350 Powerstroke Diesel EGR Basic Cooler Kit
SEGULEROriginal price $79.99 - Original price $79.99Original price$79.99$79.99 - $79.99Current price $79.99FITMENT 2003-2007 6.0L Ford F250 F350 F450 F550 Super Duty Turbo (except 2004 F250 Super Duty). 2003-2005 6.0L Ford Excursion Turbo. 2005 Ford F...
View full details -
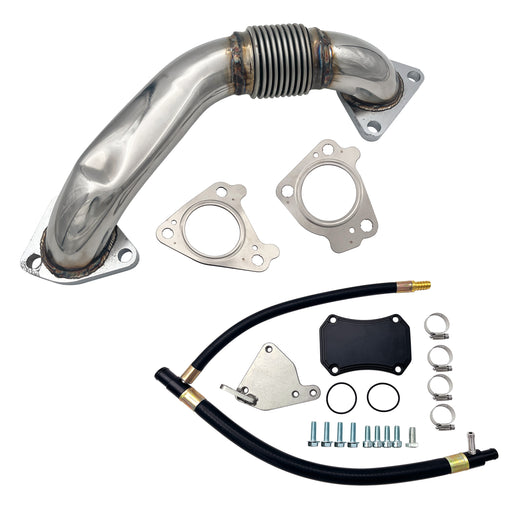
Seguler 2011-2016 6.6L GMC Chevy Duramax Diesel LML Up-Pipe & EGR Valve Cooler Delete Kit
SEGULEROriginal price $173.86 - Original price $173.86Original price$173.86$173.86 - $173.86Current price $173.86FITMENT 2011-2016 6.6L Chevy GMC Duramax LML 2500 HD 3500 HD Diesel. DESCRIPTION Product Overview Direct-injection technology endows GM 5.3L an...
View full details -
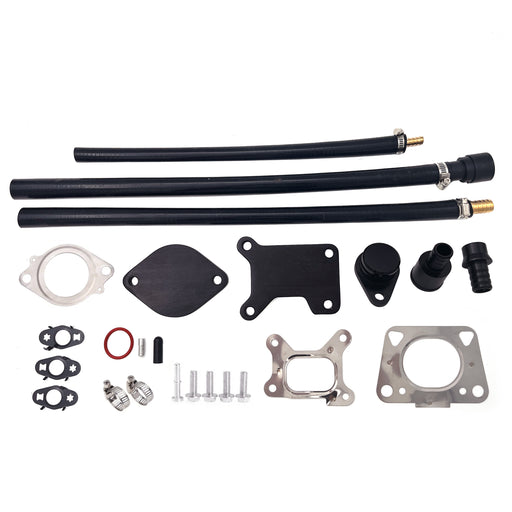
For 2017-2023 6.6L Chevy GMC Duramax L5P diesel EGR Valve Cooler Delete kit
SEGULEROriginal price $131.99 - Original price $131.99Original price$131.99$131.99 - $131.99Current price $131.99FITMENT 2017–2023 6.6L Chevrolet Silverado / GMC Sierra Duramax L5P 2500HD 3500HD Diesel. DESCRIPTION Product Overview Hot soot recirculation ...
View full details -
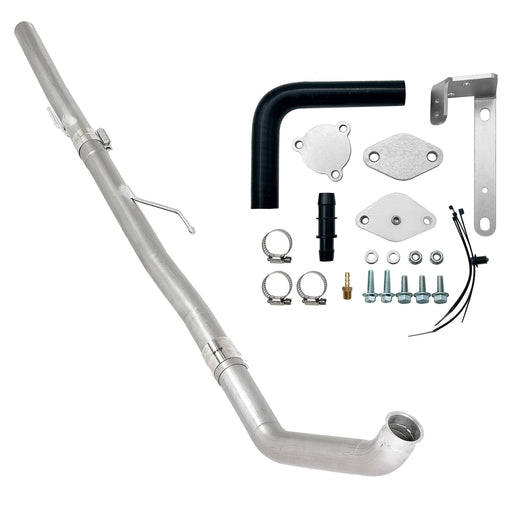
Seguler 3" Ecodiesel DPF Delete Pipe & EGR Delete kit for 2014-2018 3.0L Ram
SEGULEROriginal price $342.00 - Original price $342.00Original price$342.00$342.00 - $342.00Current price $342.00FITMENT 2014–2018 3.0L Dodge Ram 1500 EcoDiesel V6. NOTE: Fit standard Pickup models only (Crew Cab, Quad Cab). Does NOT fit Jeep Grand Cheroke...
View full details -
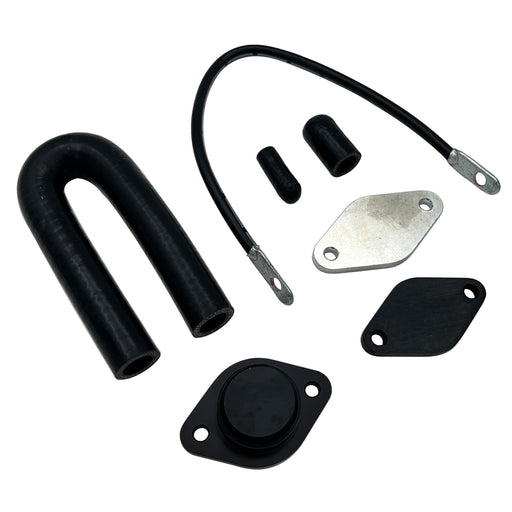
Seguler EGR valve cooler Delete kit for 2020-2022 3.0L Chevy Duramax LM2
SEGULEROriginal price $189.12 - Original price $189.12Original price$189.12$189.12 - $189.12Current price $189.12FITMENT 2020–2022 3.0L Chevrolet Silverado GMC Sierra 1500 LM2 Turbo-Diesel. DESCRIPTION Product Overview Powered by smooth inline-six engine...
View full details -

For 2013-2023 6.7L Dodge Ram Cummins Cab & Chassis EGR Delete Kit Diesel
SEGULEROriginal price $62.99 - Original price $62.99Original price$62.99$62.99 - $62.99Current price $62.99FITMENT 2013–2023 6.7L Ram Cummins 3500 4500 5500 Cab & Chassis / Commercial Trucks. Does NOT fit standard Ram 2500 3500 Pickups. DESCRIPTIO...
View full details -
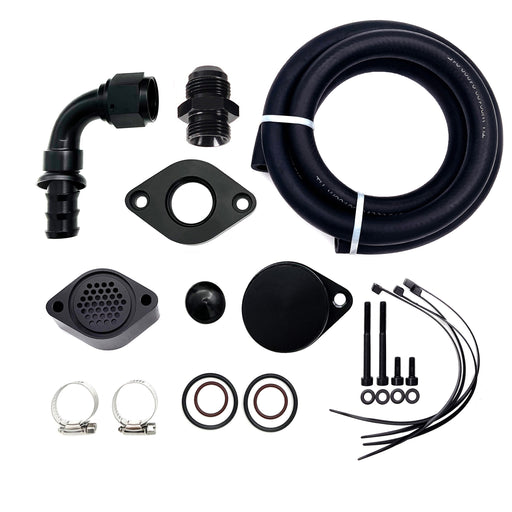
Seguler 2011-2023 6.7L Ford Powerstroke CCV PCV Reroute Engine Ventilation Kit
SEGULEROriginal price $82.99 - Original price $82.99Original price$82.99$82.99 - $82.99Current price $82.99FITMENT 2011-2023 6.7L Ford Powerstroke F-250 F-350 F-450 F-550 Super Duty V8 Diesel. Compatible with both standard Pickups and commercial Cab &...
View full details -
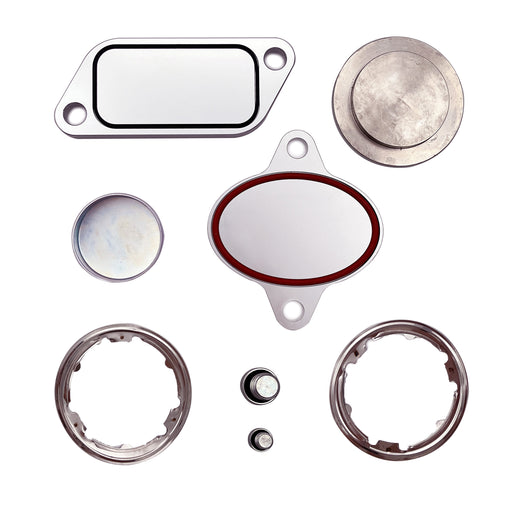
For 2007-2010 Cummins ISX CM871 EGR Plug Kit Stage 2 Plates and Plugs Aluminum
SEGULEROriginal price $67.99 - Original price $67.99Original price$67.99$67.99 - $67.99Current price $67.99FITMENT 2007-2010 Cummins Volvo, Peterbilt, Mack, International, Freightliner, Kenworth with the ISX CM871 Engines. DESCRIPTION Product Overvie...
View full details -
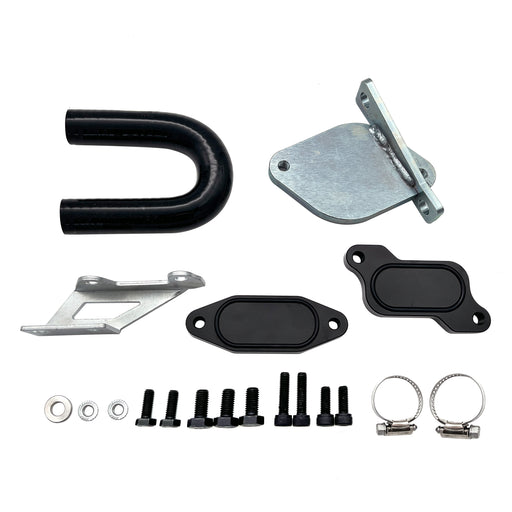
For 2007-2010 6.6L Chevy GMC LMM Duramax EGR Valve Cooler Delete Kit Fit
SEGULEROriginal price $61.99 - Original price $61.99Original price$61.99$61.99 - $61.99Current price $61.99FITMENT 2007.5-2010 6.6L Chevrolet Silverado Duramax LMM 2500HD / 3500HD. 2007.5-2010 6.6L GMC Sierra Duramax LMM 2500HD / 3500HD. Note: Standard...
View full details -
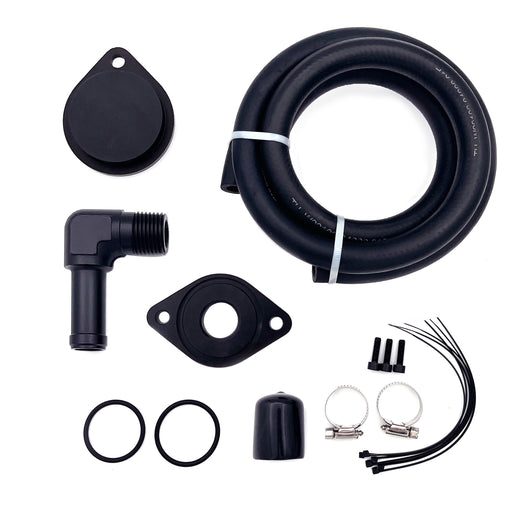
Seguler 2011-2023 Ford 6.7L Powerstroke CCV/PCV Reroute/Delete Engine Ventilation Kit
SEGULEROriginal price $72.00 - Original price $72.00Original price$72.00$72.00 - $72.00Current price $72.00FITMENT 2011-2023 6.7L Ford Powerstroke F-250 F-350 F-450 F-550 Super Duty V8 Diesel. Compatible with both standard Pickups and commercial Cab &...
View full details -
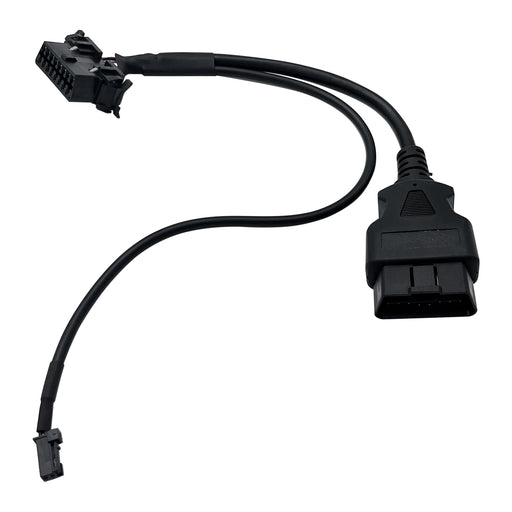
Seguler 2018+ RAM Cummins OBD2 HD Security Gate Bypass Cable
SEGULEROriginal price $45.00 - Original price $45.00Original price$45.00$45.00 - $45.00Current price $45.00FITMENT 2018+ 6.7L Ram Cummins 2500 3500 Turbo Diesel. Designed for Ram pickup trucks equipped with the factory Security Gateway Module. Note: Pl...
View full details -
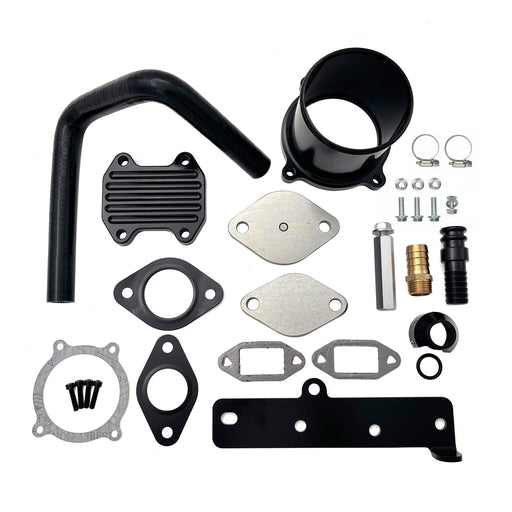
Seguler For 2013-2018 6.7L Dodge RAM 2500 3500 Cummins Diesel EGR Delete Cooler Throttle Valve Delete Kit
SEGULEROriginal price $112.00 - Original price $112.00Original price$112.00$112.00 - $112.00Current price $112.00FITMENT 2013–2018 6.7L Dodge Ram Cummins 2500 & 3500 Pickup Turbo Diesel. Note: Does NOT fit Cab & Chassis (3500 / 4500 / 5500 C&C) m...
View full details


Leave a comment