

LM2 EGR Delete: 3.0L Duramax Guide & Benefits
📘 LM2 3.0L Duramax EGR Cooler Problems: What Owners Should Know About Coolant Loss
Some LM2 owners have experienced gradual coolant loss as mileage increases. In some cases, the source can be difficult to identify because there may be no visible external leak. One component often considered during diagnosis is the EGR cooler, which uses engine coolant to reduce exhaust temperatures before a portion of exhaust gases is routed back into the intake system.
Over time, repeated thermal cycling can place stress on the EGR cooler assembly. If an internal failure occurs, coolant may enter areas where it does not belong, potentially affecting combustion conditions and lubrication effectiveness. When identified early, repairs may involve replacing the EGR cooler assembly. If left unresolved, the issue may lead to more extensive repairs.
The LM2 3.0L Duramax is one of GM’s most advanced light-duty diesel engines. However, like any modern diesel platform, its emissions system includes additional components that require attention as mileage increases.
🔬 Understanding the LM2 3.0L Duramax Emissions System
Before addressing potential concerns, it’s important to understand how the LM2 platform is designed and how its emissions components operate together over time.
The LM2 3.0L Duramax — GM’s Half-Ton Diesel
General Motors introduced the LM2 for the 2020 model year, bringing a 3.0-liter inline-six Duramax turbodiesel to the Silverado 1500, Sierra 1500, Tahoe, Yukon, and Cadillac Escalade. Rated at 277 horsepower and 460 lb-ft of torque, the LM2 was engineered to deliver diesel efficiency and towing capability in a half-ton platform without the size of a heavy-duty truck.
The engine features an aluminum block and heads, dual overhead cam design, forged steel crankshaft, and a variable-geometry turbocharger. A variable-displacement oil pump and split-flow thermal management system help improve efficiency and bring the engine to operating temperature more quickly.
Like all modern diesel engines, the LM2 uses a complex emissions system designed to meet current regulations. These components work together to control exhaust emissions, but they also add additional systems that owners should understand and monitor as mileage increases. The Exhaust Gas Recirculation (EGR) system is one of the key emissions components that LM2 owners commonly pay attention to over time.
How EGR Works — and What Owners Should Know
Exhaust Gas Recirculation (EGR) routes a portion of exhaust gas back into the intake system to reduce combustion temperatures and help control NOx emissions. On the LM2, hot exhaust passes through an EGR cooler — a coolant-fed heat exchanger — before being routed back into the engine.
Like other emissions components, the EGR system operates under high temperatures and repeated thermal cycles. As mileage increases, LM2 owners commonly monitor two areas: potential EGR cooler-related concerns and carbon buildup within the intake system.
EGR Cooler Thermal Stress and Failure Concerns
The EGR cooler operates under repeated thermal cycling — from ambient temperatures to over 1,000°F and back — throughout normal engine operation. This continuous expansion and contraction places stress on internal passages and welded areas. Over time, soot accumulation and repeated heat cycles may contribute to uneven heat transfer and additional thermal stress.
If the cooler develops an internal failure, coolant may enter the intake stream. Possible symptoms include gradual coolant loss without a visible external leak, occasional white exhaust vapor during startup, and in advanced cases, signs of coolant contamination in the engine oil.
Coolant entering the combustion process can affect normal engine operation and may reduce lubrication effectiveness. In severe cases, coolant contamination may contribute to increased wear and more extensive engine repairs.
Carbon Buildup on the Intake Side
Even without a coolant leak, the EGR system introduces soot-containing exhaust gases into the intake system as part of normal emissions operation. Over time, carbon deposits can accumulate in intake runners and on intake components, which may reduce airflow efficiency and affect intake system performance.
The effects of intake buildup may become more noticeable under higher-load conditions, such as climbing grades or towing. The engine is designed to maintain controlled intake airflow, while the EGR system recirculates measured amounts of exhaust gas as part of the emissions control strategy.
The Cascade — How EGR and DPF Systems Are Connected
The EGR system does not operate in isolation — it interacts with other emissions and engine systems. Changes in EGR operation can influence combustion characteristics and soot production, which may affect DPF loading patterns over time. Increased DPF loading can lead to more frequent regeneration cycles, which consume additional fuel. Under certain conditions, fuel dilution of engine oil may contribute to increased wear, depending on driving conditions, maintenance practices, and overall engine health.
The EGR system is one of the areas LM2 owners commonly monitor as mileage increases because changes in EGR operation can affect other connected systems.
The DPF is also part of the same exhaust management system. Changes in soot production and DPF loading behavior may contribute to additional regeneration cycles. On the LM2 platform, accessing the DPF assembly requires removal of several surrounding components, making combined service work a practical consideration for many owners.
These systems are designed to work together, and addressing EGR-related concerns early may help reduce stress on downstream components.
Is the EGR System Affecting Your Truck?
EGR-related concerns may not always trigger a check engine light in the early stages. The signs can develop gradually and may be easy to overlook.
Coolant levels dropping between service intervals without a visible external leak can be an early indicator. If no external leak is found, the EGR cooler is one component that may be inspected during diagnosis.
White exhaust vapor during cold startup, a sweet exhaust smell, or signs of coolant contamination in the oil may indicate coolant entering areas where it should not. Check the oil dipstick for milky residue or an unexpected increase in oil level.
Reduced fuel economy over time may be associated with carbon buildup in the intake system, while turbo lag or sluggish throttle response may be related to airflow restrictions or other system concerns.
No single symptom confirms an EGR-related issue by itself. However, multiple signs appearing together may justify further inspection.
Coolant levels dropping between service intervals without a visible external leak can be an early indicator. If a cooling system pressure test shows no obvious external leak while coolant continues to decrease, internal coolant consumption may need to be investigated. On the LM2, the EGR cooler is one component that may be inspected during diagnosis.
White exhaust vapor during cold startup that clears as the engine warms can indicate coolant entering the combustion chamber. A sweet exhaust smell may also be a possible sign. Check the oil dipstick: coolant contamination may appear as a milky residue or an unexpected increase in oil level despite no oil being added.
Reduced fuel economy over time — without a corresponding change in driving style or load — may be associated with progressive carbon buildup in the intake path. Increased intake restriction can affect engine efficiency over time, which may contribute to noticeable changes in fuel economy.
Unusual turbo lag or sluggish throttle response at highway speeds may be associated with airflow-related concerns, including intake buildup, increased exhaust restriction, or other related issues.
No single symptom confirms an EGR-related issue by itself. However, multiple signs appearing together may justify further inspection.
🔩 Quality Components vs. Budget Alternatives: What’s the Difference?
Not all components are designed with the same materials, construction standards, or vehicle-specific fitment. Here’s what to consider when choosing the right upgrade components.
| Feature | Quality Component | Budget Alternative |
|---|---|---|
| EGR block-off material |
Aluminum alloy designed for repeated heat cycles
|
Thinner materials — may offer reduced durability under repeated heat cycl
|
| EGR pipe block |
Blocks unused EGR passages and prevents exhaust flow through removed components |
Some kits ship with block-off plates only — missing pipe blocks require separate sourcing |
| DPF pipe material |
409 stainless steel — corrosion resistance rated for exhaust service life |
Aluminized or thinner steel — internal corrosionfrom exhaust condensation within 1–2 seasons |
| DPF construction |
Mandrel-bent for consistent internal diameter and improved airflow |
Crush-bent — diameter narrows at bends, reducing flow efficiency |
| DPF fitment |
Platform-specific — 2020-2022 LM2 (E46 ECM) only, will NOT fit LZ0 |
May be sold as “universal” — verify compatibility before purchasing |
| Can Bus signal |
Provides the required electrical connection to maintain ECM communication — keeps CAN-BUS alive for fuel tank and lift pump data |
May use incorrect resistor values — potential for intermittent communication faults |
| Can Bus fitment |
Designed for 2020-2023 6.6L L5P specifically |
May be marketed for multiple platforms — verify model-year compatibility |
The difference is rarely visible in a product photo. It shows up after the first year — in gasket leaks, exhaust noise, and ECM fault codes that can be difficult to trace.
Each of these problems has a specific hardware solution.
| Upgrade | What It Solves |
|---|---|
| EGR Delete Kit |
EGR cooler failure risk, carbon buildup in the intake path |
| DPF Delete Pipe | Exhaust backpressure, regeneration fuel consumption |
| Can Bus Plugs | ECM communication integrity after hardware changes |
Here’s the Math — What Emissions Hardware Costs Over 10 Years?
When considering LM2 emissions upgrades, there are several ways owners can approach the system. The right choice depends on the truck’s usage, maintenance goals, and how much of the emissions system they want to address at one time.
An EGR delete only approach focuses on removing the EGR valve and cooler assembly from the intake and coolant circuits. This can address EGR cooler-related concerns and reduce future intake-side carbon buildup, but the factory DPF system remains unchanged.
A DPF pipe only approach focuses on improving exhaust flow by replacing the factory DPF assembly. This addresses exhaust-side restriction concerns, while the EGR system continues to operate and recirculate exhaust gases into the intake.
An EGR + DPF combination approach addresses both sides of the system by improving intake cleanliness and changing the exhaust flow path. For owners already performing major service work, completing related upgrades together can reduce repeated disassembly and installation time.
Additional electronic components should be selected based on the specific platform. CAN Bus solutions are primarily associated with certain applications, so owners should verify compatibility before installation.
Key Takeaways:
- EGR upgrades focus on intake-side concerns and EGR-related components.
- DPF upgrades focus on exhaust-side flow and aftertreatment components.
- Combining related upgrades can reduce repeated teardown.
- The best solution depends on vehicle usage, maintenance priorities, and platform compatibility.
📦 The Three-Part Solution — EGR Delete, DPF Pipe, and Can Bus Integration
Seguler EGR valve cooler Delete kit for 2020-2022 3.0L Chevy Duramax LM2
EGR Valve Cooler Delete Kit is designed for 2020–2022 Silverado 1500 and Sierra 1500 models equipped with the 3.0L LM2 Duramax engine. It replaces the factory EGR valve and cooler assembly, removes the EGR cooler from the coolant circuit, and blocks the original exhaust gas recirculation path.
This upgrade helps address potential EGR cooler-related coolant concerns while reducing soot recirculation into the intake system, providing a cleaner intake path and improved long-term engine protection.

- Material: Aluminum alloy.
- Application: Designed to disassemble restrictive EGR coolers and valves for 2020-2022 Sierra/Silverado Duramax 3.0L LM2 Trucks.
- Performance: Enhances engine airflow, reduces carbon buildup, and ensures smoother engine performance.
-
Components: Includes parts to block the EGR cooler pipe and prevent hot exhaust gas recirculation.
| Feature | Seguler LM2 EGR Delete Kit | Lower-Cost Options |
|---|---|---|
| Material |
Aluminum alloy — designed for durability and to replacerestrictive EGR cooler and valve components |
Thinner-gauge materials — may warp or deform under repeated heat cycling |
| Cooler pipe block |
Includes components that block the EGR cooler pipe,preventing recirculation of hot exhaust gas |
Some kits may not include all required blocking components |
| Airflow impact |
Designed to improve airflow characteristics and help reduce potential intake-side carbon buildup |
May not provide equivalent flow path optimization— airflow gains vary |
| Platform match |
Designed specifically for 2020–2022 Silverado 1500 and Sierra 1500 models equipped with the 3.0L LM2 Duramax |
May be marketed for multiple platforms — verify LM2-specific fitment |
| Installation |
Designed to replace the factory EGR valve and cooler assembly with a straightforward installation process |
May require additional sourcing of gaskets,fasteners, or block-off components |
| Component life |
Removes the EGR cooler from the intake and coolant circuits, addressing one potential source of EGR-related issues |
May not address all potential concerns within the EGR system |
With the EGR cooler removed from the system and the intake path receiving clean air, the next source of restriction is downstream — the DPF that sits in the exhaust path, loading soot with every mile.
Seguler 3" Turbo Back DPF Delete Pipe for 2020-2022 3.0L 1500 LM2 GM Chevy Duramax
3" Turbo Back DPF Delete Pipe is designed for 2020–2022 3.0L LM2 Duramax applications, providing a mandrel-bent exhaust solution for improved fitment and durability. Constructed from 409 stainless steel with mandrel-bent tubing, this pipe is designed to retain the factory muffler and dual exhaust intact for a stock appearance. In off-road or competition applications where permitted, reducing exhaust restriction can help improve exhaust flow under certain operating conditions. The factory DPF assembly requires extensive disassembly to access — during a real-world removal walkthrough, the technician discharged the AC system, removed the battery and fuse block, pulled the fender well, and extracted the EGR cooler just to reach the DPF brackets. Swapping to a mandrel-bent pipe reduces the restriction — and avoids the access complexity that the removal walkthrough documented.
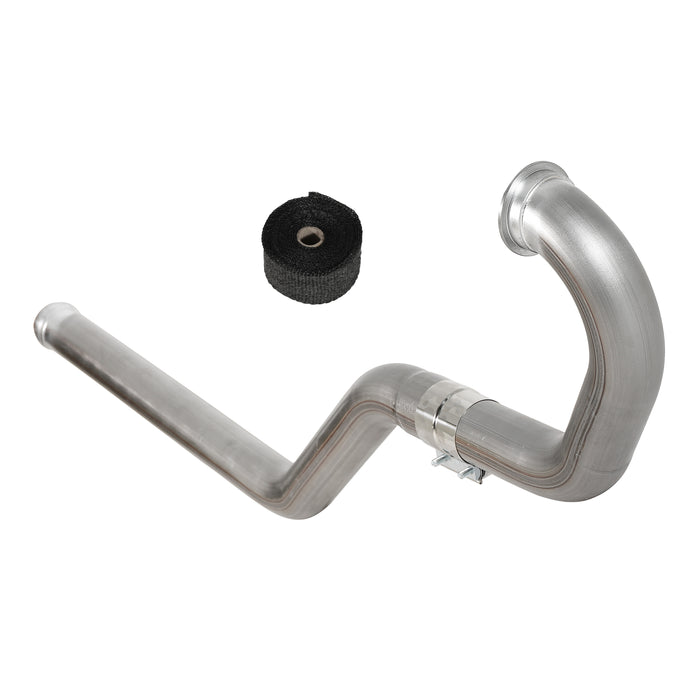
- Material: 409 stainless steel, mandrel-bent for a perfect fit and improved airflow.
- Temperature Optimization: Lowers Exhaust Gas Temperatures (EGTs) to improve engine health and longevity.
- OEM Appearance: Retains the factory muffler and dual exhaust intact.
- Vehicle Compatibility: 100% specific to 2020-2022 GM 3.0L Duramax LM2 engines (E46 ECM) only; will NOT fit 2023+ LZ0 engines.
This pipe is engineered specifically for the 2020-2022 LM2 with the E46 ECM. It will not fit 2023 and newer LZ0 engines — GM completely redesigned the exhaust routing and flange geometry for the LZ0, and components are not interchangeable between the two platforms.
| Feature | Seguler 3" LM2 DPF Pipe | Lower-Cost Options |
|---|---|---|
| Material | 409 stainless steel |
Thinner or aluminized materials — may lack corrosion resistance for long-term exhaust use |
| Construction |
Mandrel-bent for consistent fitment and improved airflow characteristics |
Crush-bent construction — inconsistent diameter at bends can reduce flow efficiency |
| EGT impact |
Designed to reduce exhaust restriction and improve exhaust flow characteristics |
May not provide equivalent flow optimization — EGT benefits vary with design |
| Fitment |
100% specific to 2020-2022 LM2 (E46 ECM) — will NOT fit LZ0 |
May be sold as “universal” — verify LM2-specific compatibility |
| Exhaust output | Retains factory muffler and dual exhaust intact for OEM appearance |
May require aftermarket exhaust or additional fabrication beyond the pipe |
| Airflow |
Designed to improve airflow and reduce backpressure, supporting more consistent engine output under sustained load |
May not achieve the same reduction in backpressure due to construction differences |
The DPF pipe addresses exhaust-side flow restrictions, while the EGR kit focuses on intake-side cleanliness and EGR system changes. The CAN Bus Plugs Connector provides the electronic connection support needed for compatible L5P configurations after factory modules are removed.
Seguler 2020-2023 chevy duramax L5P Diesel Can Bus Plugs Connector
L5P CAN Bus Plugs Connector is designed for 2020–2023 6.6L Chevy Duramax L5P diesel trucks equipped with aftermarket exhaust or delete pipe configurations. These plugs replace the factory NOx and DEF module connections, providing the required electrical connection to maintain ECM communication after factory emissions modules are removed.
By maintaining CAN-BUS communication with the vehicle system, the connectors help preserve fuel tank and lift pump data communication while providing a cleaner installation solution for modified L5P exhaust setups. Factory modules can also remain connected and secured if preferred.
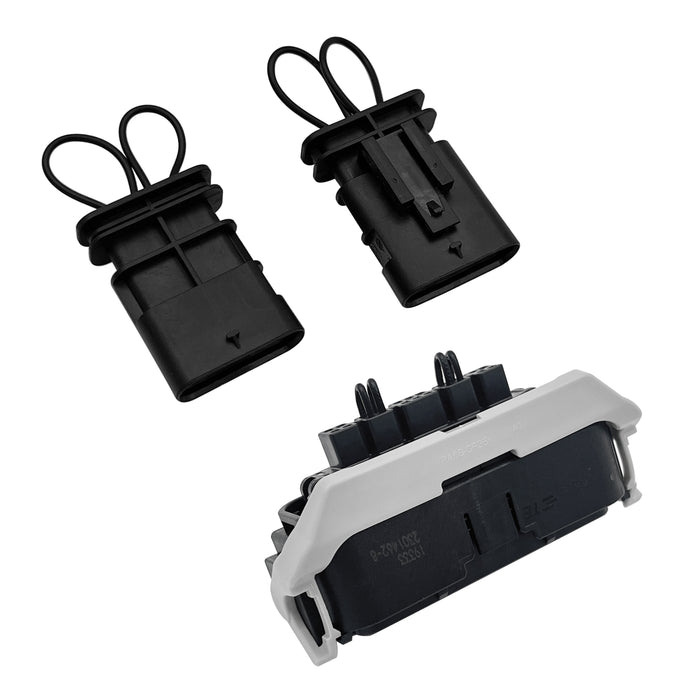
- Application: Used when removing DPF/DEF systems for compatibility with aftermarket exhaust systems or delete pipes.
- Function: Replaces NOx and DEF modules to provide a closed signal back to the ECM for proper operation.
- System Integration: Keeps the CAN-BUS alive to the fuel tank and maintains normal ECU operation for fuel tank/lift pump data.
- Fitment: Designed for 2020-2023 6.6L Chevy Duramax L5P diesel trucks.
| Feature | Seguler Can Bus Plugs | Lower-Cost Options |
|---|---|---|
| Function |
Replaces NOx and DEF modules — provides the required electrical connection to maintain communication with the ECM |
May not maintain consistent communication — potential for intermittent ECM faults |
| CAN-BUS |
Keeps CAN-BUS alive to fuel tank — maintains normal ECU operation for fuel tank and lift pump data |
May disrupt CAN-BUS communication — could affect fuel pump and level data |
| Compatibility |
Designed for 2020-2023 6.6L Chevy Duramax L5P diesel trucks |
May be marketed for multiple platforms — verify L5P-specific fitment |
| Installation |
Goes in place of factory NOx and DEF modules — factory modules can also be left plugged in and zip tied up |
May require harness modification or pin rearrangement |
| Use case |
For use with aftermarket exhaust systems or delete pipes — used when removing DPF/DEF systems |
May not be validated across all delete pipe configurations |
Addressing all three areas — intake cleanliness, exhaust flow, and electronic communication — creates a more complete approach than addressing any single component alone. Each change addresses a specific restriction — intake cleanliness, exhaust flow, or ECM signal integrity — and the effects compound.
🔧 Complete Install — EGR Delete, DPF Pipe, and Can Bus Plugs on an LM2
Follow the specific instructions included with your parts and verify local regulations before installation.
These three modifications share overlapping disassembly — the intake manifold has to come off for the EGR delete, the DPF has to come out before the pipe goes in, and reconnecting sensors and bleeding coolant finishes all three jobs at once. Doing them together saves you from draining the cooling system twice and removing the intake manifold twice.
Total time for all three: 8–10 hours for a first-timer. Budget a full weekend if this is your first time pulling the intake manifold on the LM2.
Tools You’ll Need
| Tool | Spec | Used For |
|---|---|---|
| Socket set | 8mm, 10mm, 13mm, 15mm (deep and shallow) |
Intake manifold bolts, EGR cooler fasteners, DPF flange nuts |
| Torque wrench | 10–100 ft-lb range |
Intake manifold reinstallation, DPF pipe flange bolts |
| Line wrench set | 5/8" and 3/4" |
EGR cooler coolant line fittings — prevents rounding |
| Ratcheting wrench | Various sizes |
Tight clearance around the back of the EGR cooler |
| Flathead screwdriver | Medium |
Hose clamp release, electrical connector tabs |
| Trim removal tool | Plastic |
Intake duct and harness clip r elease without breaking tabs |
| Drain pan | 3+ gallon capacity | Coolant drain |
| PB Blaster or penetrating oil | — |
Exhaust flange bolts and sensor bungs |
| Shop rags | — |
Coolant spill cleanup, gasket surface wipe-down |
| Zip ties | Medium |
Secure wiring harnesses after rerouting |
Before You Start
- Park on level ground. Chock the rear wheels. Disconnect the negative battery terminal.
- Allow the engine to cool completely — the EGR cooler retains heat long after shutdown.
- Have 2 gallons of fresh coolant ready for refill. Drain the cooling system before starting.
Step 1: Drain the Cooling System
- Drain enough coolant following the GM recommended procedure before disconnecting EGR cooler lines.
- Collect drained coolant in a clean drain pan.
🟢 Pro tip: Draining coolant from the block as well as the radiator reduces spill into the engine valley when disconnecting EGR cooler lines.
Step 2: Remove the Intake Manifold
- Disconnect the intake air duct and turbo inlet pipe. Plastic clips release with a flathead — do not pry forcefully.
- Disconnect all intake-related electrical connectors and wiring clips attached to the intake assembly. Label them if this is your first time.
- Remove the fuel rail cover (if equipped).
- Remove the intake manifold bolts in a crisscross pattern, outside to inside.
- Lift the manifold straight up. Inspect the gasket — replace if it shows compression set or cracking.
⚠️ Critical: The wiring harness runs across the top of the manifold. Lift it clear first — a broken harness clip is not sold separately.
Step 3: Remove Factory EGR and Install Delete Components
- With the intake manifold off, the EGR cooler is directly accessible in the engine valley. Use a 5/8" line wrench on the coolant fittings — box wrenches round these fittings.
- Disconnect the EGR temperature sensor and EGR position sensor connectors. Release the locking tab; do not pull on the wires.
- Remove the EGR valve (two 10mm bolts) from the intake side.
- Remove the EGR cooler mounting hardware using the appropriate sockets and extensions. Access to the rear fastener is limited and may require additional clearance tools. There are backside nuts and a hose connection that is difficult to reach — disconnect these before lifting the assembly out.
🟡 Important: The EGR cooler holds residual coolant. Even with the system drained, expect spill when separating coolant lines — have rags in the valley.
- Install the block-off plates: exhaust manifold port first, then intake-side where the EGR valve was removed. Block the EGR cooler pipe per kit instructions.
- Torque block-off plate bolts to kit specifications.
🟢 Pro tip: Apply anti-seize to the exhaust-side bolts — extreme heat cycling makes future removal difficult without it. Also, connect the rear hose to any replacement component before bolting it into position; once seated, this hose is nearly impossible to reach.
⚠️ Critical: Do NOT leave EGR coolant ports open. An open coolant passage can cause coolant leaks, loss of coolant pressure, and potential engine overheating.
Step 4: Reinstall the Intake Manifold
- Clean the gasket surface on both manifold and cylinder head — no debris, no oil film.
- Position the gasket. If reusing, verify no tears or compression marks.
- Lower the manifold straight down — do not slide across the gasket.
- Hand-start all 10mm bolts before torquing any.
- Torque crisscross, center to outside, to the factory specification. Do NOT over-tighten — manifold is aluminum, threaded into aluminum.
- Reconnect all sensor connectors, intake duct, and wiring harness clips.
🟡 Important: Reconnect every sensor now. After the engine cover goes on, a forgotten connector means starting over.
Step 5: Remove the Factory DPF Assembly
- Working from the passenger side, remove the battery, fuse block (7mm nuts), battery tray, and inner fender well. The fender well removal is critical for visibility — skip it and you’re working blind.
- Additional clearance around the HVAC and engine bay components may be required during DPF removal. Follow proper service procedures if any AC components obstruct removal.
- Disconnect all sensors: DPF differential pressure lines, exhaust temperature sensors, and the NOx sensor (remove from DPF body first — the sensor tip is fragile). Release locking tabs gently — these connectors are expensive to replace.
- Remove the DEF injector (clamp is one-time use) and the back pressure valve fasteners at the bottom of the assembly.
- Remove the front bracket (three nuts against the block, easier from the top) and loosen the rear bracket (two nuts — do not fully remove, just enough to wiggle the DPF free).
- Remove the turbo downpipe flange bolts. With all brackets loosened, lift the DPF assembly out through the top. It is heavy — two people recommended but one person can manage.
🟡 Important: The EGR cooler must have been removed first (Steps 1–4) — the DPF cannot be extracted with the EGR cooler in place. Forcing it risks damaging nearby wiring, AC lines, and heater hoses.
🟢 Pro tip: Slide a 12" piece of 3/8" ID hose over the NOx sensor bung to keep debris out during the rest of the work.
Step 6: Install DPF Pipe and Can Bus Plugs
- Clean all exhaust connection surfaces before installing the replacement pipe. Install a new gasket at each connection point (reusing the factory gasket is a leading cause of exhaust leaks).
- Position the mandrel-bent DPF delete pipe. Verify the orientation before tightening — it should align with the factory midpipe without binding.
- Hand-start all fasteners and the midpipe clamp. Tighten all fasteners evenly according to factory or hardware specifications. Do not overtighten — crimping the pipe creates a restriction.
- Install a new DEF injector clamp and seal. A practical approach: leave the bolt in the clamp, squeeze it to lock position against the injector body, then tighten. The clamp is one-time use.
- Transfer the exhaust temp sensors and NOx sensor to the new pipe bungs. Hand-thread, then snug to the specified torque. Over-tightening strips the stainless threads.
- Zip-tie any loose sensor wiring away from the pipe — wire loom touching the surface melts within one drive cycle.
🟡 Important: Start the engine and check for exhaust leaks at all connection points before reinstalling shields. An upstream leak near the turbo is typically louder; a downstream leak may be subtler — listen for a ticking sound at idle.
Can Bus Plugs (L5P Platform)
Note: These plugs are designed for the 2020–2023 6.6L L5P Duramax, a different platform from the LM2. Steps below apply to L5P installations.
Connect the Seguler Can Bus plugs in place of the factory NOx and DEF module harness connectors — no cutting or splicing. Verify each plug clicks fully into position; a partial insertion triggers ECM communication faults. Alternatively, the factory modules can be left plugged into the harness and zip-tied up. Both approaches work.
Step 7: Refill and Bleed the Cooling System
- Close all drain petcocks — double-check before refilling.
- Refill the cooling system with Dex-Cool (orange) or equivalent following the GM recommended coolant filling procedure.
- Allow the system to reach operating temperature and verify coolant level after cool-down.
- Top off as needed and fill the reservoir to the cold-fill line.
⚠️ Critical: The LM2 uses a closed cooling system. Follow the GM recommended bleeding procedure precisely — trapped air in the cylinder head can create hot spots that warp the aluminum head.
Post-Installation Checks
- Scan for fault codes before the test drive. The ECM should be clean after calibration — stock calibration can trigger EGR/DPF codes.
- Check coolant after the first heat cycle. Top off as needed.
- Inspect exhaust connections after the first drive. Re-torque the turbo flange bolts — thermal expansion settles the gasket.
- Verify all sensor connectors are fully seated. A loose exhaust temp sensor triggers a fault within 50 miles.
- Monitor coolant for the first 500 miles — any drop indicates a block-off gasket or line leak.
Three ways to know it’s done: (1) No check engine light with correct calibration. (2) Stable coolant across heat cycles. (3) No exhaust ticking from turbo flange or midpipe.
⚡ 5 Most Common Mistakes LM2 Owners Make?!
Mistake 1: Ignoring Gradual Coolant Loss
Gradual coolant loss with no puddle is the most common early sign of EGR cooler failure. Many owners top it off and keep driving — that coolant is washing oil off cylinder walls and thinning the bearing film. By the time the check engine light fires, the damage is done.
The fix: A pressure test that holds while the level drops points to internal consumption. Address it before it accelerates.
Mistake 2: Running Deleted Hardware on the Stock Calibration
The E46 ECM monitors EGR position, temperature, DPF differential pressure, and exhaust temp sensors. Hardware removal without matching calibration can trigger fault codes or drivability issues.
The fix: Load the calibration before driving. Installation and tuning are two halves of the same job.
Mistake 3: Reusing the Turbo Crush Gasket
The downpipe-to-turbo flange uses a crush gasket designed for one-time compression. Reusing it creates a leak at the highest-pressure joint in the exhaust system — and it is the hardest joint to reach once everything is reassembled.
The fix: A new gasket is inexpensive compared to the labor required to find and fix a leak after reassembly.
Mistake 4: Assuming LM2 Parts Fit the LZ0
GM redesigned the exhaust routing and flange geometry for the LZ0 starting in 2023. LM2-specific DPF pipes and EGR components are not compatible with LZ0 engines — the flange positions, pipe routing, and sensor bung locations are different.
The fix: Verify your engine code before purchasing. The eighth character of the VIN identifies the engine — L for LM2, Z for LZ0. A pipe designed for one platform will not bolt to the other.
Mistake 5: Skipping the Cooling System Bleed
The LM2 uses a closed cooling system. Refilling too quickly or skipping the proper bleed procedure can trap air in the cylinder head passages. An air pocket creates a localized hot spot that won’t register on the gauge until it’s severe — and can warp the aluminum cylinder head before the driver notices.
The fix: Follow the GM recommended coolant filling and bleeding procedure. Verify the level holds across multiple heat cycles before considering the job complete.
🎥 DPF Removal — Real-World Walkthrough on the LM2!
→ YouTube: “LM2 3.0L Duramax DPF removal replacement”
A technician walks through the complete DPF removal process on an LM2-powered truck — from battery and fuse block removal through the DPF assembly extraction. The video highlights how extensive the job is and what access challenges you’ll face on this platform.
Key techniques from the removal:
- Passenger-side teardown — battery, fuse block (7mm nuts), tray, and inner fender well all come out. The fender well removal provides critical visibility to the EGR cooler.
- HVAC clearance — additional clearance around HVAC components may be needed for the DPF extraction path.
- EGR cooler as complete assembly — two backside nuts plus a nearly unreachable hose. Connect the rear hose before bolting the cooler into place, or you won’t be able to get a hand on it afterward.
- DPF bracket to block/transmission — two backside nuts loosen only, not full removal. Just enough to wiggle the DPF free.
- Front bracket — three nuts against the block, easier from the top.
- Back pressure valve — fasteners underneath. Remove to free the lower connection.
- DEF injector clamp — one-time use. Trick: leave the bolt in, squeeze the clamp to lock position, then tighten.
- Top extraction — assembly is heavy. Two people recommended but one can manage. Expert take: “This is quite extensive as you need to remove quite a bit… You do need to remove the EGR cooler complete assembly to get the DPF out.” — LM2 service technician, HMKYlldkA0g
The same removal process applies whether you’re installing a factory replacement or a delete pipe — the difference is what goes back in.
📊 What Changes After Upgrading the LM2 EGR & DPF System?
Addressing the LM2 EGR and DPF systems focuses on improving intake cleanliness, exhaust flow characteristics, and long-term system reliability.
Removing the EGR system takes the EGR valve, cooler, and related circuits out of operation, reducing one potential source of EGR cooler-related coolant concerns. It also reduces soot recirculation into the intake system, helping maintain a cleaner airflow path over time.
Improving exhaust flow and reducing intake-side buildup may help support better throttle response, turbocharger behavior, and lower thermal stress under certain operating conditions.
Proper calibration is required after hardware changes. The LM2 E46 ECM monitors EGR-related functions, and removing components without matching calibration can trigger fault codes or drivability issues.
Not every LM2 owner needs these upgrades. For trucks with frequent towing, high mileage, or existing EGR-related concerns, addressing the EGR, DPF, and related systems together can reduce repeated teardown compared with completing each modification separately.
Frequently Asked Questions
Q1: What is an LM2 EGR delete and why do owners consider it?
A1: An LM2 EGR delete removes the EGR valve and cooler from the 3.0L Duramax engine. Owners consider it to eliminate EGR cooler failure risk — internal cracks can allow coolant into the intake — and to stop carbon buildup that progressively restricts intake airflow.
Q2: What years does the LM2 3.0L Duramax cover?
A2: The LM2 was introduced for the 2020 model year and continued through 2022. It powers the Chevy Silverado 1500, GMC Sierra 1500, Chevy Tahoe, GMC Yukon, and Cadillac Escalade. In 2023, GM introduced the LZ0 as the next-generation 3.0L Duramax with significant changes including redesigned exhaust routing — LM2 and LZ0 parts are not interchangeable.
Q3: How do I know if my LM2 EGR cooler is failing?
A3: Gradual coolant loss without a visible leak is the most common early sign. Other indicators: white vapor at startup, sweet exhaust smell, coolant on the dipstick. A pressure test that holds while coolant drops suggests internal loss through the EGR cooler.
Q4: Does an LM2 EGR delete require tuning?
A4: In most applications, calibration changes are necessary to match removed emissions components. The E46 ECM in the LM2 monitors EGR position, EGR temperature, and EGR flow sensors. Removing the EGR hardware without the corresponding calibration can trigger fault codes and potentially reduced-power operation. The ECM should be recalibrated to match the hardware configuration.
Q5: Can removing the EGR system affect fuel economy?
A5: Some owners may notice changes in fuel economy depending on driving conditions, calibration, and vehicle setup. The change comes from eliminating carbon-restricted intake flow and DPF regeneration fuel consumption.
Q6: Can EGR problems affect the DPF?
A6: Yes. A declining EGR system that allows increased soot production accelerates DPF loading. This increases regeneration frequency, which burns additional fuel and puts more thermal cycles on the DPF substrate. Addressing EGR issues can reduce the downstream stress on the DPF system.
Q7: Does the DPF delete pipe fit LZ0 engines?
A7: No. The 3-inch turbo-back pipe is designed specifically for the 2020-2022 LM2 with the E46 ECM. GM redesigned the exhaust routing and flange geometry for the LZ0 starting in 2023, and LM2 components are not compatible with LZ0 trucks.
Q8: Can I install the EGR delete without removing the DPF?
A8: Yes. The EGR delete is independent of the DPF system mechanically — removing the EGR cooler and valve does not require touching the exhaust. However, as covered above, keeping the DPF in place while the EGR soot source is eliminated means one half of the restriction is gone and the other remains. The DPF will still load soot and regenerate. Many owners address both together because the intake manifold has to come off for the EGR anyway, and the teardown overlap makes the combined job more efficient.
🏁 The Bottom Line
The LM2 3.0L Duramax delivers fuel economy and towing capability that make it a popular choice in the half-ton diesel segment — but its emissions architecture introduces vulnerabilities owners should understand before the dashboard warns them.
The EGR cooler is one of the major components that LM2 owners monitor as mileage increases. Catch it early and you replace a component. Miss the signs and the repair can escalate to engine-out work. Carbon buildup happens gradually, and the performance loss happens slowly enough that many owners don’t notice it until the restriction is significant.
Many owners aim for a cleaner intake path and improved exhaust flow when modifying their LM2 setup, along with electronic systems that operate without interruption. As one technician showed, reaching the DPF on this platform requires pulling the EGR cooler as a complete assembly — which means half the engine bay comes apart. Address all three areas at once and you only do that teardown once.
Explore Seguler’s LM2 upgrade solutions at seguler.com.
Featured collection
-
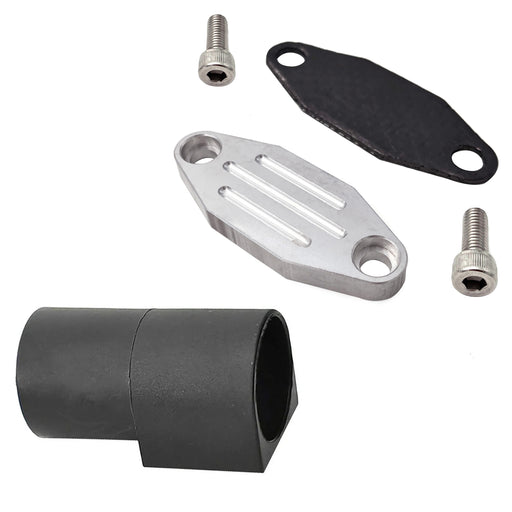
Seguler 1986-1995 Ford F150 F250 F350 Mustang Trucks EGR Simulator Eliminator / Block Off Plate Kit
SEGULEROriginal price $79.99 - Original price $79.99Original price$79.99$79.99 - $79.99Current price $79.99Block Off Plate Material: Aluminum alloy. Easy installation,and convenient to use. Made of CNC milled from aircraft grade Billet aluminum. Will N...
View full details -

Seguler 2011-2023 6.7L Ford Powerstroke Diesel EGR Delete Kit
SEGULEROriginal price $109.99 - Original price $109.99Original price$109.99$109.99 - $109.99Current price $109.99FITMENT 2011-2023 6.7L Ford Powerstroke F-250 F-350 F-450 F-550 Super Duty V8 Diesel. compatible with both standard Pickups and commercial Cab &...
View full details -
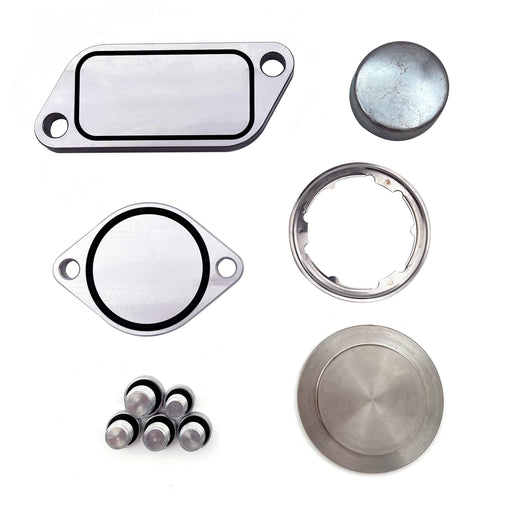
For 2010-Present Stage 2 ISX 15 CM2250 CM2350 EGR Delete Kit
SEGULEROriginal price $59.99 - Original price $59.99Original price$59.99$59.99 - $59.99Current price $59.99FITMENT 2010-Present Cummins Volvo, Peterbilt, Mack, International, Freightliner, Kenworth with the ISX15 CM2250 / CM2350 engines. DESCRIPTION P...
View full details -
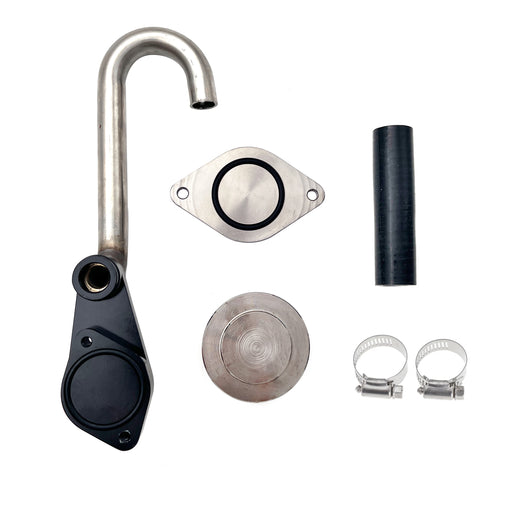
Seguler 2003-2007 6.0L FORD Powerstroke Diesel EGR Cooler Delete Kit
SEGULEROriginal price $56.14 - Original price $56.14Original price$56.14$56.14 - $56.14Current price $56.14FITMENT 2003-2007 6.0L Ford F-250 Ford F-350 F-450 F-550 Super Duty. 2003-2007 6.0L Ford Excursion SUV (Diesel Models Only). 2005-2010 Ford E-Se...
View full details -
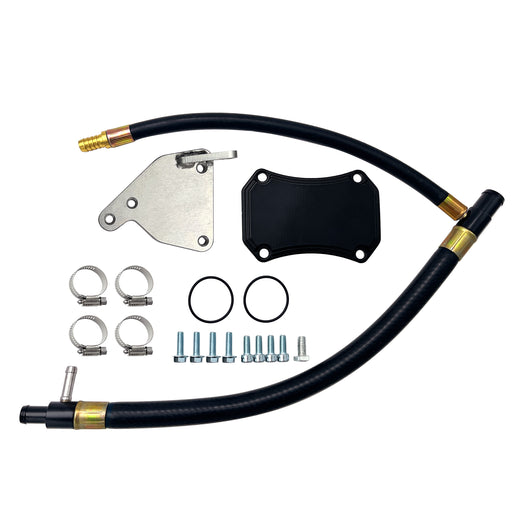
For 2011-2016 6.6L GMC Chevy Duramax Diesel LML EGR Valve Cooler Delete Kit
SEGULEROriginal price $66.49 - Original price $66.49Original price$66.49$66.49 - $66.49Current price $66.49FITMENT 2011-2016 6.6L Chevy GMC Duramax LML 2500 HD 3500 HD Diesel. DESCRIPTION Product Overview The 2011–2016 LML Duramax uses a complex EG...
View full details -
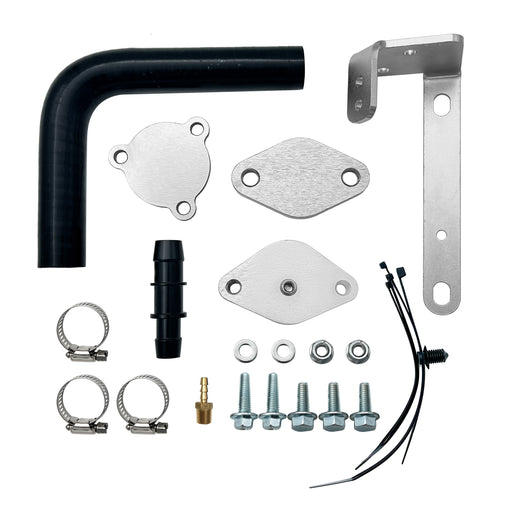
Seguler For 2014-2019 3.0L Dodge Ram 1500 EcoDiesel EGR Valve & Cooler Delete Kit
SEGULEROriginal price $72.99 - Original price $72.99Original price$72.99$72.99 - $72.99Current price $72.99FITMENT 2014-2019 3.0L Dodge Ram 1500 EcoDiesel V6 engine trucks. DESCRIPTION Product Overview Exhaust gas recirculation on 3.0L EcoDiesel V6 ...
View full details -

Seguler 2011-2023 6.7L Ford Powerstroke Diesel EGR Delete Kit
SEGULEROriginal price $85.99 - Original price $85.99Original price$85.99$85.99 - $85.99Current price $85.99FITMENT 2011-2023 6.7L Ford Powerstroke F-250 F-350 F-450 F-550 Super Duty V8 Diesel. compatible with both standard Pickups and commercial Cab &...
View full details -

Seguler 2010-2024 6.7L Dodge Ram Cummins Diesel EGR Valve Cooler Delete Kit
SEGULEROriginal price $89.99 - Original price $89.99Original price$89.99$89.99 - $89.99Current price $89.99FITMENT 2010–2024 6.7L Dodge Ram Cummins 2500 / 3500 Pickup Turbo Diesel. Note: Does NOT fit Chassis Cab 3500 / 4500 / 5500 models. DESCRIPTIO...
View full details -
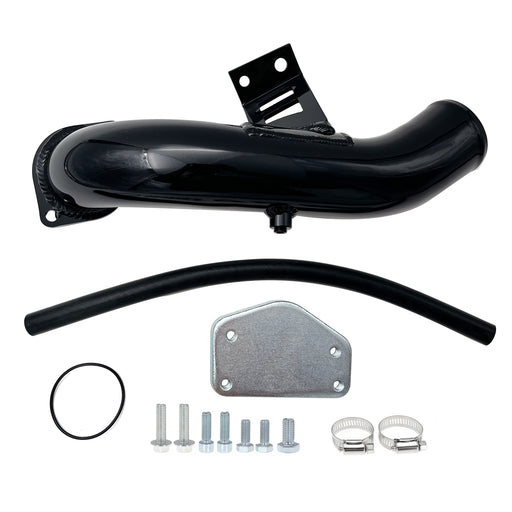
For 2004.5-2005 6.6L Chevy GMC Silverado LLY Duramax Diesel EGR Delete Kit
SEGULEROriginal price $92.99 - Original price $92.99Original price$92.99$92.99 - $92.99Current price $92.99FITMENT 2004.5-2005 6.6L Chevrolet Silverado Duramax LLY 2500HD / 3500 HD. 2004.5-2005 6.6L GMC Sierra Duramax LLY 2500HD / 3500 HD. DESCRIPTION...
View full details -

Seguler 2017-2019 L5P Duramax Diesel 4pcs L5P Can Bus Plugs Connector Replacement
SEGULEROriginal price $75.00 - Original price $75.00Original price$75.00$75.00 - $75.00Current price $75.00FITMENT 2017–2019 Chevrolet Silverado / GMC Sierra Duramax L5P 2500HD & 3500HD Diesel. DESCRIPTION Product Overview Unprotected harness con...
View full details -

Seguler 2020-2023 chevy duramax L5P Diesel Can Bus Plugs Connector
SEGULEROriginal price $80.00 - Original price $80.00Original price$80.00$80.00 - $80.00Current price $80.00FITMENT 2020–2023 Chevrolet Silverado / GMC Sierra Duramax L5P 2500HD & 3500HD Diesel. DESCRIPTION Product Overview Unprotected harness pl...
View full details -
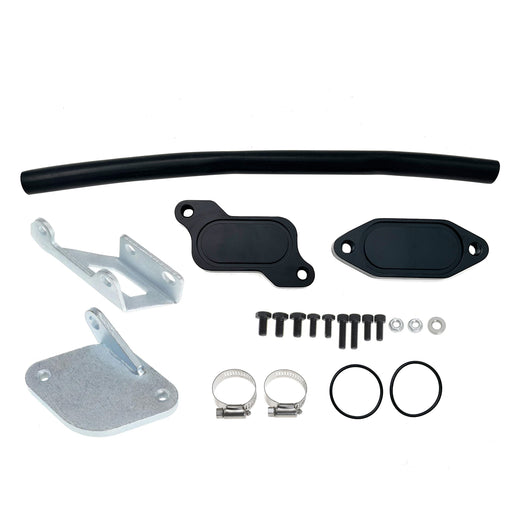
For 2006-2007 6.6L Chevrolet Silverado Classic GMC Duramax LBZ Diesel EGR Valve Cooler Delete Kit
SEGULEROriginal price $63.49 - Original price $63.49Original price$63.49$63.49 - $63.49Current price $63.49FITMENT 2006-2007.4 Chevrolet Silverado Duramax LBZ 2500HD / 3500HD. 2007.4 Chevrolet Silverado Duramax LBZ 2500HD / 3500HD Classic. 2006-2007.4 ...
View full details -

Seguler 2011-2023 6.7L Ford F250 F350 F450 F550 Powerstroke Diesel EGR Valve Delete Cooler Delete Kit
SEGULEROriginal price $55.99 - Original price $55.99Original price$55.99$55.99 - $55.99Current price $55.99FITMENT 2011-2023 6.7L Ford Powerstroke F-250 F-350 F-450 F-550 Super Duty V8 Diesel compatible with both standard Pickups and commercial Cab &a...
View full details -
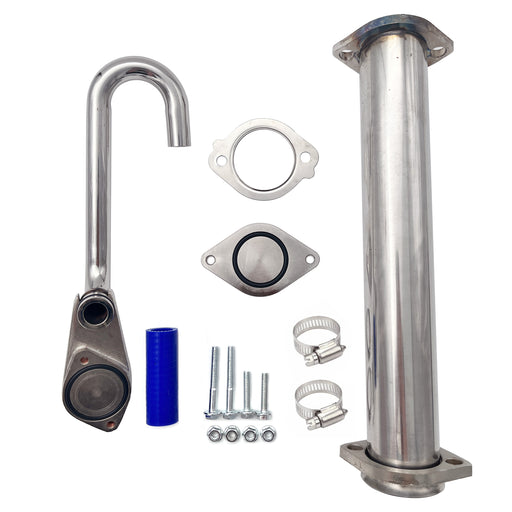
Seguler 2003-2007 6.0L Ford F250 F350 Powerstroke Diesel EGR Basic Cooler Kit
SEGULEROriginal price $79.99 - Original price $79.99Original price$79.99$79.99 - $79.99Current price $79.99FITMENT 2003-2007 6.0L Ford F250 F350 F450 F550 Super Duty Turbo (except 2004 F250 Super Duty). 2003-2005 6.0L Ford Excursion Turbo. 2005 Ford F...
View full details -
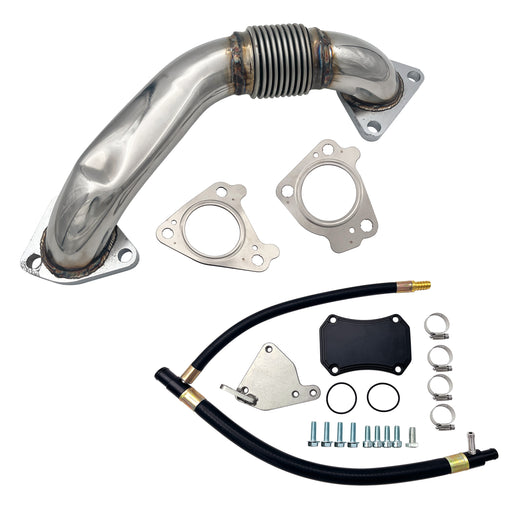
Seguler 2011-2016 6.6L GMC Chevy Duramax Diesel LML Up-Pipe & EGR Valve Cooler Delete Kit
SEGULEROriginal price $173.86 - Original price $173.86Original price$173.86$173.86 - $173.86Current price $173.86FITMENT 2011-2016 6.6L Chevy GMC Duramax LML 2500 HD 3500 HD Diesel. DESCRIPTION Product Overview Direct-injection technology endows GM 5.3L an...
View full details -
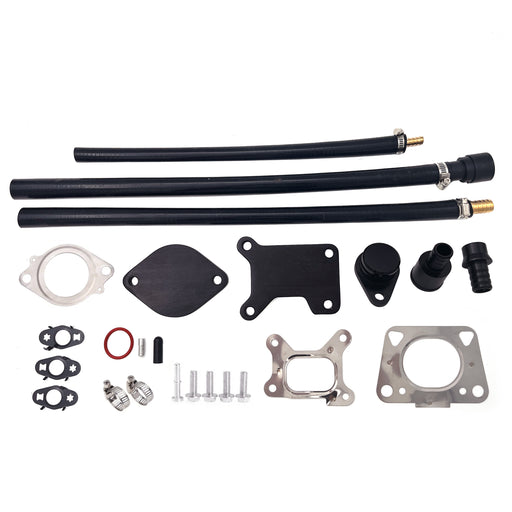
For 2017-2023 6.6L Chevy GMC Duramax L5P diesel EGR Valve Cooler Delete kit
SEGULEROriginal price $131.99 - Original price $131.99Original price$131.99$131.99 - $131.99Current price $131.99FITMENT 2017–2023 6.6L Chevrolet Silverado / GMC Sierra Duramax L5P 2500HD 3500HD Diesel. DESCRIPTION Product Overview Hot soot recirculation ...
View full details -
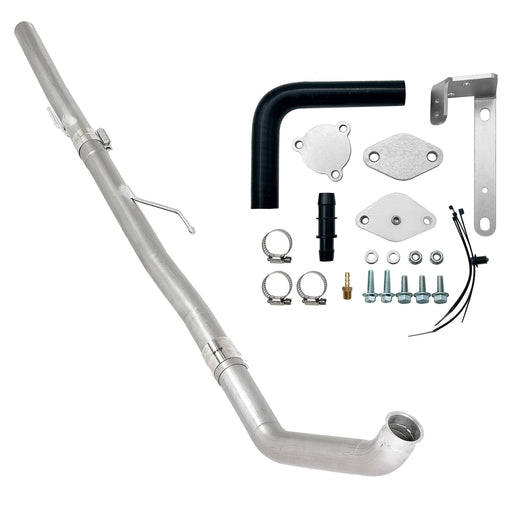
Seguler 3" Ecodiesel DPF Delete Pipe & EGR Delete kit for 2014-2018 3.0L Ram
SEGULEROriginal price $342.00 - Original price $342.00Original price$342.00$342.00 - $342.00Current price $342.00FITMENT 2014–2018 3.0L Dodge Ram 1500 EcoDiesel V6. NOTE: Fit standard Pickup models only (Crew Cab, Quad Cab). Does NOT fit Jeep Grand Cheroke...
View full details -
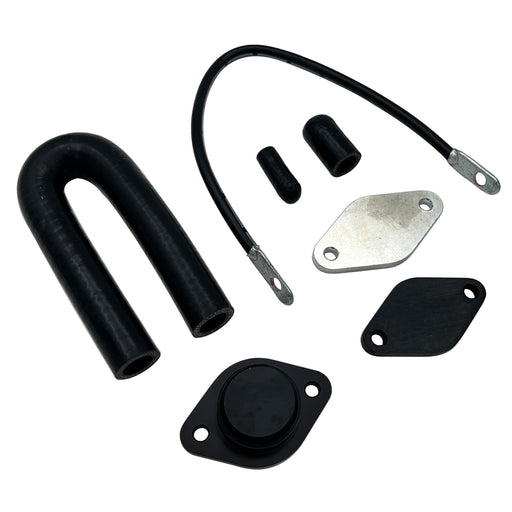
Seguler EGR valve cooler Delete kit for 2020-2022 3.0L Chevy Duramax LM2
SEGULEROriginal price $189.12 - Original price $189.12Original price$189.12$189.12 - $189.12Current price $189.12FITMENT 2020–2022 3.0L Chevrolet Silverado GMC Sierra 1500 LM2 Turbo-Diesel. DESCRIPTION Product Overview Powered by smooth inline-six engine...
View full details -

For 2013-2023 6.7L Dodge Ram Cummins Cab & Chassis EGR Delete Kit Diesel
SEGULEROriginal price $62.99 - Original price $62.99Original price$62.99$62.99 - $62.99Current price $62.99FITMENT 2013–2023 6.7L Ram Cummins 3500 4500 5500 Cab & Chassis / Commercial Trucks. Does NOT fit standard Ram 2500 3500 Pickups. DESCRIPTIO...
View full details -
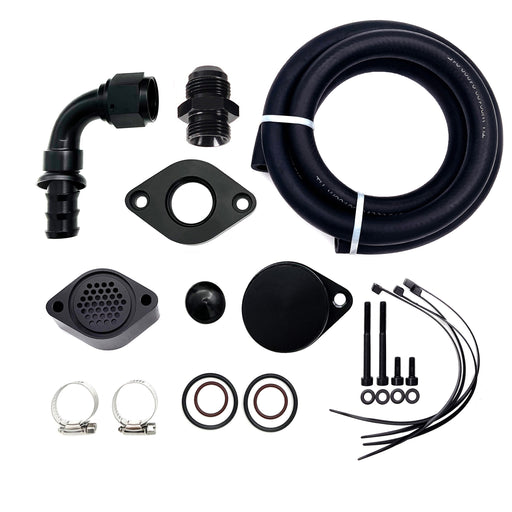
Seguler 2011-2023 6.7L Ford Powerstroke CCV PCV Reroute Engine Ventilation Kit
SEGULEROriginal price $82.99 - Original price $82.99Original price$82.99$82.99 - $82.99Current price $82.99FITMENT 2011-2023 6.7L Ford Powerstroke F-250 F-350 F-450 F-550 Super Duty V8 Diesel. Compatible with both standard Pickups and commercial Cab &...
View full details -
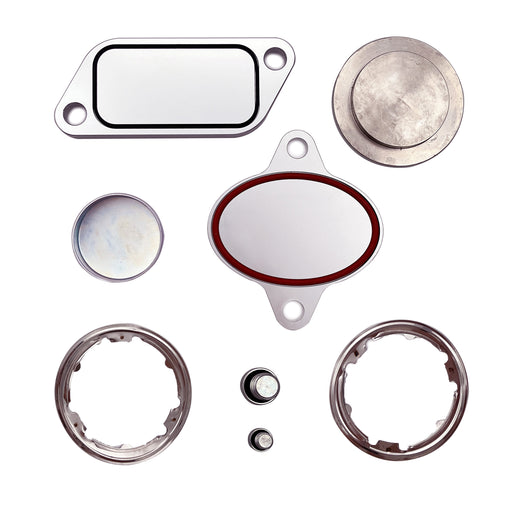
For 2007-2010 Cummins ISX CM871 EGR Plug Kit Stage 2 Plates and Plugs Aluminum
SEGULEROriginal price $67.99 - Original price $67.99Original price$67.99$67.99 - $67.99Current price $67.99FITMENT 2007-2010 Cummins Volvo, Peterbilt, Mack, International, Freightliner, Kenworth with the ISX CM871 Engines. DESCRIPTION Product Overvie...
View full details -
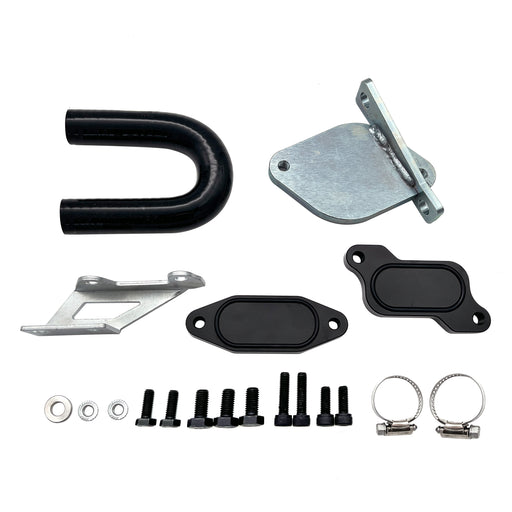
For 2007-2010 6.6L Chevy GMC LMM Duramax EGR Valve Cooler Delete Kit Fit
SEGULEROriginal price $61.99 - Original price $61.99Original price$61.99$61.99 - $61.99Current price $61.99FITMENT 2007.5-2010 6.6L Chevrolet Silverado Duramax LMM 2500HD / 3500HD. 2007.5-2010 6.6L GMC Sierra Duramax LMM 2500HD / 3500HD. Note: Standard...
View full details -
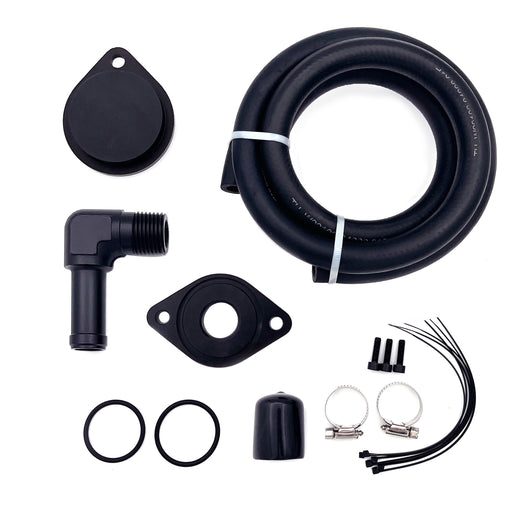
Seguler 2011-2023 Ford 6.7L Powerstroke CCV/PCV Reroute/Delete Engine Ventilation Kit
SEGULEROriginal price $72.00 - Original price $72.00Original price$72.00$72.00 - $72.00Current price $72.00FITMENT 2011-2023 6.7L Ford Powerstroke F-250 F-350 F-450 F-550 Super Duty V8 Diesel. Compatible with both standard Pickups and commercial Cab &...
View full details -
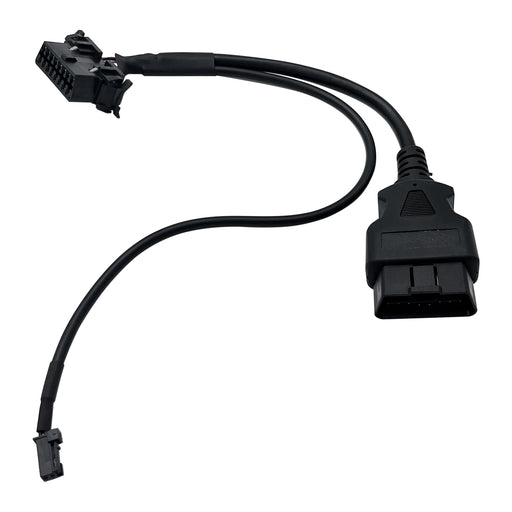
Seguler 2018+ RAM Cummins OBD2 HD Security Gate Bypass Cable
SEGULEROriginal price $45.00 - Original price $45.00Original price$45.00$45.00 - $45.00Current price $45.00FITMENT 2018+ 6.7L Ram Cummins 2500 3500 Turbo Diesel. Designed for Ram pickup trucks equipped with the factory Security Gateway Module. Note: Pl...
View full details -
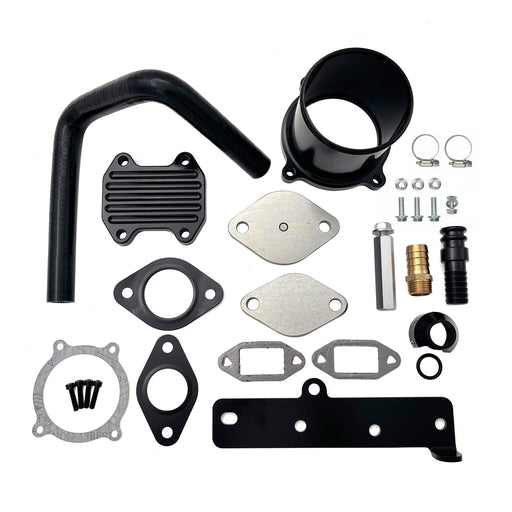
Seguler For 2013-2018 6.7L Dodge RAM 2500 3500 Cummins Diesel EGR Delete Cooler Throttle Valve Delete Kit
SEGULEROriginal price $112.00 - Original price $112.00Original price$112.00$112.00 - $112.00Current price $112.00FITMENT 2013–2018 6.7L Dodge Ram Cummins 2500 & 3500 Pickup Turbo Diesel. Note: Does NOT fit Cab & Chassis (3500 / 4500 / 5500 C&C) m...
View full details


Leave a comment