

6.7 Powerstroke EGR Cooler: Why It Matters (Warning Signs)
The $14,500 Lesson Nobody Warns You About
One of the most expensive problems 6.7L owners face often starts with symptoms that seem minor at first: unexplained coolant loss, white smoke at idle, and rough cold starts that gradually get worse.
As many trucks approach the 100,000–150,000 mile range, many owners assume they’re dealing with a head gasket issue. But the real problem may be a failing EGR cooler with internal cracks that allow coolant to enter the intake system.
Over time, coolant contamination can affect combustion, reduce oil protection, and increase the risk of major engine damage. In severe cases, repair costs can climb into five figures. The root cause is often a single emissions component that failed long before the damage became obvious.
On the 6.7L Powerstroke, the factory EGR cooler is one of the most thermally stressed components in the engine bay. It’s not just an emissions part — when it fails, the consequences can extend far beyond the EGR system, affecting the intake, lubrication system, and overall engine reliability.
Why the 6.7 Powerstroke Cooler Is a Load-Bearing Component
Ford designed the 6.7L Powerstroke’s emissions architecture around several interconnected systems, including the EGR, DPF, and SCR/DEF systems. The EGR cooler plays a critical role within the EGR system — and when it fails, the effects can extend far beyond the cooler itself.
What the EGR Cooler Actually Does
The job is straightforward: take exhaust gas exiting the cylinders at 1,200°F or more, pass it through narrow stainless steel tubes surrounded by engine coolant, drop the temperature under normal operating conditions to roughly 300-400°F, then route it back into the intake manifold. Lower combustion temps mean lower NOx — that’s the equation.
Here’s the problem: those stainless steel tubes are cycling between 1,200°F exhaust on the inside and 195°F coolant on the outside — thousands of times per drive. That’s a 1,000°F thermal shock range across a thin heat exchanger wall.
Where the 6.7 Powerstroke Cooler Sits in the System
On the 2011-2023 6.7L Powerstroke, the EGR system includes:
- EGR Valve — Electronically controlled, regulates exhaust flow into the cooler
- EGR Cooler — Heat exchanger that drops exhaust temperature before it reaches the intake
- EGR Feed Pipe — Connects exhaust manifold to cooler inlet
- EGR Crossover Tube — Routes cooled exhaust from cooler outlet to intake
- Temperature and Pressure Sensors — Monitor cooler efficiency, trigger fault codes
- Coolant Supply and Return Lines — Share engine coolant with the oil cooler circuit
The EGR cooler is one of the most failure-prone components in the emissions system — and when it goes, the damage is rarely contained to the cooler itself.
How Cooler Failure Triggers a Domino Effect
When the EGR cooler core develops internal cracks, coolant can enter the intake stream. In severe cases, this creates a chain reaction:
First: Coolant in the combustion chamber. Water doesn’t compress. Excessive coolant entering the cylinder can create hydro-lock conditions and lead to serious internal engine damage, including head gasket and component failures. Some owners and technicians have identified cylinders 5 and 6 as areas of concern due to coolant flow characteristics.
Second: Cylinder lubrication loss. Coolant entering the combustion chamber can reduce the oil film protecting cylinder walls and piston rings, increasing wear over time.
Third: Turbocharger stress. Coolant contamination can affect combustion conditions and reduce engine oil protection, potentially increasing stress on turbocharger components.
Fourth: Oil dilution. Coolant can seep past the rings into the crankcase. Contaminated oil loses its ability to properly protect main, rod, and cam bearings — accelerated wear can begin long before the dipstick shows obvious signs.
The timing varies, but the pattern is consistent. Some coolers fail at 80,000 miles, others past 150,000. Many owners wish they had identified the problem earlier.
How to Know If Your 6.7 Powerstroke Cooler Is Failing
The EGR cooler doesn’t announce itself with a bang. It whispers.
Early Warning Signs
- Unexplained coolant loss — Topping off the degas bottle every 1,000-2,000 miles with no visible external leak. This is the #1 tell.
- White vapor at cold idle — Sweet-smelling, persistent vapor that lingers. Not normal condensation. Coolant burning in the combustion chamber produces a distinctively sweet exhaust odor.
- Rough cold starts — Misfire on initial crank that smooths out after 10-15 seconds. That’s coolant pooled in a cylinder being cleared by combustion.
- Black residue in the degas bottle — Exhaust soot entering the coolant through a cracked core. If you see a dark oil-like film in the reservoir, stop driving.
Advanced Symptoms
- Overheating under load — The cooler crack enlarges under high EGT (towing uphill). Combustion gas pressurizes the cooling system, displacing coolant and causing hot spots.
- P0401 / P0402 / P2457 codes — EGR flow or cooler efficiency faults. Don’t guarantee the cooler is cracked, but they demand inspection.
- Coolant in the oil — Milky dipstick or oil level suddenly higher than your last fill. Stop-driving-now symptom.
The Diagnostic Step Most Owners Skip
Pull the EGR crossover tube where it meets the intake manifold. Wet inside, or white/green crust (dried coolant residue) = cooler is leaking. Dry, sooty tube is normal. Wet tube is a problem.
Pressure-test the cooling system overnight: pump to 16 PSI, let it sit 8 hours. If pressure drops and there’s moisture in the intake, the cooler has failed.
The Full Emissions Triangle: How Cooler Problems Cascade
The EGR cooler doesn’t exist in isolation. Its failure accelerates problems in two other emission systems — and that’s why many owners address all three at once.
EGR → CCV Connection
When the EGR cooler leaks and combustion efficiency drops, blow-by increases. More unburned fuel and combustion byproducts push past the piston rings into the crankcase. The factory CCV system routes these gases back into the intake — where they mix with oil vapor and can contribute to oil buildup in the intake system and intercooler.
An engine with a failing cooler generates more crankcase vapor than the factory CCV system was designed to handle. Excessive crankcase pressure can contribute to oil leaks and additional stress on engine seals — including the front structure seal, which on these trucks requires pulling the oil pan to access.
EGR → DPF Connection
A leaking EGR cooler can affect combustion efficiency by allowing coolant contamination into the intake and combustion process. Reduced combustion efficiency may increase soot production, causing the DPF system to accumulate soot faster and require more frequent regeneration cycles.
The DPF regeneration process relies on controlled exhaust temperatures to burn accumulated soot. When combustion quality is affected, regeneration efficiency can decrease, potentially increasing regen frequency and the risk of fuel dilution over time. Fuel-contaminated oil provides less protection for internal engine components, which can contribute to accelerated wear.
Why Owners Address All Three
On a 6.7L Powerstroke approaching 100,000 miles, the EGR cooler, CCV system, and DPF aren’t independent problems. They’re three points on the same failure triangle. Fixing one without the others is like replacing one tire on a truck with four bald ones — technically an improvement, but you’ll be back shortly.
What to Look for in Quality Solutions
When addressing the factory EGR cooler and related systems, hardware quality determines whether you do the job once or twice.
| Feature | Quality Approach | What to Avoid |
|---|---|---|
| EGR cooler bypass / delete |
CNC-machined billet aluminum and stainless steel block-off plates with 10mm EGT probe cover plates — eliminates the failure-prone heat exchanger and simplifies coolant routing |
Stamped steel plates with paper gaskets — blow out within 6 months |
| Coolant routing |
Simplified coolant routing with additional plate — bypasses the high-failure EGR cooler heat exchanger |
Universal heater hose cut to length — kinks, restricts flow, causes hot spots |
| CCV reroute |
Venturi-style design eliminates factory CCV box, manages crankcase pressure, frees engine bay room |
Open hoses dumping crankcase vapor onto the road — illegal in most states, creates slip hazard |
| DPF delete pipe |
Mandrel-bent T-409 stainless steel, 4" diameter, factory hanger provisions, sensor bungs in OEM locations — optional muffler |
Crush-bent aluminized steel, missing hanger tabs, generic sensor spacing |
| Gaskets and seals |
High-quality gaskets designed for sustained diesel exhaust temperatures — no paper, no cork |
Cork or rubber gaskets — fail at 400°F+ |
Choosing parts that hold up to heat cycling, sustained boost, and diesel vibration isn’t optional. It’s the difference between doing the job once and doing it again in six months.
Before installation, verify fitment. This kit is designed for 2011-2023 6.7L Powerstroke F-250 through F-550 Super Duty.
🔍 Key Features When Choosing Hardware
When comparing different options for EGR, CCV, and DPF components, the differences come down to materials, fitment, and what’s actually in the box.
EGR Delete Kit
| Feature | Seguler EGR Delete Kit | Lower-Cost Alternatives |
|---|---|---|
| Material |
CNC-machined billet aluminum and stainless steel — dual-material design for strength and corrosion resistance |
Stamped steel — surface rust at bolt holes within one winter isn’t uncommon |
| EGT probe cover |
10mm exhaust cover plates for Ford EGT probes — factory-spec fit |
EGT probe covers not always included — may leave sensors exposed |
| Coolant performance |
Simplified coolant routing with additional plate — eliminates the EGR cooler failure point |
Factory-style routing — same flow restriction, no routing improvement |
| EGR valve |
Removes the EGR valve from the exhaust recirculation path and helps keep the intake system cleaner |
EGR valve may remain in the intake path — can still accumulate deposits |
| Fitment |
Designed for 2011-2023 6.7L Powerstroke F-250 through F-550 Super Duty |
One-size-fits-many — bolt pattern and plate count may not match specific model years |
The EGR cooler is a three-way liability: coolant leaks into the intake, oil smoke clogs the EGR valve, and EGT probes get fouled in exhaust soot. A complete delete kit addresses all three — block-off plates stop the leak, EGT probe cover plates keep sensors clean, and simplified coolant routing eliminates the cooler failure point entirely. A kit that only blocks the cooler leaves you with a clogged valve and dirty sensors.
CCV Reroute Kit
| Feature | Seguler CCV Reroute Kit | Lower-Cost Alternatives |
|---|---|---|
| Design |
Venturi-style routing improves airflow and minimizes oil dripping.
|
Basic open-hose vent — no pressure regulation, oil can drip onto the road |
| Crankcase pressure |
Helps manage crankcase pressure and reduce oil vapor entering the intake — cleaner combustion and improved efficiency |
Minimal pressure management — vapor can back up at high RPM, pushing oil past seals |
| Engine bay |
Eliminates the factory CCV box — frees up room and gives a cleaner engine bay |
Leaves factory CCV box in place — or removes it with a dangling hose |
| Material |
High-strength ABS and metal, black anodized — designed for sustained diesel under-hood temperatures |
Thin-wall plastic — can warp from engine heat and crack over time |
| Kit completeness |
All accessories included — no hardware store trips |
Missing clamps, fittings, or mounting hardware - discovered halfway through the job |
The factory CCV box sits on top of the engine recirculating oil vapor straight into your intake — coating the intercooler, turbo compressor, and intake valves in carbonized sludge. A venturi-style reroute eliminates that entire path while managing crankcase pressure correctly. The difference isn’t just a cleaner engine bay — it’s an intercooler that actually cools and a turbo operating with cleaner intake airflow.
DPF Delete Pipe
| Feature | Seguler DPF Delete Pipe | Lower-Cost Alternatives |
|---|---|---|
| Material |
T-409 stainless steel, 16-gauge (1.5mm) minimum — mandrel-bent, TIG back-purge welded for max flow and durability |
Thinner-gauge 409 or aluminized steel — surface rust within one winter, pinhole leaks at welds by year two |
| Bending process |
Mandrel-bent — consistent inner diameter through every bend, no flow restriction |
Crush-bent designs can reduce flow area at bends and create additional restriction |
| Diameter |
Consistent 4" throughout — no crush-bent restrictions that neck down and create hot spots |
Nominal diameter “about 4 inches” — necks down at bends, may not mate flush to factory downpipe |
| Sensor bungs |
CNC-welded at OEM locations and angles — sensors thread without interference, read accurate values |
Hand-welded with inconsistent thread depth — readings may be inaccurate |
| Hanger provisions |
Laser-cut tabs at factory hanger positions, uses OEM rubber isolators |
May lack hanger tabs — pipe hangs from slip joints, can rattle against the frame |
| Weld quality |
TIG-welded, back-purged, full penetration — no internal sugaring, smooth interior flow |
MIG-welded, no back purge — oxidized beads create turbulence and catch soot |
| Sound |
No muffler — maximum flow. Optional muffler available for quieter exhaust tone |
No resonance tuning — drone at 1,600-2,000 RPM can make extended towing unpleasant |
| Installation support |
Step-by-step guide covering trimming, fitment, sensor reconnection — built for 2011-2022 6.7LPowerstroke |
Generic instructions — may miss torque specs and trimming marks specific to the platform |
A DPF delete pipe lives under the truck — road salt, gravel spray, freeze-thaw cycles, constant vibration. Lower-grade materials are more vulnerable to internal corrosion from acidic exhaust condensation. By the time you see brown spots on the outside, the inside is already perforated. A rust-pinholed delete pipe doesn’t just get loud — it dumps hot exhaust onto the underbody, wiring, and fuel lines.
💡 The Common Thread — What Actually Matters
Across all three components, the same pattern repeats: materials and fitment that work on paper don’t always hold up in the real world — especially for trucks that tow heavy, idle frequently, or operate in harsh climates.
The difference is whether the part was engineered for the environment it has to survive — 600°F EGR gas, acidic exhaust condensate, crankcase oil vapor, road salt, sustained boost pressure — or optimized for cost at the expense of those demands.
The difference shows up six months later, usually on a Tuesday, 200 miles from home.
💸 The 5 Most Expensive Cooler Mistakes 6.7L Owners Make
Every one of these has shown up in a shop bay with a five-figure estimate attached. The pattern is always the same — a small decision that felt fine at the time, then a chain reaction nobody saw coming.
Mistake 1: Ignoring the Coolant Loss
The degas bottle is low. You top it off. It’s low again in 800 miles. You top it off again.
This is the most expensive procrastination in diesel ownership. Every top-off delays the diagnosis, and every day the truck runs with a leaking cooler, more coolant enters the oil. By the time the dipstick goes milky, bearing damage is already done.
What it costs: $150 for a shop pressure test vs. $8,000-$14,000 for an engine rebuild after coolant destroys the bearings.
The fix: If you’re adding coolant more than once between oil changes, investigate the EGR cooler immediately. Don’t wait for white smoke.
Mistake 2: Addressing One System Without Looking at the Others
The EGR cooler fails. You delete or replace it. Six months later, oil consumption spikes because turbo seals were eroded by months of coolant-contaminated oil. Or the DPF clogs prematurely because fuel-thinned oil has increased blow-by.
What it costs: Paying for essentially the same teardown twice, plus the parts caught in the second wave. $2,000-$4,000 avoidable.
The fix: When you address the EGR cooler on a high-mileage 6.7L, inspect the turbo, CCV system, and DPF loading. The labor to access the EGR cooler already has you 60% of the way to the turbo and DPF. Address everything in the failure path.
Mistake 3: Skipping the Tune
You bolt on the hardware, fire it up, and the dash lights up like a Christmas tree — codes for EGR flow, DPF pressure, and SCR efficiency all at once. These are things you do not want to attempt without delete tuning loaded onto the truck.
What it costs: A tow truck. A dealership diagnostic fee. And if you’re unlucky, a forced DPF regen on a truck that no longer has a DPF — $500-$1,200 just to get it running before you even address the root problem.
The fix: Any hardware change to EGR, DPF, or CCV must be paired with tuning that disables the corresponding ECU monitors. This is not optional.
Mistake 4: Installing a Budget EGR Delete Kit With Paper Gaskets
A $54 delete kit with stamped steel plates and paper gaskets shows up. Three months of heat cycling later, the gaskets have carbonized and the plates have warped. Exhaust gas — carrying carbon monoxide — leaks past the failed seal into the HVAC intake at the base of the windshield.
What it costs: You won’t get a bill. You’ll get a headache that won’t go away, a CO detector going off in the cab, and the same job to do over. Budget $300-$500 for the do-over plus whatever the first kit cost.
The fix: EGR block-off plates live at 400-600°F. Quality gasket materials rated for that environment include MLS (multi-layer steel) and Viton. CNC-machined billet aluminum and stainless steel plates dissipate heat evenly — stamped steel warps.
Mistake 5: Running a DPF Delete Without Monitoring EGTs
The DPF is out. It sounds great. But the tune added fuel without adjusting timing, and exhaust gas temperatures climb past 1,300°F on a long grade with a trailer. The pistons don’t melt right away. They soften, lose tensile strength, and develop micro-cracks that open up 10,000 miles later.
What it costs: Eight pistons, rings, a block hone or bore, gaskets, 25+ hours labor — $6,000-$10,000 to rebuild the bottom end.
The fix: After any exhaust modification, install an EGT gauge if your truck doesn’t have one — and actually watch it. Sustained EGTs above 1,250°F under load mean your tune is too hot, your turbo is undersized, or both. Back out of the throttle before the pistons become the fuse.
💡 Why You Should Address EGR, CCV, and DPF Together
Three reasons to tackle all three in one weekend instead of spacing them out:
-
The teardown already overlaps. The EGR cooler sits in the engine valley, buried under the intake manifold, charge-air piping, and wiring harness. Getting to it means pulling the entire intake tract — the exact same teardown required to access the CCV oil separator at the rear. With the intake already apart for the EGR delete, the CCV reroute adds about 45 minutes instead of a separate 2-hour job.
-
The parts compound each other. Deleting the EGR fixes the coolant-in-intake problem. But the CCV system keeps injecting crankcase oil vapor into that same intake — coating valves, intercooler tubes, and the turbo in sludge. Address both at once and your intake stays clean. Adding the DPF delete removes the backpressure that keeps EGTs high — and cleaner combustion means less particulate in the exhaust overall.
-
One tune, loaded once. EGR, DPF, and SCR monitoring all live in the same ECU calibration. Delete the EGR now and the DPF later, and you’re paying for two tuning sessions, flashing the ECU twice, troubleshooting two rounds of adaptation. Load one calibration that handles all three systems, drive 200 miles to let the ECU adapt, and you never touch the OBD port again.
The math: A shop doing all three at once typically charges 6-8 hours. Doing them separately: EGR alone, 4 hours. CCV, 2 hours. DPF, 2 hours. That’s 8 hours across three visits — each with its own diagnostic fee, shop supplies charge, and three trips to drop off the truck.
With the failure chain and hardware options laid out, here is how the install comes together in one weekend.
💡 Solutions for Each Link in the Triangle
The three failure points this article has mapped out — EGR cooler, CCV system, and DPF — each have a corresponding solution. The install guide below walks through all three in one weekend.
EGR Cooler Delete — Eliminating the Root Failure Point
The core problem detailed in the diagnosis section starts with the EGR cooler. When the cooler cracks internally, coolant enters the intake — and from there, it cascades into bearing contamination, cylinder wear, and head gasket stress.
For owners of 2011-2023 6.7L Powerstrokes looking to move beyond the factory design, proven hardware solutions are available.
For 2011-2023 6.7L Ford Powerstroke Diesel EGR Delete Kit
EGR Delete Kit replaces the failure-prone cooler, valve, and plumbing with CNC-machined billet aluminum and stainless steel block-off plates — including 10mm EGT probe cover plates and simplified coolant routing that eliminates the cooler failure point.
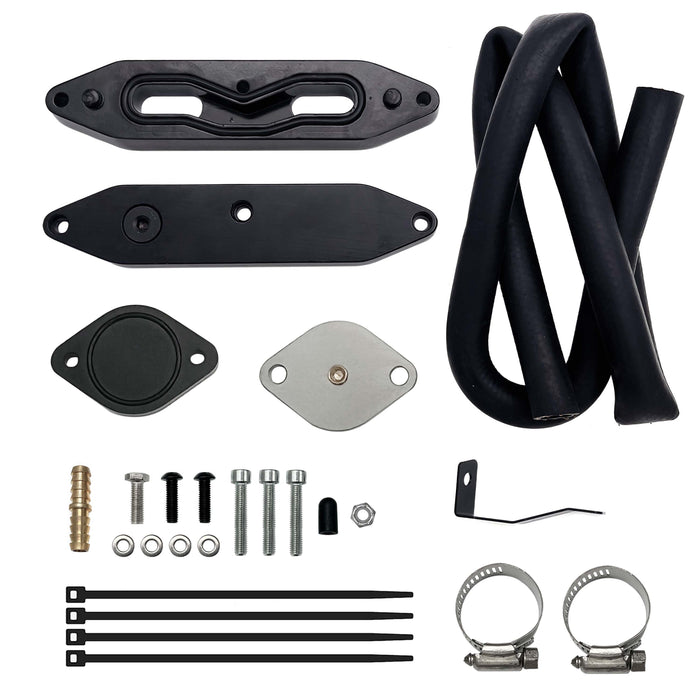
- Material & Construction: CNC-machined from billet aluminum and stainless steel with a 10mm hole exhaust cover plate for Ford EGT probes, ensuring durability.
- Cooling Efficiency: Features an additional plate that promotes faster coolant recirculation, resulting in lower coolant temperatures.
- Maintenance & Longevity: Reduces expensive EGR system maintenance costs, eliminates oil smoke accumulation and EGR valve blockage, and extends the vehicle's service life.
- Vehicle Fitment: Fits 2011-2023 6.7L Ford Powerstroke F-250, F-350, F-450, and F-550 Super Duty diesel trucks.
CCV Reroute — Keeping Crankcase Vapor Out of the Intake Path
Even with the EGR system addressed, the factory CCV continues routing oil vapor into the intake — coating the intercooler and turbo in deposits. A venturi-style reroute stops that cycle before it starts.
Seguler 2011-2023 6.7L Ford Powerstroke CCV PCV Reroute Engine Ventilation Kit
The CCV PCV Reroute Engine Ventilation Kit replaces the factory CCV system and redirects crankcase vapors away from the intake tract. The factory setup continuously routes oil vapor back into the intake, where it can contribute to oil buildup inside the turbocharger, intercooler, and intake components over time.
By properly managing crankcase pressure and controlling oil vapor contamination, this reroute system helps maintain a cleaner intake path, reduce sludge buildup, and support more consistent airflow. For high-mileage and heavy-duty 6.7L Powerstroke applications, it provides a more reliable ventilation solution while helping protect critical intake and turbo system components.

- Material & Construction: CNC-machined from aircraft-grade aluminum with a black anodized coating to withstand extreme, long-term engine bay heat.
- Flow & Pressure Relief: Engineered with a high-volume straight bore and an unrestricted, direct open passage that completely eliminates factory internal baffles.
- Sludge & Maintenance Prevention: Eradicates intercooler sludge by stopping greasy condensation from baking onto inner intercooler cores, preventing rubber boot blow-offs and clearing bulky factory crankcase filtration units for easy maintenance.
- Hose Quality: Shipped with a heavy-walled 3/4" reinforced routing hose designed to handle hot oil vapors without collapsing, pinching, or sweating over time.
DPF Delete Pipe — Reducing Backpressure and Regen Frequency
The third leg of the emissions triangle is backpressure. A loaded DPF increases exhaust restriction, raises EGTs, and forces regeneration cycles that can dilute the engine oil. Removing that restriction addresses the system-level bottleneck.
Seguler 2011-2022 6.7L Ford Powerstroke 4" Dp-Back DPF Delete Pipe
For 6.7L Powerstroke owners who tow heavy or demand more from their trucks, the 4" Downpipe-Back Race Exhaust replaces the restrictive factory emissions exhaust system with a more direct, free-flowing exhaust path. By reducing exhaust backpressure and improving exhaust flow, it helps the turbocharger recover faster, improves throttle response, and reduces the strain created by the factory exhaust restrictions.
Designed for trucks used in towing, hauling, and high-load conditions, this system provides a cleaner exhaust route and supports more efficient engine operation when paired with proper tuning. Removing the factory DPF restriction also eliminates the need for regeneration cycles that can contribute to increased exhaust heat and fuel dilution, helping create a more consistent and reliable setup for modified 6.7L Powerstroke applications.
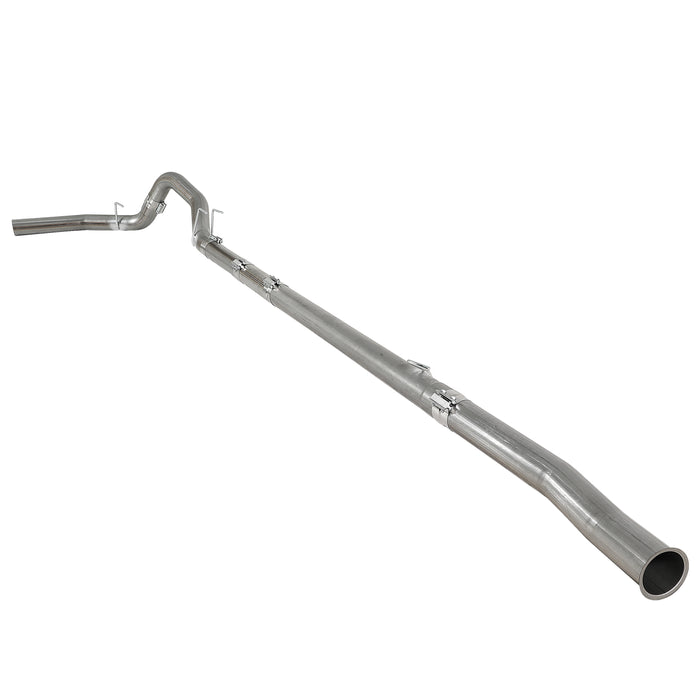
- Material & Construction: Manufactured from T-409 stainless steel featuring a 4.0″ Downpipe Back exhaust system.
- Performance & Design: Designed for competition applications without a muffler to achieve maximum exhaust flow.
- Functional Benefits: Enhances exhaust flow by reducing exhaust backpressure to boost engine performance, with an optional muffler available for a quieter experience.
- Vehicle Fitment: Fits 2011-2022 Ford F-250, F-350, and F-450 6.7L Superduty pickup trucks (not suitable for Cab & Chassis trucks).
These aren’t performance mods. They’re reliability upgrades for owners who want to address the root causes before they become roadside emergencies.
🛠 11-Step DIY Installation — EGR Delete + CCV Reroute + DPF Delete Pipe (2011–2023 6.7L)
Combined DIY time: 6-8 hours. A shop with a lift and two techs: about 4. Logical order: EGR delete first (engine bay), then CCV reroute (same area), then DPF delete pipe (under the truck).
Tools You’ll Need
| Tool | Spec | Used For |
|---|---|---|
| Socket set | 8mm–15mm, 3/8" drive | Intake, EGR, bracket bolts throughout |
| Torque wrench | 10–50 Nm range | CCV separator bolts (96 lb-in / 10.8 Nm) |
| Coolant drain pan | 5-gallon minimum | Radiator drain before opening EGR coolant lines |
| Pick tool set | Small angled picks | Releasing wiring clips, vacuum line tabs |
| Flathead screwdriver | Medium & small | Spring clip release on CAC intake pipe, hose clamps |
| Ratchet + extensions | 3/8" with 6" and 10" extensions | Reaching PCM bracket bolts, firewall-side EGR hardware |
| Exhaust hanger tool | Pliers-type or pry bar | Removing OE rubber exhaust isolators |
| Reciprocating saw | With metal blade | Trimming DPF delete pipe for custom wheelbase fit |
| Safety glasses | ANSI Z87.1 | Coolant splash, rust, under-truck debris |
| Nitrile gloves | Heavy-duty | Diesel coolant is a skin and eye irritant |
| Shop rags | 6–8 towels | Fuel filter housing, EGR coolant ports, frame rail |
| Anti-seize compound | Nickel-based, high-temp | Exhaust slip joints and clamp bolts |
Before You Start
- Warm the engine for 5 minutes. Warm coolant drains faster. The EGR cooler holds about two gallons — you want it in the drain pan, not on your garage floor.
- Use a clean drain pan — you’ll want to reuse this coolant. The radiator drain valve is on the driver’s side. Turn it counterclockwise 90°, pull out, turn another 90°. Save the coolant in old washer fluid jugs or a clean bucket.
- Park on level ground with rear wheels chocked. You’ll be under the truck for the DPF pipe. Level ground keeps CCV oil drainage accurate.
- Disconnect both batteries. You’ll be unplugging PCM connectors, MAF sensors, and working near the fuel filter housing. One slipped wrench across a hot terminal means a dealer module reprogram.
- Have shop rags ready — 6 to 8. Stuff them around the fuel filter housing, EGR coolant ports, and frame rail. The frame-mounted fuel filter will spill diesel when moving lines for CCV access. No amount of experience prevents it entirely.
- Have the tune ready. Before turning a single bolt, verify the ECU calibration for your specific hardware is loaded on your tuning device. A 6.7L with deleted EGR and DPF hardware on the stock tune can quickly trigger fault codes and reduced-power conditions.
Step 1 — Remove intake, drain coolant & disconnect EGR plumbing
Drain the radiator into a 5-gallon catch pan. Pull the MAF sensor connector (red locking tab → unplug), release the two spring clamps on the air box-to-intake joint, and remove the complete intake pipe assembly. Disconnect both large-diameter coolant hoses from the EGR cooler — have rags ready. Release the two clamps on the EGR T-pipe using the straight hook tool. Remove the long EGR pipe (5 bolts) and short EGR pipe (4 bolts). Keep all factory bolts and gaskets — several get reused. Unplug the temperature sensor probe on the short pipe before removal.
Step 2 — Disconnect wiring, vacuum lines & remove EGR cooler
Unplug the orange connector (yellow locking tab) and black connector from the EGR cooler harness. Pull and cap the vacuum line with the rubber plug provided. Remove the PCM harness from the passenger-side firewall bracket and secure it out of the way.
Remove all end bolts securing the EGR cooler — seven bolts total: three on top, three on the bottom, one at the center front. The rear bolts are tight but they’ll break loose with a long ratchet. Pull the cooler forward, check for any remaining clips or vacuum lines, then lift the assembly out. It’s bulky and holds residual coolant.
Step 3 — Install block-off plates & complete coolant reroute
Install the baffle (block-off plate): partially-enclosed baffle below, fully-enclosed above — follow the kit diagram. Secure with supplied bolts, then use the two hex-head bolts for the intake block-off O-ring plate. Check that the O-ring seats flush.
Mount the coolant baffle with supplied hex-head bolts and factory washers. Thread the temperature sensor probe into the blocking plate. Disconnect the coolant line at the firewall, remove it, and install the supplied coolant hose in its place — clamp securely. If access is tight, remove the passenger-side mudguard. Insert the second coolant line into the adapter on the coolant pipe and clamp. Reconnect the PCM plug.
Step 4 — Install pressure sensor bracket & degas line
Remove the rear-left bolt from the black intake Y-pipe (passenger side, near firewall). Loosely install the pressure sensor bracket using the factory bolt, then bolt it to the pressure line hook-bracket with the supplied small bolt, washers, and nut. Tighten all hardware.
Install the supplied coolant hose from the degas bottle to the disconnected port near the bottom passenger side of the radiator. Verify no ports left open.
Step 5 — Remove CAC pipe & fuel lines for CCV access
Pull the spring clip on the CAC intake pipe quick-connect fitting until it seats. Remove the pipe and inspect the turbo compressor inlet for debris.
Remove the fuel filter outlet tube, inlet tube, and injector return tube. Discard the left fuel supply tube bolts (replacements in the kit).
Step 6 — Remove factory CCV separator, install reroute unit & cap intake
Release the CCV oil separator outlet hose retaining tabs — the clamp has three keepers, pry each one out and the hose slides free. Disconnect the hose from the lower intake manifold — place a towel underneath. Remove the four bolts (two at the rear, one at the front, one on top) and lift out the separator.
Clean the breather port with brake cleaner. Mount the new CCV reroute unit per the kit diagram. Torque both bolts to 96 lb-in (10.8 Nm) — over-tightening cracks the plastic housing. Install the provided cap onto the intake manifold port.
Step 7 — Reassemble fuel system, intake & bleed fuel
Reinstall the fuel filter and bracket. Install the new fuel pump supply tube bracket bolt and left fuel supply tube bolts (torque to factory spec). Reconnect the injector return tube, fuel filter inlet tube, and outlet tube.
Reinstall the CAC intake pipe and all intake components. Reconnect both batteries. Cycle the key to RUN (without starting) three times to bleed the fuel system — each cycle runs the in-tank pump for ~30 seconds. Check for fuel leaks.
Step 8 — Remove factory exhaust
Move underneath the truck. Unplug all DPF and SCR sensors before dropping any pipes. Starting at the downpipe flange, loosen bolts and work back — unclamping from DPF through tailpipe. Remove metal hangers from OE rubber isolators.
If the tailpipe won’t clear the rear axle, jack under the frame (not the axle) for suspension droop. The complete exhaust weighs ~80-100 lbs — have help supporting the DPF section.
Step 9 — Install downpipe flange, Pipe #1 & Pipe #2
Install the flange adapter onto the factory downpipe outlet and leave it hand-tight to allow final adjustment during exhaust alignment. Connect Pipe #1 to the flange adapter, then slide the smaller end of Pipe #2 into the outlet of Pipe #1. Install the factory-style hanger into the rubber isolator and keep all slip-joint clamps loose until the entire exhaust system is positioned correctly.
⚠️ The exhaust pipe is intentionally designed with extra length to accommodate different cab and bed configurations. Always measure carefully and confirm fitment before cutting.
Step 10 — Install muffler, axle tube & tailpipe
Measure the gap between the muffler section (Pipe #3-1) and Pipe #2. Trim the extension pipe (Pipe #3-2), accounting for 1.5-2" insertion at each slip joint. Mount the muffler and bracket. Slide Pipe #4 (axle tube) over the axle, accounting for suspension travel. Connect the tailpipe (Pipe #5) with the rear hanger bracket. Confirm the tip extends past the body panel.
Step 11 — Align, tighten, reconnect sensors, load tune & test
Adjust the entire exhaust system for even clearance — minimum 1" at the closest point to frame, driveshaft, or spare tire. Tighten from downpipe flange back, applying nickel anti-seize to all clamp bolts. Reconnect all DPF and SCR sensors.
Load the ECU calibration that disables EGR, DPF, and SCR monitoring. Start the engine and check: exhaust leaks at every joint, EGTs at idle (300-400°F), coolant leaks at block-off plates and reroute connections, fuel leaks at the three filter connections. Idle for 10 minutes, then top off the degas bottle with saved coolant — expect to add about a gallon after the first heat cycle burps the air out.
Once bled, pack dielectric grease into unused electrical connectors and tape them up tight. Route all loose wiring away from hot surfaces before calling it done.
After the Install — First Drive Checklist
- Coolant level — Check the degas bottle after the first heat cycle. Air pockets settle out — expect to add up to half a quart of saved coolant.
- Fuel leaks — Inspect all three filter connections after 10 minutes at operating temperature.
- Exhaust leaks — Cold start the next morning. Any black puff from a slip joint that wasn’t there when warm means the clamp needs another quarter-turn.
- EGT monitoring — On your first test drive, watch EGTs under heavy throttle. Sustained temps above 1,250°F mean the tune needs adjustment.
- Oil vapor — Check under the CCV vent after 100 miles. A few drops of oil condensate are normal. A puddle means the vent line routing needs attention.
Frequently Asked Questions
Q1: What are the first signs of 6.7 Powerstroke cooler failure?
A1: The earliest sign is unexplained coolant loss with no external leak. White vapor at cold start with a sweet smell is the next giveaway. Either symptom warrants immediate inspection of the EGR crossover tube for moisture or coolant residue.
Q2: Can a failing EGR cooler cause a head gasket failure?
A2: Yes, a severely leaking EGR cooler can contribute to head gasket failure in some cases. In severe cases, excessive coolant entering the cylinder can create hydraulic pressure spikes that lift the cylinder head, stretch head bolts, and eventually blow the gasket — some owners and technicians consider cylinders 5 and 6 higher-risk areas.
Q3: How long does a factory 6.7 Powerstroke EGR cooler typically last?
A3: No fixed number. Some fail at 70,000 miles, others past 180,000. Variables: towing frequency, idle time, ambient temperature, and coolant maintenance. Trucks that tow heavy in hot climates fail earlier due to sustained EGT exposure and thermal cycling.
Q4: Can I replace just the cooler without touching anything else?
A4: Yes, but it may not be the most comprehensive long-term approach. If your cooler failed at 120,000 miles from thermal fatigue, the replacement has the same design weakness. Many owners address the entire EGR system at once, or delete it entirely, rather than replacing a component that will fail again.
Q5: Does a CCV reroute help with cooler-related problems?
A5: Indirectly, yes. Removing oil vapor from the intake stream reduces carbon buildup on valves, intercooler, and turbo. This is especially valuable on an engine already experiencing combustion inefficiency — less oil vapor in the intake means fewer deposits compounding the problem.
Q6: Will addressing the EGR cooler affect my truck’s towing performance?
A6: OEM replacement with factory tuning = unchanged. EGR delete with retune = many owners report 200-300°F cooler EGTs at the manifold, reduced turbo lag, and improved throttle response. Tradeoff: no longer emissions-compliant for on-road use.
Q7: How much does a complete EGR cooler replacement cost at a shop?
A7: $1,800-$3,200 depending on location, labor rate, and whether additional components (coolant lines, sensors, gaskets) need replacement. A delete solution with tuning is generally less in parts but requires ECU recalibration.
Q8: Is it safe to drive with a small coolant leak from the EGR cooler?
A8: No. A “small” leak today is a catastrophic failure waiting to happen. Coolant contamination of engine oil begins immediately. Bearing, cylinder wall, and turbo seal damage is cumulative. If you confirm a leak, park it.
Q9: What’s the relationship between the EGR cooler and DPF regeneration?
A9: Direct and expensive. Coolant in the combustion chamber can significantly affect combustion efficiency — soot output increases. A loaded DPF triggers more frequent regens, each dumping unburned diesel past the rings into the oil pan. Fuel-thinned oil can’t protect bearings. This chain reaction is why early detection of EGR cooler issues matters.
Q10: Do I need to replace the CCV filter when addressing the EGR cooler?
A10: Not mandatory, but recommended above 100,000 miles. The labor overlap is significant — the CCV housing is accessible during EGR work. A clogged CCV filter on a high-mileage engine increases crankcase pressure, worsening any existing turbo seal leak.
🏁 The Bottom Line
The factory EGR cooler can become a major failure point over time, especially under heavy towing, extended idling, and repeated thermal cycling. For many 6.7L Powerstroke owners, the first warning signs appear small — coolant loss, white smoke, or rough cold starts — but ignoring them can allow a minor emissions component failure to develop into a much larger engine repair.
Owners typically have three options: replace the OEM EGR cooler and continue with the same factory design, address the EGR system only while leaving other emissions-related limitations in place, or address the complete EGR, CCV, and DPF system together to target multiple factory weak points at once.
The $14,500 lesson from the F-350 that started this story? It was avoidable. A failing EGR cooler is a small component that can create major consequences when ignored. Learn more about SEGULER 6.7L Powerstroke EGR Delete, CCV Reroute, and DPF solutions at https://www.seguler.com/
Featured collection
-
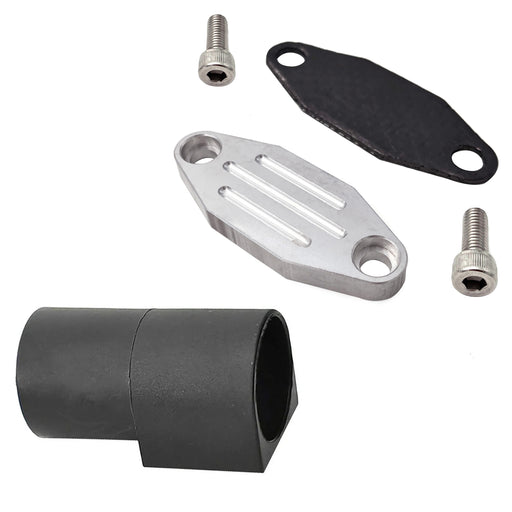
Seguler 1986-1995 Ford F150 F250 F350 Mustang Trucks EGR Simulator Eliminator / Block Off Plate Kit
SEGULEROriginal price $79.99 - Original price $79.99Original price$79.99$79.99 - $79.99Current price $79.99Block Off Plate Material: Aluminum alloy. Easy installation,and convenient to use. Made of CNC milled from aircraft grade Billet aluminum. Will N...
View full details -

Seguler 2011-2023 6.7L Ford Powerstroke Diesel EGR Delete Kit
SEGULEROriginal price $109.99 - Original price $109.99Original price$109.99$109.99 - $109.99Current price $109.99FITMENT 2011-2023 6.7L Ford Powerstroke F-250 F-350 F-450 F-550 Super Duty V8 Diesel. compatible with both standard Pickups and commercial Cab &...
View full details -
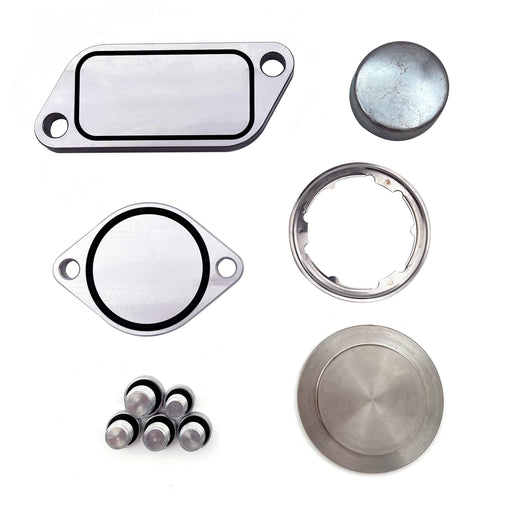
For 2010-Present Stage 2 ISX 15 CM2250 CM2350 EGR Delete Kit
SEGULEROriginal price $59.99 - Original price $59.99Original price$59.99$59.99 - $59.99Current price $59.99FITMENT 2010-Present Cummins Volvo, Peterbilt, Mack, International, Freightliner, Kenworth with the ISX15 CM2250 / CM2350 engines. DESCRIPTION P...
View full details -
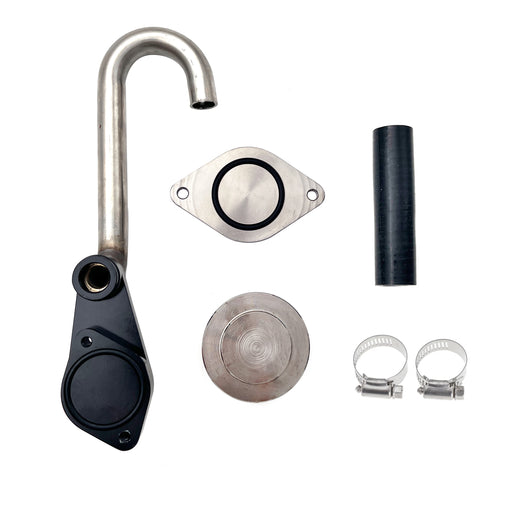
Seguler 2003-2007 6.0L FORD Powerstroke Diesel EGR Cooler Delete Kit
SEGULEROriginal price $56.14 - Original price $56.14Original price$56.14$56.14 - $56.14Current price $56.14FITMENT 2003-2007 6.0L Ford F-250 Ford F-350 F-450 F-550 Super Duty. 2003-2007 6.0L Ford Excursion SUV (Diesel Models Only). 2005-2010 Ford E-Se...
View full details -
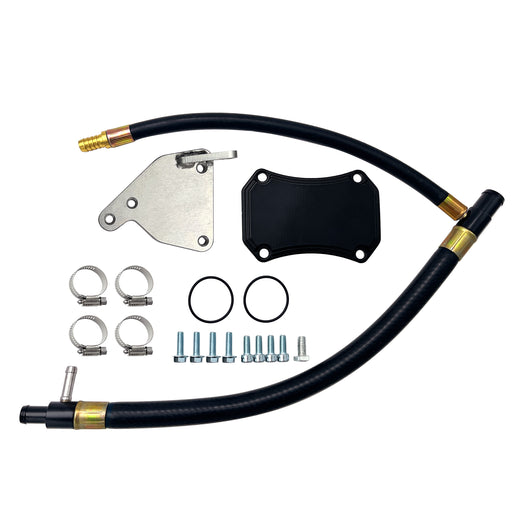
For 2011-2016 6.6L GMC Chevy Duramax Diesel LML EGR Valve Cooler Delete Kit
SEGULEROriginal price $66.49 - Original price $66.49Original price$66.49$66.49 - $66.49Current price $66.49FITMENT 2011-2016 6.6L Chevy GMC Duramax LML 2500 HD 3500 HD Diesel. DESCRIPTION Product Overview The 2011–2016 LML Duramax uses a complex EG...
View full details -
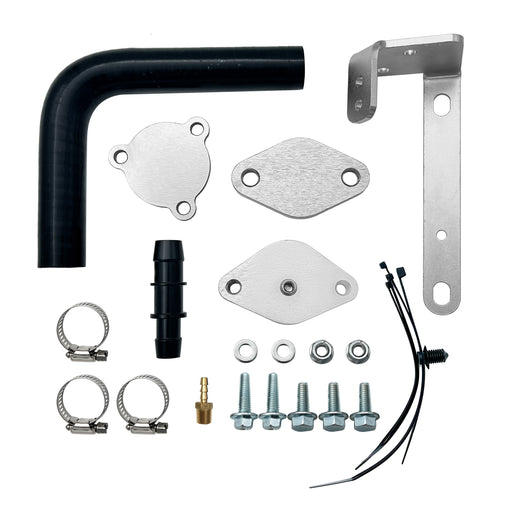
Seguler For 2014-2019 3.0L Dodge Ram 1500 EcoDiesel EGR Valve & Cooler Delete Kit
SEGULEROriginal price $72.99 - Original price $72.99Original price$72.99$72.99 - $72.99Current price $72.99FITMENT 2014-2019 3.0L Dodge Ram 1500 EcoDiesel V6 engine trucks. DESCRIPTION Product Overview Exhaust gas recirculation on 3.0L EcoDiesel V6 ...
View full details -

Seguler 2011-2023 6.7L Ford Powerstroke Diesel EGR Delete Kit
SEGULEROriginal price $85.99 - Original price $85.99Original price$85.99$85.99 - $85.99Current price $85.99FITMENT 2011-2023 6.7L Ford Powerstroke F-250 F-350 F-450 F-550 Super Duty V8 Diesel. compatible with both standard Pickups and commercial Cab &...
View full details -

Seguler 2010-2024 6.7L Dodge Ram Cummins Diesel EGR Valve Cooler Delete Kit
SEGULEROriginal price $89.99 - Original price $89.99Original price$89.99$89.99 - $89.99Current price $89.99FITMENT 2010–2024 6.7L Dodge Ram Cummins 2500 / 3500 Pickup Turbo Diesel. Note: Does NOT fit Chassis Cab 3500 / 4500 / 5500 models. DESCRIPTIO...
View full details -
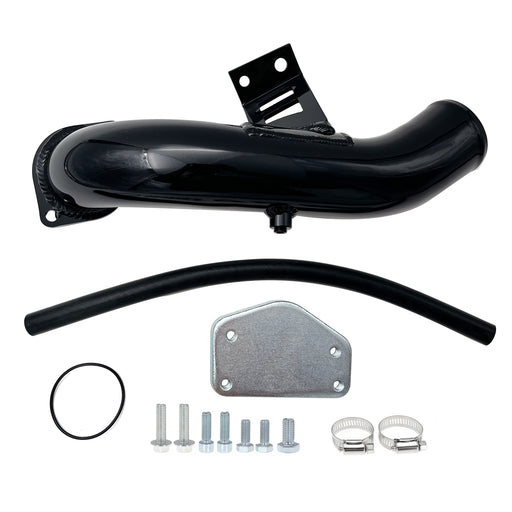
For 2004.5-2005 6.6L Chevy GMC Silverado LLY Duramax Diesel EGR Delete Kit
SEGULEROriginal price $92.99 - Original price $92.99Original price$92.99$92.99 - $92.99Current price $92.99FITMENT 2004.5-2005 6.6L Chevrolet Silverado Duramax LLY 2500HD / 3500 HD. 2004.5-2005 6.6L GMC Sierra Duramax LLY 2500HD / 3500 HD. DESCRIPTION...
View full details -

Seguler 2017-2019 L5P Duramax Diesel 4pcs L5P Can Bus Plugs Connector Replacement
SEGULEROriginal price $75.00 - Original price $75.00Original price$75.00$75.00 - $75.00Current price $75.00FITMENT 2017–2019 Chevrolet Silverado / GMC Sierra Duramax L5P 2500HD & 3500HD Diesel. DESCRIPTION Product Overview Unprotected harness con...
View full details -

Seguler 2020-2023 chevy duramax L5P Diesel Can Bus Plugs Connector
SEGULEROriginal price $80.00 - Original price $80.00Original price$80.00$80.00 - $80.00Current price $80.00FITMENT 2020–2023 Chevrolet Silverado / GMC Sierra Duramax L5P 2500HD & 3500HD Diesel. DESCRIPTION Product Overview Unprotected harness pl...
View full details -
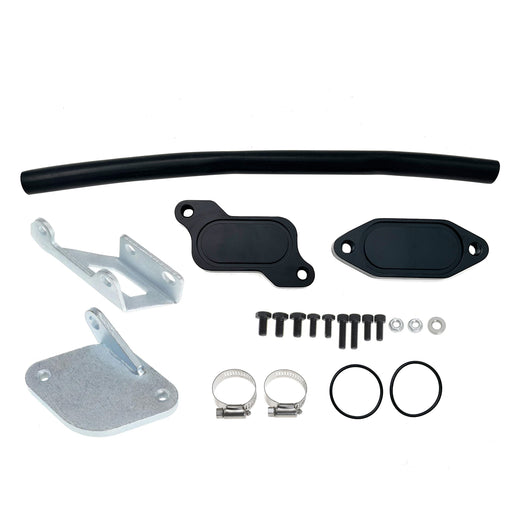
For 2006-2007 6.6L Chevrolet Silverado Classic GMC Duramax LBZ Diesel EGR Valve Cooler Delete Kit
SEGULEROriginal price $63.49 - Original price $63.49Original price$63.49$63.49 - $63.49Current price $63.49FITMENT 2006-2007.4 Chevrolet Silverado Duramax LBZ 2500HD / 3500HD. 2007.4 Chevrolet Silverado Duramax LBZ 2500HD / 3500HD Classic. 2006-2007.4 ...
View full details -

Seguler 2011-2023 6.7L Ford F250 F350 F450 F550 Powerstroke Diesel EGR Valve Delete Cooler Delete Kit
SEGULEROriginal price $55.99 - Original price $55.99Original price$55.99$55.99 - $55.99Current price $55.99FITMENT 2011-2023 6.7L Ford Powerstroke F-250 F-350 F-450 F-550 Super Duty V8 Diesel compatible with both standard Pickups and commercial Cab &a...
View full details -
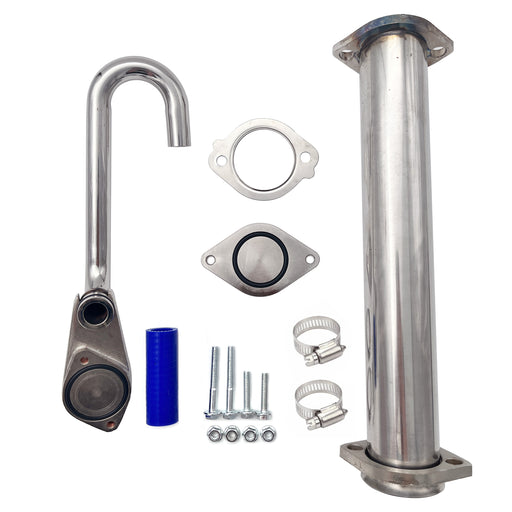
Seguler 2003-2007 6.0L Ford F250 F350 Powerstroke Diesel EGR Basic Cooler Kit
SEGULEROriginal price $79.99 - Original price $79.99Original price$79.99$79.99 - $79.99Current price $79.99FITMENT 2003-2007 6.0L Ford F250 F350 F450 F550 Super Duty Turbo (except 2004 F250 Super Duty). 2003-2005 6.0L Ford Excursion Turbo. 2005 Ford F...
View full details -
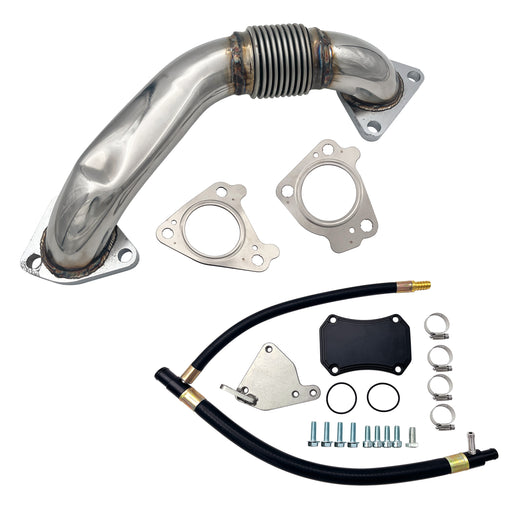
Seguler 2011-2016 6.6L GMC Chevy Duramax Diesel LML Up-Pipe & EGR Valve Cooler Delete Kit
SEGULEROriginal price $173.86 - Original price $173.86Original price$173.86$173.86 - $173.86Current price $173.86FITMENT 2011-2016 6.6L Chevy GMC Duramax LML 2500 HD 3500 HD Diesel. DESCRIPTION Product Overview Direct-injection technology endows GM 5.3L an...
View full details -
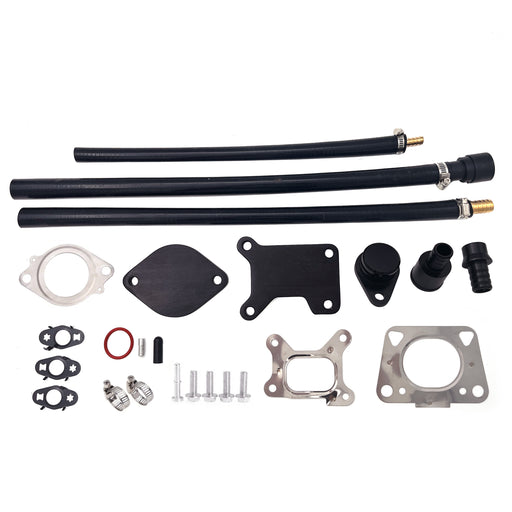
For 2017-2023 6.6L Chevy GMC Duramax L5P diesel EGR Valve Cooler Delete kit
SEGULEROriginal price $131.99 - Original price $131.99Original price$131.99$131.99 - $131.99Current price $131.99FITMENT 2017–2023 6.6L Chevrolet Silverado / GMC Sierra Duramax L5P 2500HD 3500HD Diesel. DESCRIPTION Product Overview Hot soot recirculation ...
View full details -
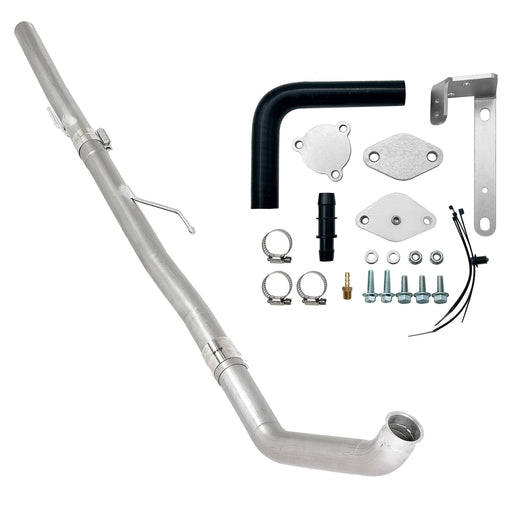
Seguler 3" Ecodiesel DPF Delete Pipe & EGR Delete kit for 2014-2018 3.0L Ram
SEGULEROriginal price $342.00 - Original price $342.00Original price$342.00$342.00 - $342.00Current price $342.00FITMENT 2014–2018 3.0L Dodge Ram 1500 EcoDiesel V6. NOTE: Fit standard Pickup models only (Crew Cab, Quad Cab). Does NOT fit Jeep Grand Cheroke...
View full details -
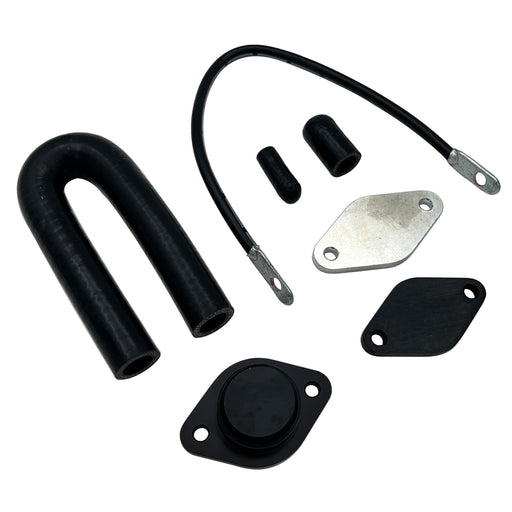
Seguler EGR valve cooler Delete kit for 2020-2022 3.0L Chevy Duramax LM2
SEGULEROriginal price $189.12 - Original price $189.12Original price$189.12$189.12 - $189.12Current price $189.12FITMENT 2020–2022 3.0L Chevrolet Silverado GMC Sierra 1500 LM2 Turbo-Diesel. DESCRIPTION Product Overview Powered by smooth inline-six engine...
View full details -

For 2013-2023 6.7L Dodge Ram Cummins Cab & Chassis EGR Delete Kit Diesel
SEGULEROriginal price $62.99 - Original price $62.99Original price$62.99$62.99 - $62.99Current price $62.99FITMENT 2013–2023 6.7L Ram Cummins 3500 4500 5500 Cab & Chassis / Commercial Trucks. Does NOT fit standard Ram 2500 3500 Pickups. DESCRIPTIO...
View full details -
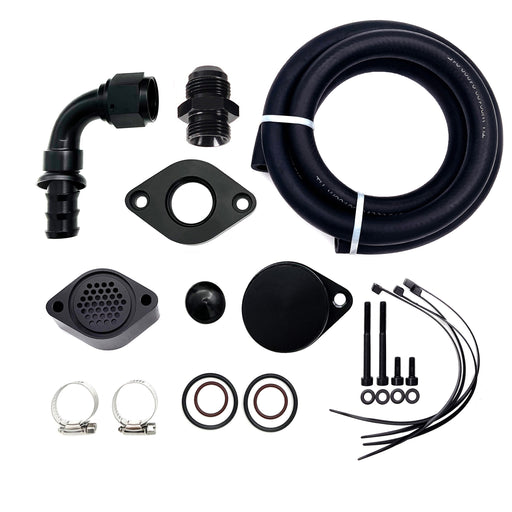
Seguler 2011-2023 6.7L Ford Powerstroke CCV PCV Reroute Engine Ventilation Kit
SEGULEROriginal price $82.99 - Original price $82.99Original price$82.99$82.99 - $82.99Current price $82.99FITMENT 2011-2023 6.7L Ford Powerstroke F-250 F-350 F-450 F-550 Super Duty V8 Diesel. Compatible with both standard Pickups and commercial Cab &...
View full details -
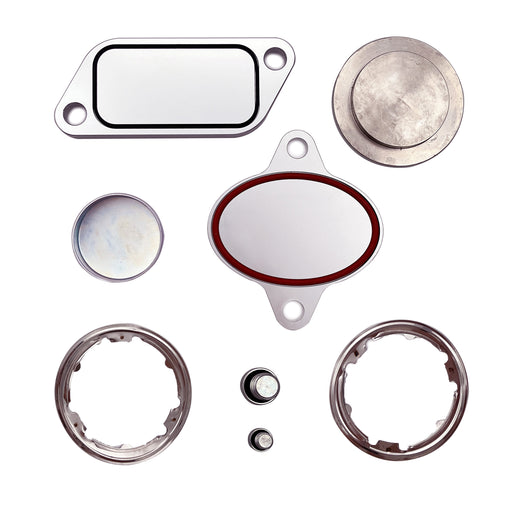
For 2007-2010 Cummins ISX CM871 EGR Plug Kit Stage 2 Plates and Plugs Aluminum
SEGULEROriginal price $67.99 - Original price $67.99Original price$67.99$67.99 - $67.99Current price $67.99FITMENT 2007-2010 Cummins Volvo, Peterbilt, Mack, International, Freightliner, Kenworth with the ISX CM871 Engines. DESCRIPTION Product Overvie...
View full details -
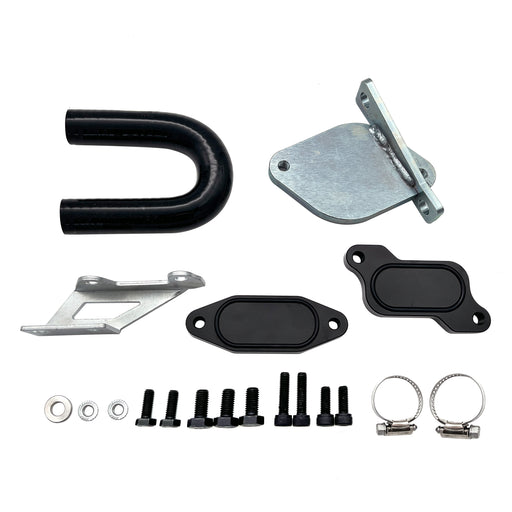
For 2007-2010 6.6L Chevy GMC LMM Duramax EGR Valve Cooler Delete Kit Fit
SEGULEROriginal price $61.99 - Original price $61.99Original price$61.99$61.99 - $61.99Current price $61.99FITMENT 2007.5-2010 6.6L Chevrolet Silverado Duramax LMM 2500HD / 3500HD. 2007.5-2010 6.6L GMC Sierra Duramax LMM 2500HD / 3500HD. Note: Standard...
View full details -
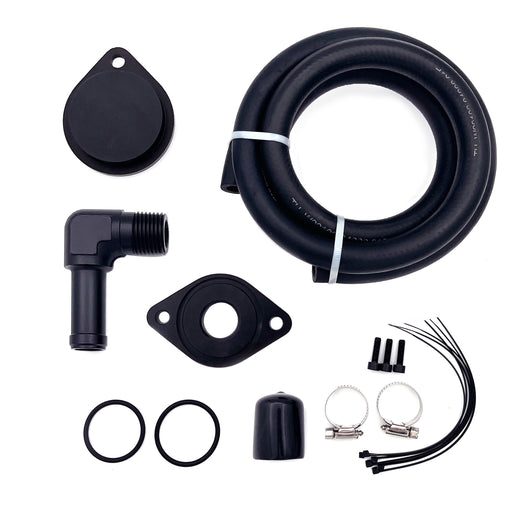
Seguler 2011-2023 Ford 6.7L Powerstroke CCV/PCV Reroute/Delete Engine Ventilation Kit
SEGULEROriginal price $72.00 - Original price $72.00Original price$72.00$72.00 - $72.00Current price $72.00FITMENT 2011-2023 6.7L Ford Powerstroke F-250 F-350 F-450 F-550 Super Duty V8 Diesel. Compatible with both standard Pickups and commercial Cab &...
View full details -
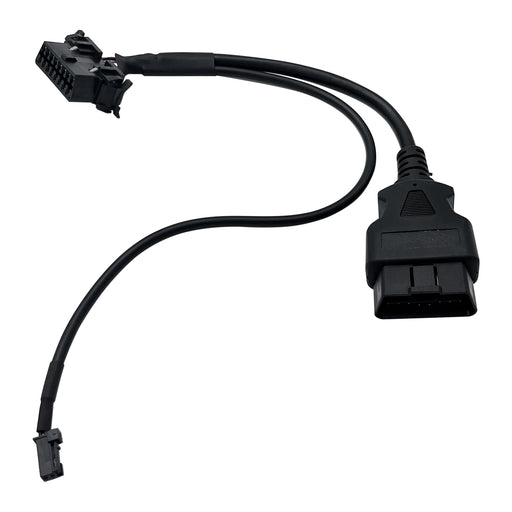
Seguler 2018+ RAM Cummins OBD2 HD Security Gate Bypass Cable
SEGULEROriginal price $45.00 - Original price $45.00Original price$45.00$45.00 - $45.00Current price $45.00FITMENT 2018+ 6.7L Ram Cummins 2500 3500 Turbo Diesel. Designed for Ram pickup trucks equipped with the factory Security Gateway Module. Note: Pl...
View full details -
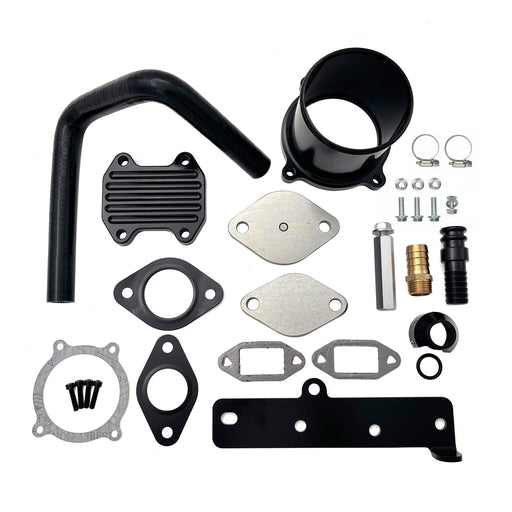
Seguler For 2013-2018 6.7L Dodge RAM 2500 3500 Cummins Diesel EGR Delete Cooler Throttle Valve Delete Kit
SEGULEROriginal price $112.00 - Original price $112.00Original price$112.00$112.00 - $112.00Current price $112.00FITMENT 2013–2018 6.7L Dodge Ram Cummins 2500 & 3500 Pickup Turbo Diesel. Note: Does NOT fit Cab & Chassis (3500 / 4500 / 5500 C&C) m...
View full details


Leave a comment