

2011-2016 Duramax LML EGR Problems: Causes, Solutions & Upgrade Guide
Many 2011-2016 Duramax LML owners eventually start looking into EGR problems when their truck still runs, still tows, and still starts every morning — but it does not feel quite the same as it used to. The engine itself is usually not the problem. Over time, the emissions and ventilation systems around the engine can begin affecting airflow, response, and overall driving feel.
Maybe throttle response feels softer. Maybe towing uphill takes more effort. Maybe regeneration happens more often, or you find oil and carbon buildup where you never expected it.
Many of these symptoms come back to three systems working together: the EGR system, the crankcase ventilation (CCV) system, and the diesel particulate filter (DPF). They are not always separate problems — they are three parts of the same airflow story. Understanding how these systems interact is the first step toward finding the right solution for long-term LML reliability.
The Three Systems That Change How Your LML Breathes
1. EGR: The Source of Soot
The EGR system routes a small portion of exhaust gas back into the intake to lower combustion temperatures and reduce NOx. On the LML, two components do this work: the EGR cooler (a heat exchanger that uses engine coolant to pull heat out of the exhaust gas) and the EGR valve (the metering device that controls how much cooled exhaust reaches the intake). The tradeoff is the soot — feeding exhaust back through the intake means feeding fine soot particles into the same path the air uses, and over the miles that soot settles and builds.
2. CCV: The Oil Vapor Problem Most Owners Miss
The crankcase ventilation (CCV/PCV) system vents crankcase vapors — which carry a fine mist of engine oil — back into the turbo inlet, where they mix with the incoming charge air. That oil vapor is the second half of the intake-contamination story. On its own it leaves an oily film on everything it touches, but mixed with EGR soot under engine heat, it becomes the binding agent that turns loose soot into hard, sticky sludge.
3. DPF: The Exhaust Restriction Problem
On the exhaust side, the diesel particulate filter (DPF) captures soot in a ceramic substrate and periodically burns it off through a process called regeneration. When the truck spends too much time idling, making short trips, or running at low load, the filter fills faster than it can regenerate — and the exhaust side begins to restrict, pushing backpressure upstream toward the turbo.
The simple way to look at it: EGR introduces soot, CCV introduces oil vapor, and DPF controls exhaust flow. Over time, these three systems determine how easily your LML can breathe.
What Is Actually Causing LML Performance Problems?
EGR Soot: Where Intake Contamination Starts
Exhaust gas is dirty. Even on a clean-running diesel, the exhaust stream carries fine soot particles, and the EGR system is deliberately feeding some of that soot back into the intake. Over tens of thousands of miles, that soot does not stay suspended — it settles. It coats the inside of the intake manifold, the intake ports, and the valve surfaces. It mixes with whatever else is already in the intake tract, hardens under heat, and forms a layer of carbon that gradually narrows the path the air has to flow through.
The result is a slow, cumulative restriction. The first sign is usually a throttle that does not answer as quickly as it used to. The engine still makes power, but it has to work a little harder to pull the same amount of air through a dirty intake, and the throttle response softens as the restriction builds. This is why owners describe the change as a feeling rather than a failure — there is rarely a single moment where the truck “breaks.” It just gets progressively less eager. The question owners ask — why does my truck feel slower after years of driving? — usually traces back to this: an intake that has been quietly collecting soot the whole time.
CCV Oil Vapor: The Ingredient That Turns Soot Into Sludge
Carbon by itself is one problem. The LML’s crankcase ventilation system makes it worse by adding a second ingredient. The factory CCV/PCV system vents crankcase vapors — which carry a fine mist of engine oil — directly back into the turbo inlet, where they mix with the incoming charge air. From there, the oil-laden vapor moves through the turbo and into the intercooler, boots, and intake, where it leaves an oily residue.
On its own, oil vapor leaves an oily film on everything it touches. But when that oil mist meets the dry carbon soot the EGR system is feeding in, the two combine into something worse: a thick, sticky sludge that bakes onto intake surfaces under heat. This is the “cement-like” buildup owners find when they pull an intake apart on a high-mileage LML. Dry soot would sit loose and relatively harmless; oil vapor is the glue that turns it into a solid, flow-choking deposit. So the EGR problem and the CCV problem are not two separate issues — they are two halves of the same intake-contamination problem.
DPF Restriction: When the Exhaust Side Starts Fighting Back
The DPF handles the exhaust side of the LML’s airflow system by capturing soot and burning it off during regeneration. When the truck spends too much time idling, making short trips, or running at low load, the filter can fill faster than it can regenerate, causing exhaust restriction.
As backpressure builds, the engine works harder to push exhaust out, which can increase EGTs and make the truck feel less responsive under load. The DPF is separate from the EGR system, but both affect the same airflow path — EGR adds soot to the intake side, while the DPF manages soot on the exhaust side. On 2011+ LML trucks, the DEF/SCR system adds another layer of sensors and components that can also affect system operation when problems occur.
EGR vs CCV vs DPF: Telling the Symptoms Apart
Because these three systems all touch the same airflow path, it is easy to confuse their symptoms. A truck with a dirty intake might get blamed on the EGR when the real contributor is oil vapor from the CCV. A truck that feels warm and sluggish under load might be fighting DPF backpressure rather than an EGR issue. Before spending money, it helps to separate what each system does and what its long-term failure looks like.
| System | What It Does | What Owners Notice |
|---|---|---|
| EGR | Recirculates exhaust into the intake | Carbon buildup, softer response |
| CCV | Routes crankcase vapor into the intake | Oily residue in the intake |
| DPF | Captures exhaust soot | More frequent regeneration |
The key takeaway is that these are not three competing diagnoses — they are usually three contributors to the same underlying condition, which is a breathing path that gets progressively dirtier and more restricted as the truck ages. A full answer to Duramax LML EGR problems often means looking at the intake and the exhaust side together, because the soot from the EGR, the oil from the CCV, and the backpressure from the DPF are all feeding the same problem.
What Are the Symptoms of EGR Problems on a Duramax?
EGR-related trouble does not usually announce itself with a single dramatic failure. A lot of owners do not notice it overnight — it usually happens slowly, and one day the truck just does not feel as responsive as it used to. The early signs of Duramax LML EGR problems are easy to write off as normal aging, which is exactly why they build up unnoticed. It shows up as a collection of small, easy-to-dismiss signs that add up over time. Here is what owners most commonly report:
-
Reduced throttle response. The truck still pulls, but the initial tip-in feels softer, and it does not jump like it did when it was newer.
-
More soot buildup. A visible increase in soot around the exhaust, or an intake that shows heavy carbon when inspected, points at the recirculation path doing its worst work.
-
Higher exhaust temperatures. When the intake is restricted or the EGR is feeding hot exhaust back in, exhaust gas temperatures run higher under load.
-
Poor towing response. The change is most noticeable under a heavy trailer, where the truck feels like it is working harder to hold speed on grades.
-
Intake contamination. Oil film or sticky carbon deposits in the intake tract — often found when doing unrelated maintenance — are a direct sign of the EGR/CCV combination at work.
-
Frequent emissions system concerns. Recurring regeneration cycles, or warning lights tied to the emissions hardware, can accompany an EGR system that is no longer doing its job cleanly.
None of these symptoms is conclusive on its own, and that is part of why they get ignored for so long. A truck can run for thousands of miles with a slowly carbon-clogged intake and still start, idle, and drive every day. It is the gradual loss of the crisp, eager behavior the truck had when it was new that tells the real story.
Can Cleaning Fix EGR Problems?
A natural first instinct is to clean rather than replace — pull the intake, clean the carbon, and put it back. Cleaning has its place, but it is worth being honest about what it can and cannot do.
| Option | Best For | Limitation |
|---|---|---|
| Clean | Light buildup | Deposits come back |
| Replace | Failed parts | Same factory design |
| Upgrade | Recurring issues | Needs proper install |
The limitation of cleaning is that it resets the clock without changing the mechanism. The EGR system is still going to feed soot back into the intake, and the CCV is still going to feed oil vapor back into the same path, so the same deposits will form again on the same schedule. Cleaning is a reasonable fix for a truck that just needs a refresh. It is not a fix for a truck whose owner is tired of cleaning the same intake every couple of years. That is the point where the conversation shifts from “how do I clean it” to “how do I stop it from coming back.” For an owner who is done fighting recurring Duramax LML EGR problems, the upgrade options below are the logical next step.
How Do Owners Usually Approach LML Problems?
There is no single right answer for every LML owner, because the right answer depends on how the truck is used and what the owner is trying to accomplish. Most owners land on one of four approaches.
Option 1: Keep The Factory System
For a truck that lives as a daily driver or operates in an area where the emissions system must remain in place, the sensible path is maintenance. Keep the EGR valve clean, watch the coolant level for signs the cooler is weeping, stay on top of regeneration by getting the truck up to highway speed regularly, and replace factory components with factory-style parts when they wear out. This is the lowest-risk approach, and it keeps the truck fully compliant. What it does not do is change the underlying wear pattern — the same deposits will keep forming, and the same components will keep needing attention.
Option 2: Reduce Intake Contamination With a CCV Reroute
The factory CCV/PCV system routes oil-laden crankcase vapor straight into the turbo inlet. On a stock truck, that oil mist is the ingredient that turns dry EGR soot into the sticky sludge that clogs the intake. A CCV reroute addresses the intake-contamination problem at its source by diverting crankcase vapor away from the intake path, so the oil never reaches the turbo, the intercooler, or the intake ports.
Seguler CCV PCV ReRoute Delete Kit for 2011-2016 6.6L Chevy Duramax LML
The CCV/PCV Reroute Delete Kit is designed to replace the factory crankcase ventilation system on 2011–2016 6.6L Duramax LML diesel trucks. The kit redirects crankcase vapors away from the factory intake path, helping reduce the amount of oil mist and vapor being introduced back into the intake system.
By rerouting the factory CCV system, this kit helps minimize oil residue buildup inside the intake tract and provides a cleaner ventilation path for the engine. It also includes the necessary components to simplify the factory breather setup while maintaining proper crankcase ventilation.
For LML Duramax owners looking to address crankcase vapor concerns, this kit provides a straightforward ventilation solution that supports cleaner intake conditions and long-term engine maintenance.

Key points
- Efficient Crankcase Vapor Routing redirects crankcase pressure and vapor through a streamlined vent path for improved ventilation.
- Reduced Oil Mist Contamination helps prevent oil vapor from soaking intercooler boots and intake components.
- Cleaner Intake Airflow helps reduce oil residue and carbon buildup inside the intake manifold and grid heater area.
- Turbocharger Protection helps minimize hot oil vapor exposure around the turbo compressor for improved long-term reliability.
The factory CCV system is one of the areas that receives attention on the 6.6L Duramax LML platform due to its role in managing crankcase pressure and oil vapor circulation. Understanding how the ventilation system works and how crankcase vapor affects the intake system helps owners better identify potential maintenance concerns and make informed decisions when improving long-term engine cleanliness and reliability.
Option 3: Address Recurring EGR Valve & Cooler Problems
For the owner whose symptoms point at the EGR circuit itself — coolant that vanishes without a puddle, white smoke on a cold start, or an intake that keeps carboning up no matter how often it is cleaned — the next step is to address the EGR valve and cooler directly. On the LML, the EGR cooler is the component that carries both exhaust heat and engine coolant, which makes it the most likely part to crack over time. A cracked cooler can leak coolant into the intake, and that is a path that leads toward serious engine damage if left alone.
2011-2016 6.6L GMC Chevy Duramax Diesel LML EGR Valve Cooler Delete Kit
The EGR Valve & Cooler Delete Kit is designed to replace the factory EGR valve and cooler assembly on 2011–2016 6.6L Duramax LML Chevy Silverado and GMC Sierra 2500HD/3500HD trucks. The kit removes the factory exhaust gas recirculation path, helping reduce the amount of hot exhaust gases and soot being routed back into the intake system.
By removing the factory EGR cooler components, this kit helps address common concerns associated with soot buildup and long-term heat cycling of the original system. It also includes the necessary block-off plates and coolant reroute components to simplify the factory EGR layout while maintaining proper coolant flow after the cooler is removed.
For LML Duramax owners looking to address EGR-related maintenance concerns, this kit provides a simplified solution for the exhaust recirculation system while supporting cleaner intake conditions and long-term engine reliability.

Key points
- Premium Billet Aluminum & Stainless Steel Construction combines a CNC-machined aluminum intake plate with a stainless steel exhaust plate for a durable, corrosion-resistant seal.
- Reduced Intake Soot Buildup blocks the factory EGR flow to help prevent soot and oily residue from accumulating inside the intake manifold and grid heater.
- Improved Engine Temperature Management eliminates hot exhaust gas recirculation and includes a coolant reroute solution to support more efficient coolant flow.
- Improved Turbo Response helps prevent EGR bypass leaks and allows exhaust flow to remain directed through the turbocharger for improved throttle response.
The factory EGR system is one of the areas that receives attention on the 6.6L Duramax LML platform due to its constant exposure to exhaust heat, soot circulation, and coolant flow. Understanding how the EGR valve, cooler, and intake system work together helps owners better identify long-term maintenance concerns and make informed decisions when addressing airflow, buildup, and engine reliability considerations.
Option 4: Address Exhaust Restriction With a DPF Pipe
On the exhaust side, the DPF and the downstream emissions hardware are the restriction that builds up over time. For high-mileage trucks — and for builds that will be used in off-road or competition applications where the emissions hardware is not required — replacing the DPF section with a straight pipe removes that restriction and lets the exhaust evacuate freely.
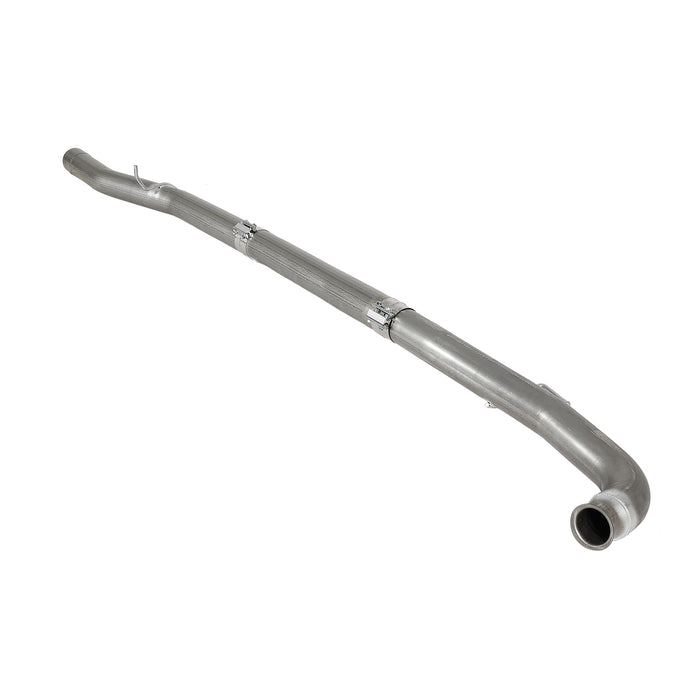
2011-2015.5 6.6L Chevy Duramax Diesel 4inch DPF Delete Pipe Exhaust
The 4" DPF Delete Pipe Eliminator is designed to replace the factory DPF assembly on Chevy Silverado and GMC Sierra 2500HD/3500HD trucks equipped with the 6.6L Duramax diesel engine. This downpipe-back exhaust replacement removes the factory DPF restriction and provides a larger 4-inch exhaust path for improved exhaust flow.
By replacing the factory aftertreatment section with a high-flow exhaust pipe, this kit helps reduce exhaust restriction and simplifies the exhaust system layout. The design uses durable materials and factory-style mounting points to provide a direct-fit installation while maintaining proper exhaust routing.
For Duramax owners using their trucks for off-road or competition applications, this 4" DPF delete pipe provides a straightforward exhaust upgrade solution focused on improved airflow, reduced restriction, and a cleaner exhaust system configuration.
Key points
- Premium T409 Stainless Steel Construction built with full 4" mandrel-bent tubing for excellent durability and heat resistance.
- High-Flow Exhaust Design replaces the restrictive factory DPF, CAT, and SCR/DEF section with a larger 4" straight pipe.
- Reduced Exhaust Restriction helps improve exhaust flow and reduce backpressure during heavy-load and towing conditions.
- Simplified Exhaust System Setup provides a cleaner, streamlined exhaust configuration for off-road and competition applications.
The factory DPF system is one of the areas that receives the most attention on the 6.6L Duramax platform due to its role in exhaust flow management and aftertreatment operation. Understanding how the DPF, CAT, SCR/DEF components, and exhaust system work together helps owners better understand the purpose of each component and make informed decisions when addressing long-term exhaust system considerations.
How Long Are You Keeping Your LML?
- Keeping the truck for daily driving? Maintain the factory system and focus on inspection.
- Fighting repeated intake buildup? A CCV reroute is usually the first step.
- Seeing coolant loss or EGR-related issues? Focus on the EGR components.
- Building an off-road or competition truck? Exhaust flow becomes part of the conversation.
Which Upgrade Matches Your Goal?
The three upgrades above are not competing versions of the same part; they target different ends of the same breathing path. The table below lines them up against the goal each one serves.
| Upgrade | Main Focus | Best For |
|---|---|---|
| CCV Reroute | Intake cleanliness | Oil vapor concerns |
| EGR Valve & Cooler | EGR components | Recurring EGR issues |
| DPF Pipe | Exhaust flow | Exhaust restriction |
The reason these three keep getting discussed together is that they map onto the three ways an LML’s breathing path degrades: the EGR feeds in soot, the CCV feeds in oil, and the DPF builds backpressure. A truck can benefit from any one of them, but they are most effective when the owner understands which one matches the problem they are actually trying to solve.
A Common LML Improvement Strategy
Owners who address all three rarely do it all at once. A common sequence is to work through the breathing path in order, understanding the problem before changing hardware. The first step is to identify which system is actually causing the symptoms. From there, most owners reduce intake contamination first with a CCV reroute, since it is the least invasive and stops the oil that feeds sludge. Next comes addressing the EGR components to remove soot recirculation and the cooler risk, followed by the exhaust side with a DPF pipe for builds where that change is appropriate.
This sequence is not mandatory, and many owners stop after one step. The point is that the order reflects the airflow path itself: clean up what enters the intake first, then address what the intake and exhaust are carrying. Starting with the CCV reroute is a common first move because it is the least invasive and it immediately stops the oil that makes everything else stickier. From there, owners decide how far to go based on their symptoms and their use case.
Installation Considerations
None of these three upgrades is especially exotic, but each one touches a system that rewards care and planning.
- Verify fitment first. The DPF pipe fits the 2011–2015.5 V-band trucks, not the 2015.5–2016 3-bolt flange trucks. Confirm which turbo discharge style is under the truck before ordering.
- Check local regulations. Removing EGR or DPF hardware changes how the emissions systems operate and may not be permitted for on-road use. These components are intended for off-road or competition applications where such modifications are allowed, and the owner is responsible for compliance with applicable regulations.
- Follow the kit instructions. Use the hardware and torque specifications provided with the kit, and reference the factory service information for the truck.
- Plan for the tune. The DPF pipe requires a matching ECM calibration to operate correctly. Install the calibration as part of the job rather than as an afterthought.
- Consider professional installation. A capable home mechanic can handle these with the right tools and time, but the tight rear engine bay on the LML makes professional installation a reasonable choice for anyone unsure.
The steps below describe the general flow for each of the three upgrades. None of these jobs should use a torque value pulled from memory — use the kit’s included instructions and the factory service information for the exact numbers, and check for leaks once everything is back together.
EGR Valve & Cooler Delete Kit (SG-ER-0031)
Step 1. Disconnect the negative cable from both batteries, drain the engine coolant, and remove the intake resonator, intake pipe, and air filter for access.
Step 2. Disconnect the electrical connectors and remove the intercooler pipe, throttle valve, and grille heater to clear the intake side.
Step 3. Remove the PCV valve, the turbine interface, and the crossover pipe to expose the EGR valve and coolers.
Step 4. Remove the EGR valve, then disconnect the five coolant lines and the bolts holding the two EGR coolers, and lift both coolers out.
Step 5. Remove the exhaust bypass valve, then install the exhaust block gasket and the billet aluminum intake block-off plate where the EGR valve and coolers were removed.
Step 6. Route the new 5/8" and 3/8" coolant lines to reconnect the cooling loop at the return pipe, the front coolant line near the thermostat, and the heater hose.
Step 7. Reinstall the turbine interface, PCV valve, throttle valve, grille heater, intercooler pipe, intake pipe, and air filter, then start the engine and check for leaks and top up the coolant.
DPF Delete Pipe (SG-ER-0022)
Step 1. Disconnect the battery and let the exhaust cool, then remove the clamp at the turbo downpipe connection.
Step 2. Position the new pipe with its hanger in the factory hanger location and connect it using the factory clamp.
Step 3. Connect the mid-pipe section to the downpipe end and seat the hanger into the factory rubber isolator.
Step 4. Connect the remaining section to the factory tailpipe, trimming the pipe to length if needed.
Step 5. Working front to back, tighten every clamp to the kit’s specified torque, checking pipe alignment and clearance as you go.
Step 6. Reinstall the transmission dipstick and coolant hose bracket, then start the engine and check for exhaust leaks along the full run.
CCV/PCV Reroute Kit (SG-ER-0231)
Step 1. Lubricate the inner edge of the billet aluminum vent plate, then bolt it in place without over-tightening — the O-ring handles the seal, not the bolt torque.
Step 2. Remove the factory PCV hose from the valve cover and the resonator plate near the turbo inlet, using a swivel socket and extension for the lower bolt, then lift the assembly out of the engine bay.
Step 3. Install the stopper plate in place of the factory PCV hose using the original bolts, and tuck the wiring harness bracket under the lower bolt.
Step 4. Slide the spring clamp onto the new hose a few inches from the end, then press the hose onto the valve cover PCV fitting.
Step 5. Slide the clamp into place with needle-nose pliers so the hose seats tightly and leak-free.
Step 6. Route the hose up, over, and down toward the driver’s-side frame rail, keeping it clear of moving parts and hot components.
Step 7. Secure the hose along the frame with the provided tie wraps and confirm all connections are tight.
Common Installation Mistakes
These three upgrades are straightforward on paper, but a few mistakes show up again and again in owner discussions. Knowing what to avoid before starting the job can save time, prevent leaks, and avoid unnecessary troubleshooting.
1.Skipping the Tune Before Installing the DPF Pipe
Installing the pipe without the matching ECM calibration can cause the truck to set codes and continue searching for emissions components that are no longer installed. The calibration is part of the installation process, not something to handle afterward.
2.Getting the Downpipe Fitment Wrong
The 2011–2015.5 trucks use a V-band clamp connection, while the 2015.5–2016 trucks use a 3-bolt flange. Confirm which style is on your truck before ordering, because these two setups do not interchange.
3.Over-Tightening the Block-Off Plates
The intake plate’s O-ring creates the seal — not excessive bolt pressure. Over-tightening the fasteners can damage the plate or the plastic intake tube where the seal sits.
4.Routing the Coolant Hose With a Kink
A coolant bypass hose that is kinked or touching a hot surface can restrict coolant flow or wear through over time. Route the hose carefully, keep it away from heat sources, and secure it before refilling the cooling system.
5.Not Bleeding the Cooling System Properly
Air trapped inside the cooling system can cause inaccurate temperature readings and make the truck run hotter than expected. After installation, fully bleed the system and recheck the coolant level after the first heat cycle.
Frequently Asked Questions
Q:Why does my Duramax LML EGR get dirty?
A:The EGR system routes exhaust gas back into the intake, and that exhaust carries fine soot. Over time, soot combines with oil vapor from the CCV system and forms carbon buildup on intake surfaces. This is a normal result of how the system operates, not necessarily a sign of a failed part.
Q:What causes carbon buildup in a Duramax intake?
A:Two things together. The EGR system feeds dry soot into the intake, and the CCV system feeds oil vapor into the same path. Dry soot on its own is relatively loose and manageable, but when oil mist mixes with it under engine heat, the two bake into a hard, sticky sludge. That combination is what creates the heavy carbon deposits owners find on high-mileage trucks.
Q:Can CCV oil vapor affect the intake system?
A:Yes. The factory CCV/PCV system sends oil vapor into the turbo inlet, where it can coat intake components. When combined with EGR soot, that oil residue can contribute to sticky carbon buildup. Rerouting the vapor away from the intake helps reduce this type of contamination.
Q:Does the EGR cooler need replacement?
A:The EGR cooler carries both exhaust heat and engine coolant, making it a common failure point on the LML. Over time, thermal stress can crack internal passages and allow coolant into the intake. Coolant loss without a visible leak or white smoke on startup are common signs of a cooler issue.
Q:What causes DPF restriction?
A:The DPF stores soot and burns it off during regeneration. When a truck spends a lot of time idling, making short trips, or running at low load, the filter fills faster than it can regenerate, and the exhaust side begins to restrict. That backpressure pushes heat upstream toward the turbo and makes the truck run warmer and less eager under load.
Q:Should I upgrade EGR, CCV, or exhaust first?
A:It depends on the symptom. If the intake has oil buildup or keeps getting dirty, a CCV reroute is usually the first step. If you are seeing coolant loss or EGR-related issues, focus on the EGR valve and cooler. For exhaust restriction concerns or off-road builds, the DPF pipe addresses the exhaust side. The right starting point depends on which system is causing the problem.
Q:How do I know if my LML EGR cooler is leaking?
A:The two main signs are unexplained coolant loss and white smoke on a cold start. A cracked EGR cooler can allow coolant into the intake, causing a slowly dropping coolant level, sweet-smelling exhaust, or white vapor. If these symptoms appear, the cooler should be one of the first areas to inspect.
Q:Will a CCV reroute affect emissions or make the truck louder?
A:No. A CCV reroute only changes where crankcase vapor goes — it redirects the oil-laden vapor away from the intake instead of feeding it back through the turbo. It does not touch the exhaust system, so the exhaust note stays the same, and it does not modify any sensors or engine management components.
Q:Does the DPF pipe require a tune?
A:Yes. Removing the DPF and the downstream emissions hardware changes how the exhaust system operates, so the truck needs a matching ECM calibration to run correctly. The calibration should be treated as part of the installation, not an optional add-on, and it is one of the reasons this upgrade is intended for off-road or competition use.
Q:Will removing the EGR or DPF trigger a check engine light?
A:On its own, removing that hardware will set codes because the engine management system is still looking for components that are no longer there. The matching calibration is what tells the truck to stop looking for them. This is why the tune and the hardware go together — one without the other is how a properly installed part ends up looking like the problem.
Finding the Right Solution for Your LML Duramax
The LML engine itself is rarely the weak point. Most long-term concerns come from the systems around the engine that control airflow, emissions, and ventilation.
Understanding whether your truck’s issue comes from EGR soot, CCV oil vapor, or DPF restriction is the first step toward choosing the right solution.
Different owners need different approaches. A CCV/PCV Reroute Kit helps reduce the oil vapor that turns soot into sludge. An EGR Valve & Cooler Delete Kit addresses recurring EGR-related concerns, while a 4" DPF Delete Pipe focuses on exhaust flow for off-road or competition applications.
These upgrades are not a one-size-fits-all package. The right choice depends on your truck’s symptoms, how it is used, and which part of the airflow system needs attention.
To explore the full lineup of Duramax upgrade parts, visit seguler.com.
Featured collection
-
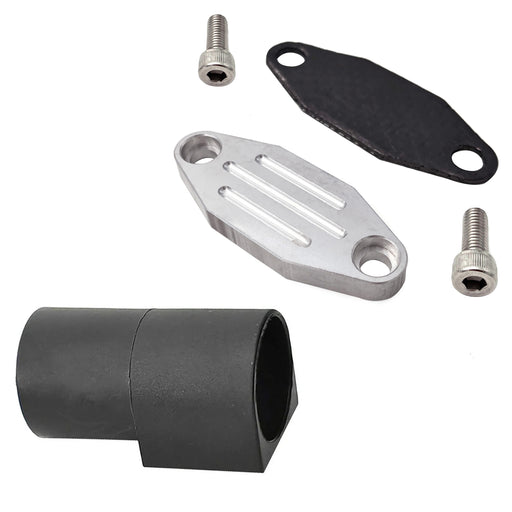
Seguler 1986-1995 Ford F150 F250 F350 Mustang Trucks EGR Simulator Eliminator / Block Off Plate Kit
SEGULEROriginal price $79.99 - Original price $79.99Original price$79.99$79.99 - $79.99Current price $79.99Block Off Plate Material: Aluminum alloy. Easy installation,and convenient to use. Made of CNC milled from aircraft grade Billet aluminum. Will N...
View full details -

Seguler 2011-2023 6.7L Ford Powerstroke Diesel EGR Delete Kit
SEGULEROriginal price $109.99 - Original price $109.99Original price$109.99$109.99 - $109.99Current price $109.99FITMENT 2011-2023 6.7L Ford Powerstroke F-250 F-350 F-450 F-550 Super Duty V8 Diesel. compatible with both standard Pickups and commercial Cab &...
View full details -
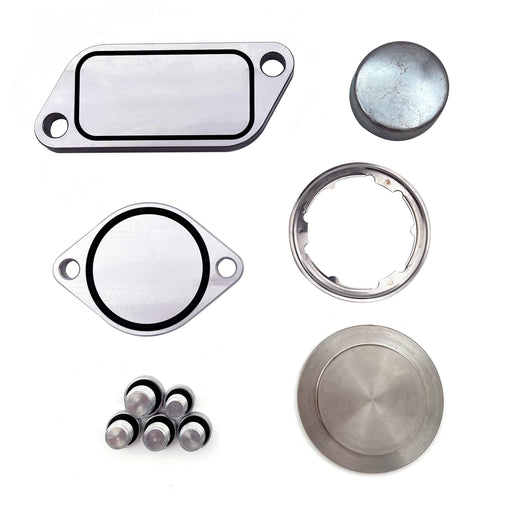
For 2010-Present Stage 2 ISX 15 CM2250 CM2350 EGR Delete Kit
SEGULEROriginal price $59.99 - Original price $59.99Original price$59.99$59.99 - $59.99Current price $59.99FITMENT 2010-Present Cummins Volvo, Peterbilt, Mack, International, Freightliner, Kenworth with the ISX15 CM2250 / CM2350 engines. DESCRIPTION P...
View full details -
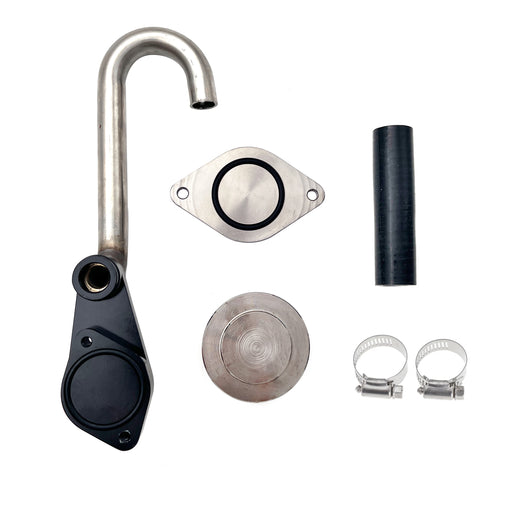
Seguler 2003-2007 6.0L FORD Powerstroke Diesel EGR Cooler Delete Kit
SEGULEROriginal price $56.14 - Original price $56.14Original price$56.14$56.14 - $56.14Current price $56.14FITMENT 2003-2007 6.0L Ford F-250 Ford F-350 F-450 F-550 Super Duty. 2003-2007 6.0L Ford Excursion SUV (Diesel Models Only). 2005-2010 Ford E-Se...
View full details -
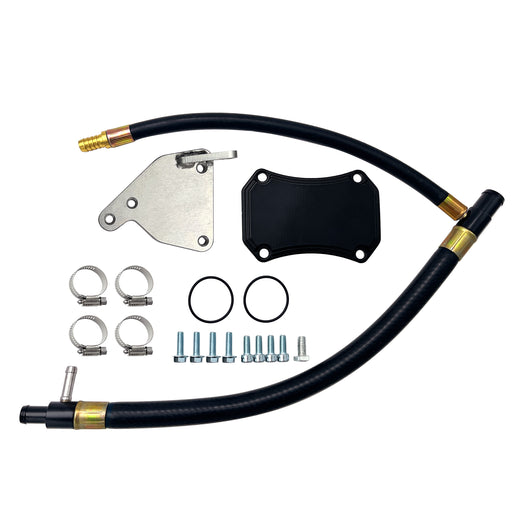
For 2011-2016 6.6L GMC Chevy Duramax Diesel LML EGR Valve Cooler Delete Kit
SEGULEROriginal price $66.49 - Original price $66.49Original price$66.49$66.49 - $66.49Current price $66.49FITMENT 2011-2016 6.6L Chevy GMC Duramax LML 2500 HD 3500 HD Diesel. DESCRIPTION Product Overview The 2011–2016 LML Duramax uses a complex EG...
View full details -
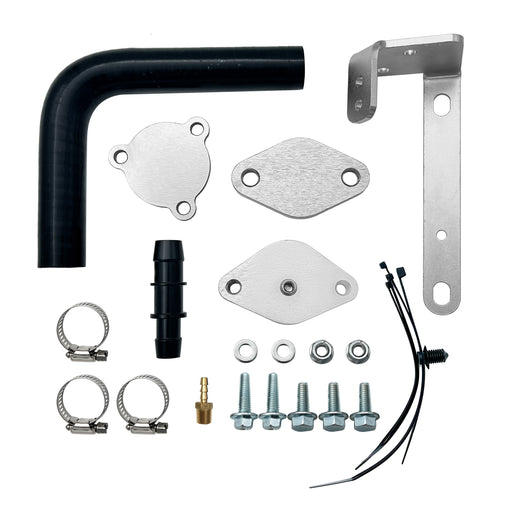
Seguler For 2014-2019 3.0L Dodge Ram 1500 EcoDiesel EGR Valve & Cooler Delete Kit
SEGULEROriginal price $72.99 - Original price $72.99Original price$72.99$72.99 - $72.99Current price $72.99FITMENT 2014-2019 3.0L Dodge Ram 1500 EcoDiesel V6 engine trucks. DESCRIPTION Product Overview Exhaust gas recirculation on 3.0L EcoDiesel V6 ...
View full details -

Seguler 2011-2023 6.7L Ford Powerstroke Diesel EGR Delete Kit
SEGULEROriginal price $85.99 - Original price $85.99Original price$85.99$85.99 - $85.99Current price $85.99FITMENT 2011-2023 6.7L Ford Powerstroke F-250 F-350 F-450 F-550 Super Duty V8 Diesel. compatible with both standard Pickups and commercial Cab &...
View full details -

Seguler 2010-2024 6.7L Dodge Ram Cummins Diesel EGR Valve Cooler Delete Kit
SEGULEROriginal price $89.99 - Original price $89.99Original price$89.99$89.99 - $89.99Current price $89.99FITMENT 2010–2024 6.7L Dodge Ram Cummins 2500 / 3500 Pickup Turbo Diesel. Note: Does NOT fit Chassis Cab 3500 / 4500 / 5500 models. DESCRIPTIO...
View full details -
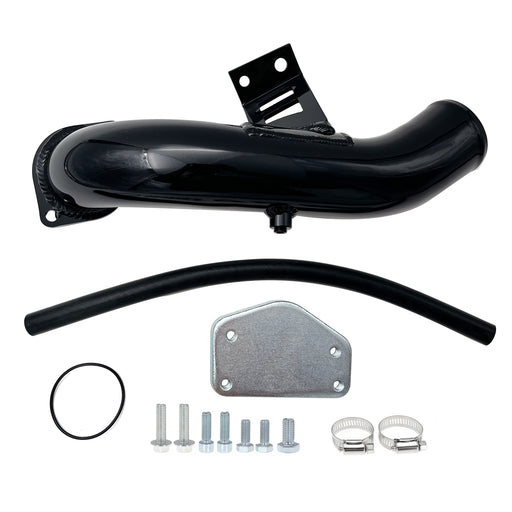
For 2004.5-2005 6.6L Chevy GMC Silverado LLY Duramax Diesel EGR Delete Kit
SEGULEROriginal price $92.99 - Original price $92.99Original price$92.99$92.99 - $92.99Current price $92.99FITMENT 2004.5-2005 6.6L Chevrolet Silverado Duramax LLY 2500HD / 3500 HD. 2004.5-2005 6.6L GMC Sierra Duramax LLY 2500HD / 3500 HD. DESCRIPTION...
View full details -

Seguler 2017-2019 L5P Duramax Diesel 4pcs L5P Can Bus Plugs Connector Replacement
SEGULEROriginal price $75.00 - Original price $75.00Original price$75.00$75.00 - $75.00Current price $75.00FITMENT 2017–2019 Chevrolet Silverado / GMC Sierra Duramax L5P 2500HD & 3500HD Diesel. DESCRIPTION Product Overview Unprotected harness con...
View full details -

Seguler 2020-2023 chevy duramax L5P Diesel Can Bus Plugs Connector
SEGULEROriginal price $80.00 - Original price $80.00Original price$80.00$80.00 - $80.00Current price $80.00FITMENT 2020–2023 Chevrolet Silverado / GMC Sierra Duramax L5P 2500HD & 3500HD Diesel. DESCRIPTION Product Overview Unprotected harness pl...
View full details -
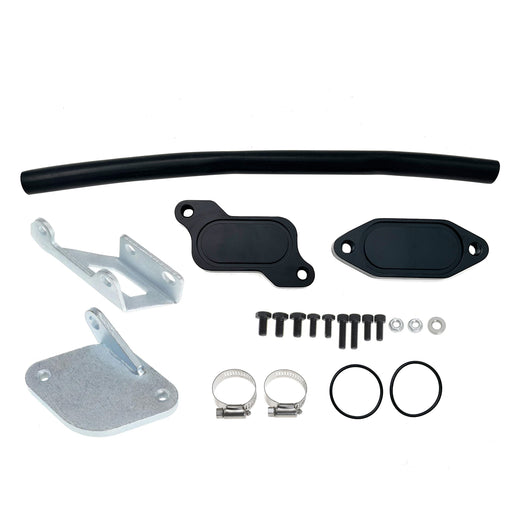
For 2006-2007 6.6L Chevrolet Silverado Classic GMC Duramax LBZ Diesel EGR Valve Cooler Delete Kit
SEGULEROriginal price $63.49 - Original price $63.49Original price$63.49$63.49 - $63.49Current price $63.49FITMENT 2006-2007.4 Chevrolet Silverado Duramax LBZ 2500HD / 3500HD. 2007.4 Chevrolet Silverado Duramax LBZ 2500HD / 3500HD Classic. 2006-2007.4 ...
View full details -
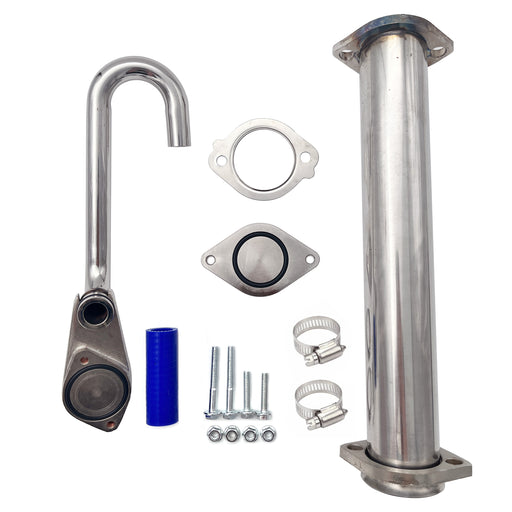
Seguler 2003-2007 6.0L Ford F250 F350 Powerstroke Diesel EGR Basic Cooler Kit
SEGULEROriginal price $79.99 - Original price $79.99Original price$79.99$79.99 - $79.99Current price $79.99FITMENT 2003-2007 6.0L Ford F250 F350 F450 F550 Super Duty Turbo (except 2004 F250 Super Duty). 2003-2005 6.0L Ford Excursion Turbo. 2005 Ford F...
View full details -

Seguler 2011-2023 6.7L Ford F250 F350 F450 F550 Powerstroke Diesel EGR Valve Delete Cooler Delete Kit
SEGULEROriginal price $55.99 - Original price $55.99Original price$55.99$55.99 - $55.99Current price $55.99FITMENT 2011-2023 6.7L Ford Powerstroke F-250 F-350 F-450 F-550 Super Duty V8 Diesel compatible with both standard Pickups and commercial Cab &a...
View full details -
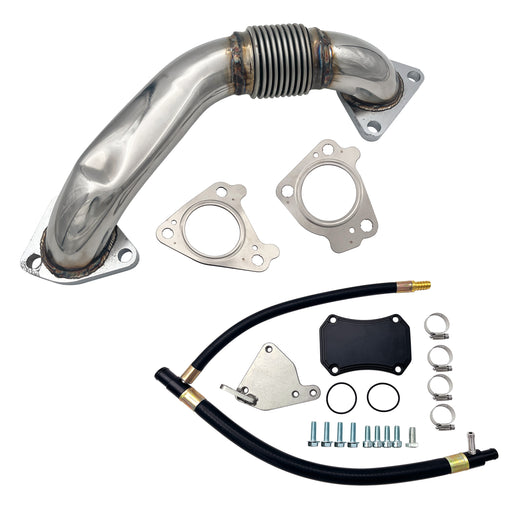
Seguler 2011-2016 6.6L GMC Chevy Duramax Diesel LML Up-Pipe & EGR Valve Cooler Delete Kit
SEGULEROriginal price $173.86 - Original price $173.86Original price$173.86$173.86 - $173.86Current price $173.86FITMENT 2011-2016 6.6L Chevy GMC Duramax LML 2500 HD 3500 HD Diesel. DESCRIPTION Product Overview Direct-injection technology endows GM 5.3L an...
View full details -
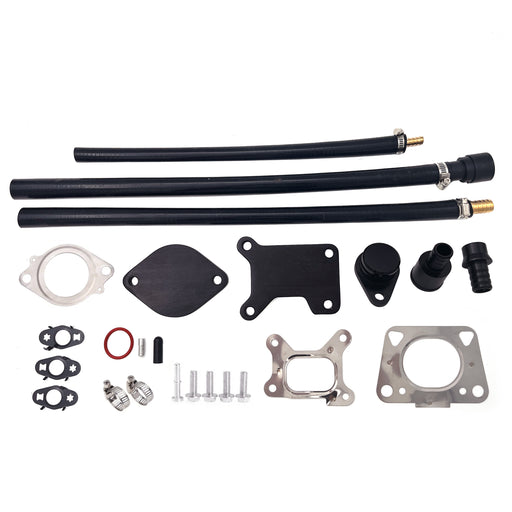
For 2017-2023 6.6L Chevy GMC Duramax L5P diesel EGR Valve Cooler Delete kit
SEGULEROriginal price $131.99 - Original price $131.99Original price$131.99$131.99 - $131.99Current price $131.99FITMENT 2017–2023 6.6L Chevrolet Silverado / GMC Sierra Duramax L5P 2500HD 3500HD Diesel. DESCRIPTION Product Overview Hot soot recirculation ...
View full details -
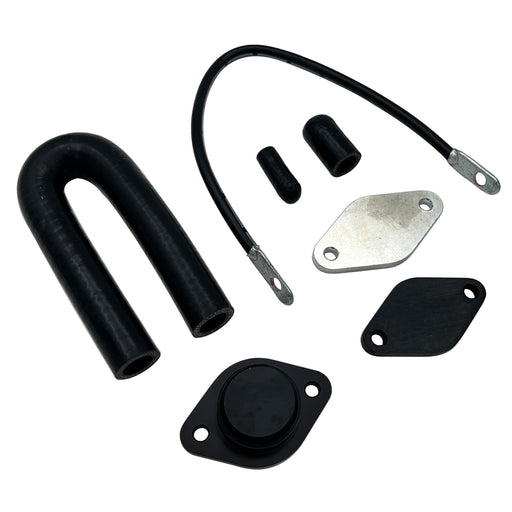
Seguler EGR valve cooler Delete kit for 2020-2022 3.0L Chevy Duramax LM2
SEGULEROriginal price $189.12 - Original price $189.12Original price$189.12$189.12 - $189.12Current price $189.12FITMENT 2020–2022 3.0L Chevrolet Silverado GMC Sierra 1500 LM2 Turbo-Diesel. DESCRIPTION Product Overview Powered by smooth inline-six engine...
View full details -
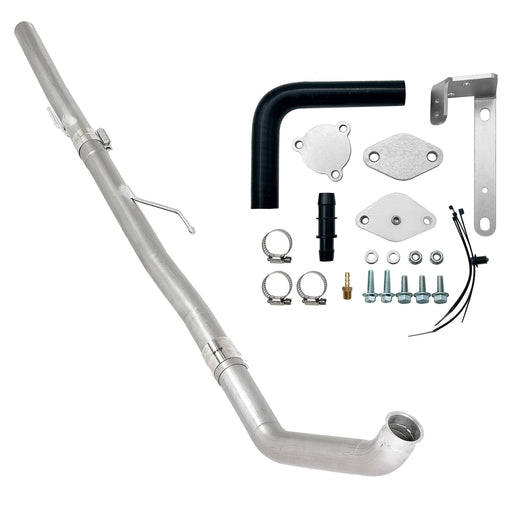
Seguler 3" Ecodiesel DPF Delete Pipe & EGR Delete kit for 2014-2018 3.0L Ram
SEGULEROriginal price $342.00 - Original price $342.00Original price$342.00$342.00 - $342.00Current price $342.00FITMENT 2014–2018 3.0L Dodge Ram 1500 EcoDiesel V6. NOTE: Fit standard Pickup models only (Crew Cab, Quad Cab). Does NOT fit Jeep Grand Cheroke...
View full details -

For 2013-2023 6.7L Dodge Ram Cummins Cab & Chassis EGR Delete Kit Diesel
SEGULEROriginal price $62.99 - Original price $62.99Original price$62.99$62.99 - $62.99Current price $62.99FITMENT 2013–2023 6.7L Ram Cummins 3500 4500 5500 Cab & Chassis / Commercial Trucks. Does NOT fit standard Ram 2500 3500 Pickups. DESCRIPTIO...
View full details -
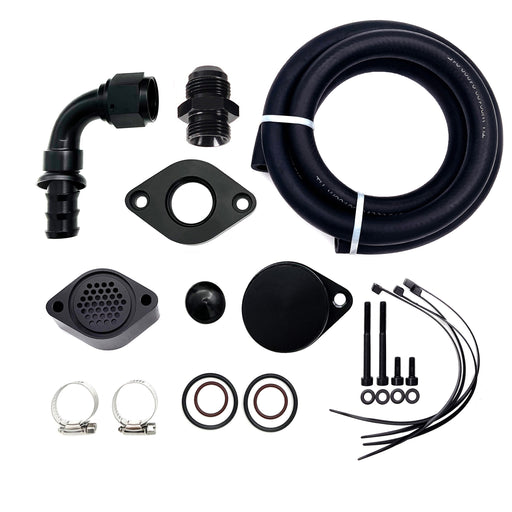
Seguler 2011-2023 6.7L Ford Powerstroke CCV PCV Reroute Engine Ventilation Kit
SEGULEROriginal price $82.99 - Original price $82.99Original price$82.99$82.99 - $82.99Current price $82.99FITMENT 2011-2023 6.7L Ford Powerstroke F-250 F-350 F-450 F-550 Super Duty V8 Diesel. Compatible with both standard Pickups and commercial Cab &...
View full details -
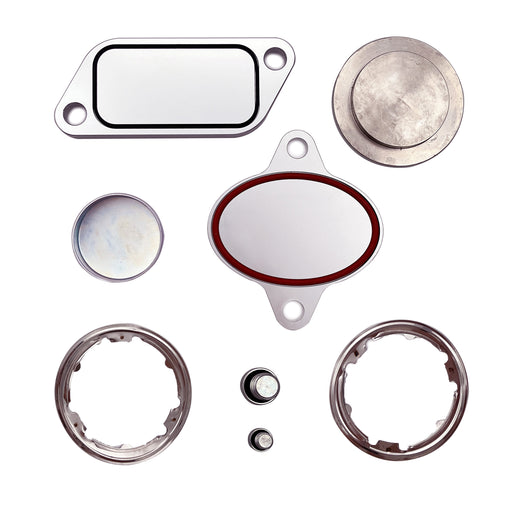
For 2007-2010 Cummins ISX CM871 EGR Plug Kit Stage 2 Plates and Plugs Aluminum
SEGULEROriginal price $67.99 - Original price $67.99Original price$67.99$67.99 - $67.99Current price $67.99FITMENT 2007-2010 Cummins Volvo, Peterbilt, Mack, International, Freightliner, Kenworth with the ISX CM871 Engines. DESCRIPTION Product Overvie...
View full details -
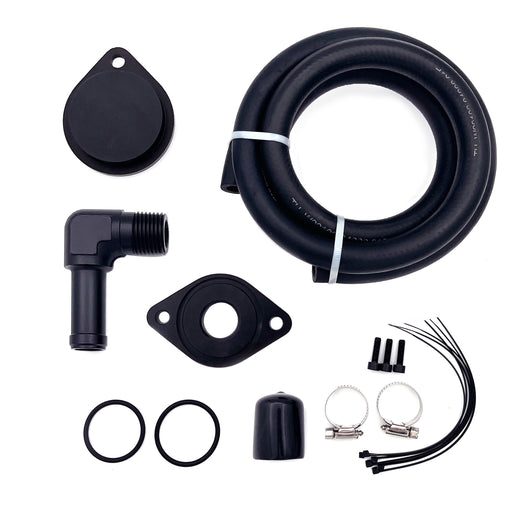
Seguler 2011-2023 Ford 6.7L Powerstroke CCV/PCV Reroute/Delete Engine Ventilation Kit
SEGULEROriginal price $72.00 - Original price $72.00Original price$72.00$72.00 - $72.00Current price $72.00FITMENT 2011-2023 6.7L Ford Powerstroke F-250 F-350 F-450 F-550 Super Duty V8 Diesel. Compatible with both standard Pickups and commercial Cab &...
View full details -
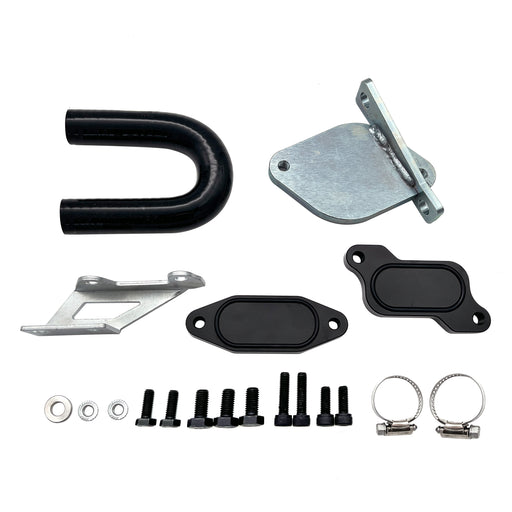
For 2007-2010 6.6L Chevy GMC LMM Duramax EGR Valve Cooler Delete Kit Fit
SEGULEROriginal price $61.99 - Original price $61.99Original price$61.99$61.99 - $61.99Current price $61.99FITMENT 2007.5-2010 6.6L Chevrolet Silverado Duramax LMM 2500HD / 3500HD. 2007.5-2010 6.6L GMC Sierra Duramax LMM 2500HD / 3500HD. Note: Standard...
View full details -
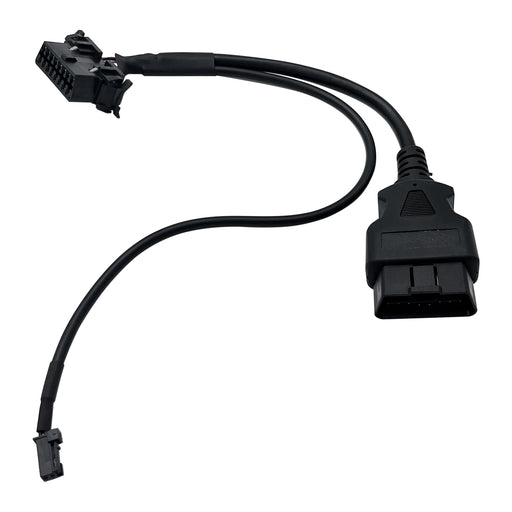
Seguler 2018+ RAM Cummins OBD2 HD Security Gate Bypass Cable
SEGULEROriginal price $45.00 - Original price $45.00Original price$45.00$45.00 - $45.00Current price $45.00FITMENT 2018+ 6.7L Ram Cummins 2500 3500 Turbo Diesel. Designed for Ram pickup trucks equipped with the factory Security Gateway Module. Note: Pl...
View full details -
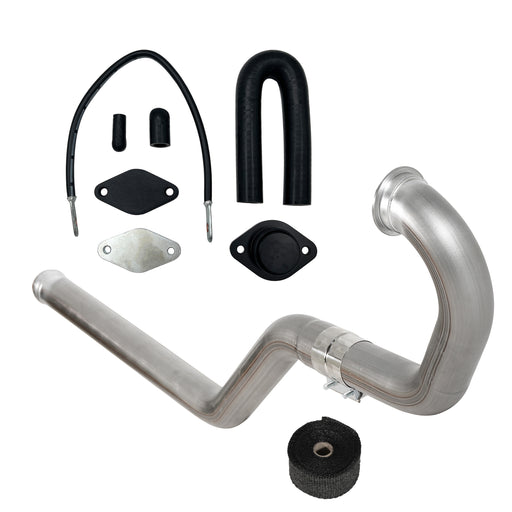
3" Turbo Back DPF & EGR Delete Kit for 2020-2022 GM 3.0L LM2 Duramax
SEGULEROriginal price $550.00 - Original price $550.00Original price$550.00$550.00 - $550.00Current price $550.00FITMENT 2020–2022 3.0L Chevrolet Silverado 1500 LM2 Diesel. 2020–2022 3.0L GMC Sierra 1500 LM2 Diesel. DESCRIPTION Product Overview On the 3.0...
View full details


Leave a comment