

Duramax Upgrade Guide for Common Problems and Performance Solutions
The 6.6L Duramax V8 has earned its reputation the hard way — by holding up to heavy trailers, long mountain grades, and years of daily abuse without complaining. It is one of the few diesel platforms that owners routinely push past 300,000 miles and still trust for hard work. But even a strong engine has weak links, and on the Duramax they cluster in one area: the exhaust path running from the manifolds up through the up-pipes, into the turbo, and out the downpipe, plus the EGR loop that feeds spent exhaust back into the intake.
Owners of 2001–2016 trucks — the LB7, LLY, LBZ, LMM, and LML generations — keep running into three problems over and over. The factory up-pipes crack at their thin flex bellows and leak boost. The factory downpipe pinches exhaust flow directly behind the turbo and traps heat where it does the most harm. And the EGR cooler sits in the path of hot exhaust and coolant, so it can eventually crack and let coolant into places it should never be.
None of these are mysterious. Each has clear symptoms, a clear cause, and a clear fix proven across thousands of trucks. This Duramax Improvement Guide walks through all three, explains how the exhaust and EGR systems work together, and lays out the hardware that addresses each section directly — so you can name the problem before you spend money on a fix.
How the Duramax Exhaust and EGR System Creates Problems
Many LML Duramax owners eventually run into the same question: why do certain exhaust and EGR components become problem areas as mileage climbs?
The answer comes down to two things the system deals with every day: extreme heat and constant soot exposure.
The exhaust system works under harsh conditions from the moment exhaust leaves the engine. The factory up-pipes use flexible bellows to handle normal expansion and contraction, but after thousands of heat cycles, those thin sections can weaken and develop leaks. Once exhaust starts escaping before reaching the turbo, owners may notice reduced performance, louder exhaust noise, or signs of a failing component.
The downpipe is another area where factory design focuses more on packaging than maximum airflow. On LML Duramax trucks, the tight bends and restricted factory routing can increase heat retention and exhaust restriction around the turbo area.
The EGR system adds another challenge. It redirects a portion of exhaust gas back into the intake to help control emissions, but that exhaust also carries soot. Over time, soot mixes with oil vapor inside the intake system and can create buildup in the EGR components and airflow passages.
Understanding this exhaust and EGR path explains why these parts become common upgrade points on the LML Duramax. Instead of focusing on one single failure, this guide looks at how heat, exhaust flow, and soot buildup work together — and why many owners choose upgraded components for long-term durability.
The Three Problems That Send Duramax Owners Looking for Answers
Cracked Up-Pipe Flex Bellows
The most common exhaust complaint on the Duramax is also one of the hardest to catch at first, because it only really shows up under load. The factory up-pipe flex bellows are thin and expected to absorb all of the thermal movement between the engine and the turbo. Over time they fatigue, crack, and start leaking.
When a bellow cracks, exhaust escapes before it reaches the turbo — lost drive pressure the turbo needs to build boost. The result is a truck that feels soft on acceleration, makes a metallic screech or high-pitched whistle under heavy throttle, and runs higher EGTs because the turbo is working harder to make the same boost from less available energy. Soot is the telltale sign: black stains on the firewall or the back of the engine block, right where the bellow sits. The failure is purely mechanical — thin stainless asked to flex constantly eventually work-hardens and fractures, and once it does the leak only gets worse.
A Pinched Factory Downpipe
The downpipe carries exhaust from the turbo down to the rest of the system, and on the LML it is a genuine bottleneck. The factory piece uses tight bends and flattened sections that choke the turbine’s ability to evacuate exhaust gas, so backpressure builds, heat stays trapped around the turbo, and EGTs climb — especially towing heavy up a grade.
A restricted downpipe does not fail dramatically the way an up-pipe does; it quietly costs you performance and heat margin for the life of the truck. It is a heat problem as much as a flow problem, because the trapped heat soaks back into the turbo and surrounding components. That is why the downpipe is so popular with owners who tow — it is less about peak horsepower and more about keeping temperatures in a safe range on a long grade.
EGR Cooler Failure
The EGR cooler gives a lot of Duramax owners the most anxiety, and for good reason. It sits in the path of both hot exhaust gas and engine coolant, using the coolant to pull heat out of the exhaust before it is fed back into the intake — exhaust on one side, coolant on the other, and a thin wall in between.
When that wall cracks after enough thermal cycling, coolant leaks into the intake side. That shows up as mystery coolant loss with no visible puddle, white smoke from the exhaust, and in the worst case, enough coolant in the cylinders to cause serious damage. It is one of the few failures on these trucks that can go from “I think I smell something” to “the engine won’t turn over” in a hurry, which is why so many LML owners treat the cooler as a scheduled replacement rather than waiting for symptoms.
Signs Your Duramax Is Trying to Tell You Something
Each problem has its own signature, and learning to read them is the fastest way to avoid throwing parts at a problem that is not there.
On the exhaust side, a cracked up-pipe shows up as a metallic screech or whistle under acceleration, a loss of boost you can feel in the pedal, higher towing EGTs, and soot staining around the bellow. A restricted downpipe is quieter — mostly elevated EGTs under load and a turbo that feels lazier than it should at low RPM. On the EGR side, watch for a coolant level that drops with no visible leak, a sweet smell that comes and goes, white smoke, or a rough start after the truck sits.
These symptoms overlap in confusing ways, so the short version is: soot on the firewall or a screech under load points to the up-pipe; high EGTs on grades with no obvious leak point to the downpipe; coolant loss, white smoke, or a sweet smell points to the EGR cooler. If more than one is true, address the leak first — a boost leak masks everything downstream of it.
What Leaving These Problems Alone Costs You
None of these problems gets better on its own, and all of them get more expensive the longer they are ignored. A cracked up-pipe starts as a small boost leak but only grows, and a turbo working harder to make up lost drive pressure runs hotter and wears faster. A restricted downpipe does not fail suddenly, but its elevated EGTs are a slow tax on the turbo, valves, and pistons every time the truck pulls a grade. A leaking EGR cooler is the most urgent, because a small internal coolant leak can turn into a serious engine problem without much warning.
The frustrating part is that all three announce themselves early, in ways that are easy to miss. The boost leak screeches under load, the EGTs climb on long pulls, and the coolant level drops a little more each month. Catching those signals early and addressing the right section — the whole point of this Duramax Improvement Guide — is dramatically cheaper than waiting for a failure to force the issue.
Know Your Generation: The Fitment Split That Trips Up Duramax Owners
This is the single biggest mistake Duramax owners make when buying exhaust and EGR hardware, and it is worth drilling into before you order anything.
GM made small but critical changes across the 2001–2016 run that mean parts do not always cross generations — even when they look close.
| Component | LB7 (2001–2004) | LLY–LMM (2004.5–2010) | LML (2011–2016) |
|---|---|---|---|
| EGR from the factory | No | Yes | Yes |
| Exhaust Up-Pipe | Non-EGR config | EGR or non-EGR config | EGR or non-EGR config |
| 3" Downpipe (this kit) | — | — | 2011–2015.5 (V-band) |
| EGR Delete Kit (this kit) | — | — | 2011–2016 |
What the table tells us:
The up-pipe is the only part here that spans the entire 2001–2016 run, because all five generations — LB7, LLY, LBZ, LMM, and LML — used a similar flex-bellow design in roughly the same location. The catch is the EGR configuration: the LB7 (2001–2004) never had an EGR cooler from the factory, so it takes the non-EGR up-pipe, while the LLY-through-LML trucks use the EGR-compatible version unless the EGR has been removed.
The downpipe and EGR delete kit are LML-only. Earlier trucks are a different platform when it comes to the turbo outlet and the EGR cooler arrangement, so those two parts do not cross back into LB7–LMM territory.
The downpipe split is the one to watch:
Within the LML run itself, the factory flange changed partway through. The 2011–2015.5 trucks use a V-band connection at the turbo outlet, while the later 2015.5–2016 trucks moved to a three-bolt flange. The two are not interchangeable without modifying the downstream system, so a 3" downpipe made for the V-band trucks will not bolt onto the later three-bolt trucks as-is.
Bottom line:
Match the part to your year. If you are on a 2011–2015.5 LML, the V-band downpipe fits; if you are on a 2015.5–2016, it does not. And if you own an LB7–LMM, the up-pipe is the relevant piece — not the downpipe or the EGR kit.
What to Look for in Quality Exhaust and EGR Hardware
Once you have identified which section is causing the problem, the next step is choosing hardware that will actually hold up. The diesel exhaust environment is unforgiving — extreme heat, constant thermal cycling, road salt, and vibration all work against cheap parts.
The first thing to check is material. Exhaust components should be stainless steel, ideally a heavier gauge that survives constant expansion and contraction without cracking the way the thin factory pieces do. On the EGR side, the intake and exhaust plates that seal off the deleted cooler path should be made from materials that resist both heat and corrosion.
The second is how the tubing is formed. A quality up-pipe or downpipe is mandrel-bent, which keeps the inside diameter consistent through every curve; the factory pieces are often crush-bent, which pinches the tube at the bends and reduces flow.
The third is the flex section itself. On an up-pipe, the flex bellow is the part that fails, so a quality replacement uses a heavy-duty interlocking mesh bellow that can absorb movement without cracking — the single most important difference between a part that leaks again in a year and one that stays sealed.
Finally, on a deleted EGR setup, the coolant path matters. The factory EGR cooler is part of the cooling loop, so simply capping the ports can leave coolant with nowhere to go. Quality hardware provides a defined reroute path so the cooling system keeps circulating normally.
Put that together and the checklist is short: stainless construction, mandrel-bent tubing, an interlocking mesh bellow, and a defined coolant reroute. If a part checks those boxes, it is built for the environment it will live in; if it skips one, you are saving money in exactly the place that matters most — the trade-off this Duramax Improvement Guide keeps circling back to.
The Upgrade Path Most Owners Actually Follow
Nobody does all three of these at once. Most Duramax owners work through them in a rough order, driven by what breaks first and what the truck is used for — and that order is what this Duramax Improvement Guide maps out below.
The up-pipe is usually the first stop, because the boost leak announces itself the loudest and the fix is straightforward. A lot of trucks that feel soft or noisy under load turn out to have a cracked bellow, and replacing it is the single highest-impact exhaust fix on the earlier platforms.
The downpipe tends to come next, often on trucks that tow, because the owner has already noticed EGTs climbing on grades and wants the heat margin back. It pairs naturally with an up-pipe, since both live on the same path and both are bolt-on parts that do not require a tune.
The EGR delete is the most considered decision, because it changes the intake-side system rather than just the exhaust path. Owners typically get there after seeing the coolant-loss warning signs, or because they are already in there doing an up-pipe and want to remove the now-useless EGR riser branch at the same time. The ordering is not a rule — the three sections are rarely treated as an all-or-nothing bundle, just worked through one at a time as symptoms point the way.
Seguler Solutions for the Common Duramax Problems
Each of those problems has a straightforward hardware fix, and the three parts below each target one section of the exhaust and EGR path. You do not need all three at once — start with whichever one matches what your truck is actually doing, and let the symptoms point the way.
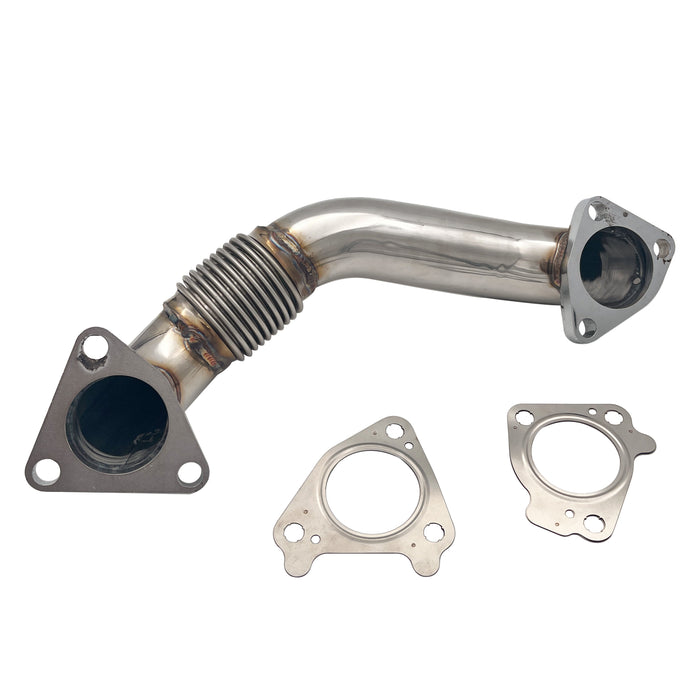
Seguler 2001-2016 6.6L Chevrolet Chevy GMC Duramax LB7 LLY LBZ LMM LML Exhaust Up-Pipe
Exhaust Up-Pipe Upgrade is designed for 2001–2016 6.6L Duramax diesel trucks equipped with LB7, LLY, LBZ, LMM, and LML engines to replace the factory exhaust up-pipe components. The OEM up-pipes are exposed to extreme exhaust heat, pressure changes, and repeated thermal cycles, which can lead to cracks, exhaust leaks, and reduced exhaust flow as trucks accumulate mileage.
The exhaust up-pipe plays an important role in directing exhaust gases from the manifolds to the turbocharger. Replacing worn factory components helps restore proper exhaust flow, reduce potential leak points, and provide a more durable solution for towing, daily driving, and heavy-duty diesel applications. Designed as a direct-fit replacement, this Exhaust Up-Pipe upgrade helps address common factory weak points across multiple generations of 6.6L Duramax trucks.
Key points:
- Extreme heat and corrosion resistance with heavy-gauge stainless steel construction to withstand high temperatures, thermal expansion, towing stress, and harsh road conditions.
- Improved exhaust flow with thick-wall mandrel-bent tubing to help reduce restriction and deliver consistent exhaust energy to the turbocharger.
- Durable flex bellow design to address common OEM cracking, exhaust leaks, soot buildup, and noise caused by failed factory components.
- Direct bolt-on replacement with precision-fit mounting points designed to match factory manifolds and turbo configurations.
Seguler 2011-2015.5 Chevy/GMC 6.6L Duramax LML Turbo Diesel 3Inch Downpipe Exhaust
The 3" Downpipe Exhaust Upgrade is designed for 2011–2015 6.6L Chevrolet Chevy GMC LML Duramax diesel trucks to replace the factory downpipe section and improve exhaust flow between the turbocharger and the rest of the exhaust system. The original downpipe design can create restrictions in the exhaust path, especially under heavy load and towing conditions, affecting overall exhaust efficiency and heat management.
The exhaust downpipe plays an important role in directing hot exhaust gases away from the turbocharger. Replacing the factory component with a durable 3-inch design helps reduce potential restriction, improve exhaust flow consistency, and provide a more reliable exhaust system configuration for daily driving, towing, and heavy-duty diesel applications.

Key points:
- Heavy-duty mandrel-bent construction with stainless steel materials designed to withstand extreme heat cycles, road salt, and harsh driving conditions.
- Improved exhaust flow with a smooth 3-inch high-flow design that helps reduce restriction and improve turbocharger exhaust efficiency.
- Replaces the restrictive factory downpipe with precision-fit tubing to address OEM design limitations and support better exhaust system performance.
- High-temperature thermal protection wrap helps reduce heat transfer to nearby components, including the transmission area, cab floor, and surrounding wiring.
The exhaust downpipe is an important part of how the 6.6L Duramax manages exhaust flow and turbocharger operation under different driving conditions. As LML Duramax trucks accumulate mileage and continue to experience high exhaust temperatures and heavy-duty use, understanding how exhaust restrictions, heat transfer, and factory components affect overall system operation helps owners better evaluate long-term maintenance needs and the condition of their diesel platform.
2011-2016 6.6L GMC Chevy Duramax Diesel LML EGR Valve Cooler Delete Kit
The 6.6L Duramax EGR Delete Kit is designed for 2011–2015 Chevrolet Silverado and GMC Sierra 2500HD/3500HD trucks equipped with the LML Duramax diesel engine to address the factory EGR valve, cooler, and related components. By replacing the original EGR system, it helps simplify the exhaust recirculation setup and reduces the amount of soot and exhaust residue introduced back into the intake system over time.
The EGR system operates under continuous exposure to high exhaust temperatures, coolant flow, and repeated heat cycles, making it an area many Duramax owners monitor as mileage increases. Replacing the factory EGR components helps reduce heat-related stress from exhaust gas recirculation, maintain a cleaner intake-side environment, and provide a more straightforward configuration for heavy-duty diesel applications.

Key points:
The Three Products Side by Side
| Part | Part # | Fits | What it solves | Standout feature |
|---|---|---|---|---|
| Exhaust Up-Pipe | SG-DP-0009 | 2001–2016 LB7–LML | Cracked flex bellow / boost leak | Interlocking mesh bellow |
| 3" Downpipe | SG-DP-0013 | 2011–2015.5 LML (V-band) | Pinched flow / high EGTs | Mandrel-bent stainless |
| EGR Delete Kit | SG-ER-0031 | 2011–2016 LML | Cooler failure / soot sludge | CNC plates + coolant reroute |
How These Parts Sit in the Market
The three parts covered here sit in a busy aftermarket, and the price spread from one seller to the next is wider than most people expect. A part that looks identical in a thumbnail can be quoted at very different numbers, and that gap is rarely just brand markup — it usually reflects what the part is actually built from and what ships in the box.
Read a price difference by working backward from the job. Diesel exhaust and EGR hardware lives in extreme heat, constant thermal cycling, road salt, and vibration, and the parts that hold up are built heavier and formed more carefully — which costs more up front. A listing at the bottom of the range is usually skipping one of those steps, whether it is thinner material, a simpler flex section, or no gaskets and hardware in the box. None of that is automatically a problem, but it does mean the lower number is not apples-to-apples with a part built to survive the same environment.
The useful question is not who sells it cheapest, but what you are actually getting for the number. Three checks answer that every time: the material grade and wall thickness, the flex-bellow construction on the up-pipe, and whether fresh gaskets and mounting hardware are included. Run the same three checks against any two listings and the price difference usually explains itself.
There is no single correct price — only a specification the job demands. Paying for the right specification is cheaper than paying twice, which is exactly what happens when a part leaks again inside a year and has to come back out.
What These Problems Look Like on a Real Truck
The symptoms in this Duramax Improvement Guide are easiest to recognize when you see them play out the way they actually do on the road, rather than as a checklist in the abstract.
Take a towing LML. The owner runs a fifth-wheel trailer through the mountains every summer, and for a while everything is fine. Then, on a long climb, the truck starts making a metallic screech under load and the EGT gauge sits noticeably higher than it used to at the same speed. A quick look under the hood finds soot staining on the passenger side of the firewall. That is a cracked up-pipe bellow doing exactly what a boost leak does — robbing the turbo of drive pressure and running everything hotter.
Now take an older LBZ that mostly works light duty but hauls a boat on weekends. The owner notices the coolant reservoir needs topping off every month, but there is no puddle on the driveway, and the truck starts a little rough after sitting. That combination — coolant loss without a visible leak — is the EGR cooler’s calling card, even on a truck that is not worked hard.
Finally, take an LML that already had its up-pipe done but still runs hot EGTs on grades. The boost leak is fixed, but the restriction behind the turbo is still there, pinching the flow and holding heat in. Adding the downpipe is what finally brings the temperatures down on the same climb.
Three different trucks, three different starting points, but the pattern is the same: name the symptom, find the section, fix the section. That is the entire method this Duramax Improvement Guide is built around.
How These Three Upgrades Fit Together
The three sections are related in a way that is easy to miss if you think of them as separate parts. The exhaust gas flows through the up-pipes, into the turbo, out the downpipe, and a portion of it loops back through the EGR system into the intake. Touch one section and you change what the others see.
The cleanest way to think about it is as three layers of the same path. The up-pipe feeds the turbo from the front; if it leaks, the turbo starves for drive pressure no matter how good the downpipe is. The downpipe evacuates the turbo from the back; if it is pinched, heat and pressure back up through the whole system. And the EGR loop is the side path that feeds exhaust back into the intake, where it does slow, steady damage in the form of soot and sludge.
This is why the upgrades compound. An EGR delete works best when the up-pipe’s now-useless riser branch is also removed. A downpipe delivers the most benefit when the up-pipe is sealing properly and the turbo is getting the drive pressure it needs. Done together, the three sections address the front, the back, and the side of the exhaust path in one pass — which is exactly how this Duramax Improvement Guide frames the whole approach.
You do not have to do all three at once. The right move is to identify which section is actually causing your problem and start there. But understanding how they connect helps you avoid the common trap of fixing one leak only to have the next restriction in line still holding the truck back.
Installation Steps
All three upgrades are mechanical bolt-on parts, and none of them requires a custom ECM tune to work on its own. The steps below describe the general flow for each one. None of these jobs needs a torque value pulled from memory — use your factory service information and the kit’s included instructions for the exact numbers, and check for leaks when everything is back together.
Up-Pipe Installation
Step 1. Disconnect the negative battery terminal and let the exhaust system cool completely. Apply penetrating oil to the manifold and up-pipe fasteners ahead of time.
Step 2. Remove the front wheel and inner fender liner on the side you are working on to open up access, and reposition anything in the way such as the transmission dipstick tube.
Step 3. Remove the heat shield and any temperature sensor, then unbolt the factory up-pipe from the exhaust manifold and the turbo.
Step 4. Clean the cylinder head and flange sealing surfaces, and remove any old gasket material without gouging the metal.
Step 5. Position the new up-pipe with a fresh gasket, start every fastener by hand to avoid cross-threading, and leave them loose until the flanges are aligned.
Step 6. Torque the up-pipe fasteners to the kit’s specified value — commonly referenced around 39 ft-lb for the pipe-to-manifold and pipe-to-turbo connections, but always confirm against your service information. Reinstall the heat shield, liner, and wheel, then start the engine and check for exhaust leaks.
Downpipe Installation
Step 1. Confirm which flange your LML uses — the V-band outlet on 2011–2015.5 trucks, or the three-bolt flange on later 2015.5–2016 trucks. This downpipe is built for the V-band trucks.
Step 2. Let the exhaust cool, then disconnect the battery.
Step 3. From underneath, separate the turbo outlet connection and the front-pipe connection.
Step 4. Work the factory downpipe out and the new one into place, keeping the V-band clamp aligned as you go.
Step 5. Tighten both connections to the kit’s specified torque, then start the engine and check for leaks at the turbo outlet and the front pipe.
EGR Delete Kit Installation
Step 1. Disconnect the battery and let the engine cool, then relieve the cooling system pressure.
Step 2. Remove the EGR valve and cooler assembly, and clean the sealing surfaces thoroughly.
Step 3. Install the intake plate and exhaust plate with new gaskets, starting the fasteners by hand before tightening.
Step 4. Route the included coolant hose to maintain the cooling loop. If you are also running a delete-configured up-pipe, remove the now-unused EGR riser branch at the same time.
Step 5. Refill and burp the cooling system, then start the engine and check for coolant and exhaust leaks.
None of this requires exotic equipment — basic hand tools cover most of it, with an afternoon to a full weekend of time depending on how deep you go and how much access you have. The up-pipe is the most physical because of the tight access behind the engine, while the downpipe is largely a matter of working the old pipe out from underneath. The EGR delete adds the coolant work on top, which is why it is worth setting aside the extra time to do the refill and burp carefully.
Common Installation & Setup Mistakes
A few missteps are common enough to be worth naming before you start.
Mistake 1: Getting the flange year wrong.
The 3" downpipe only fits the 2011–2015.5 LML trucks that use a V-band connection at the turbo outlet. The later 2015.5–2016 trucks moved to a three-bolt flange, and the two do not interchange without modifying the downstream system. The fix: confirm the connection style before you order, and again before you start.
Mistake 2: Reusing old gaskets.
Gaskets are one-time-use crush components. A flattened or damaged gasket is a shortcut that shows up as an exhaust or coolant leak a few hundred miles later, which means taking everything apart again. The fix: fit fresh gaskets and clean the sealing surfaces before assembly.
Mistake 3: Over-tightening the fasteners.
These parts seat against cast-iron manifolds and thin stainless flanges. Going past the specified torque can strip threads or warp a flange, and the damage may not show up until the joint fails under heat. The fix: use the kit’s torque spec or your factory service information, not feel.
Mistake 4: Ignoring the coolant path on an EGR delete.
The factory cooler is part of the cooling loop, so simply capping the ports can leave a dead end that traps air or pressure. The reroute hose is not an optional extra — it is the difference between a clean delete and a cooling system that misbehaves later. The fix: route the included hose before you refill and burp the system.
Mistake 5: Leaving the EGR riser branch in place.
Once the EGR is gone, that branch on the up-pipe is dead weight and a future leak point. It is far easier to address it while everything is already apart than to go back in later. The fix: if you are running a delete-configured up-pipe, remove the now-unused branch at the same time.
Mistake 6: Skipping the post-install leak check.
It is tempting to call the job done once everything is bolted up, but a small leak at an exhaust joint, coolant line, or gasket surface is far cheaper to catch now than on the side of the road. The fix: start the engine and check every connection before you button everything back up.
What to Expect After the Upgrade
What you notice first depends on which section you fixed. An up-pipe replacement removes the boost leak, so throttle response sharpens and the metallic screech under load goes away. A downpipe replacement is felt more in towing EGTs and low-RPM turbo response than in raw seat-of-the-pants power. An EGR delete stops the soot loop, removes the coolant-leak risk, and frees up space in the engine bay.
None of these parts turn a Duramax into a race truck by themselves, and this Duramax Improvement Guide is not going to promise numbers it cannot back up. What they do is remove specific, well-documented weaknesses and let the engine work the way it was always capable of working. For most owners, that is exactly what they are after: fewer failure points, cooler towing temperatures, and a truck that stops leaking boost and coolant.
Frequently Asked Questions
Q1: What are the main symptoms of a cracked Duramax up-pipe?
A loud metallic screech or whistle under hard acceleration is the classic sign, along with a loss of turbo boost, soot buildup on the firewall or the back of the engine block, and higher towing EGTs. Because the leak only really opens up under load, it is easy to miss at idle or light throttle.
Q2: Do these exhaust upgrades require a custom ECM tune?
No. The up-pipe and the downpipe are purely mechanical bolt-on parts that replace factory tubing, and they work safely on a completely stock tune. The EGR delete changes the intake-side path, and on the LML it is normally done as part of a broader plan that includes proper calibration, but the hardware itself is mechanical.
Q3: Can the up-pipe and downpipe be installed with the engine still in the truck?
Yes. The up-pipe is the tighter job because the access is behind the engine, but removing the inner fender liners and the downpipe opens up enough room to work without pulling the engine or the cab. The downpipe itself is accessible from underneath once the turbo outlet and the front pipe are separated.
Q4: Does the EGR delete kit fully remove the cooler, or just block it off?
It is a complete cooler removal kit. The entire dual-cooler assembly comes out of the engine bay, which frees up a large amount of space on the passenger side and removes the cooler as a failure point rather than just capping it in place.
Q5: Why does the EGR delete kit include a coolant hose?
The factory EGR cooler is part of the cooling loop, so once it is removed the coolant needs a defined path to keep circulating. The included three-terminal hose connects the heater core and engine coolant ports together to maintain a leak-free bypass with no cooling issues.
Q6: Why is it recommended to change the up-pipe at the same time as the EGR delete?
The factory up-pipe on an EGR-equipped truck has a bulky EGR riser branch that becomes useless once the EGR is deleted. Swapping to a delete-configured up-pipe removes that branch and the future leak point it represents, and it is much easier to do while everything is already apart.
Q7: Will the downpipe fit a 2016 LML?
The downpipe covered here is built for the 2011–2015.5 LML trucks with the V-band turbo outlet. The later 2015.5–2016 trucks used a three-bolt flange exhaust system, so they are not a direct fit unless the downstream system is modified. Confirm the flange type before ordering.
Q8: Do I have to do all three upgrades at once?
No. The right approach is to identify which section is actually causing your problem and start there. The three sections work together, but each one is a complete fix on its own, and there is no requirement to do them all in a single pass.
Q9: What should I look for in a quality up-pipe so it does not crack again?
The flex bellow is the part that fails, so look for a heavy-duty interlocking mesh stainless bellow rather than another thin section. Heavy-gauge stainless construction and mandrel-bent tubing are also worth checking, since crush-bent tubing and thin material are what set up the original failure in the first place.
Q10: Will these changes affect the exhaust sound?
An up-pipe or downpipe replacement usually makes the turbo spool slightly more audible and can give the exhaust a slightly deeper tone, but it should not create the kind of interior drone that becomes annoying on the highway. The EGR delete does not meaningfully change the exhaust note by itself.
Bottom Line
The Duramax is a strong platform, but its long-term reputation is shaped less by the engine itself and more by the handful of weak points around it — the up-pipes, the downpipe, and the EGR cooler. The good news is that all three are well understood, and each has a direct, proven fix.
This Duramax Improvement Guide is built around a simple idea: name the symptom first, then address the section that is actually causing it. A cracked up-pipe is a boost leak. A pinched downpipe is a heat and restriction problem. A failing EGR cooler is a coolant-in-the-intake problem. Each one maps to a specific piece of hardware, and each one is a mechanical fix that does not require a tune by itself.
Whether you are sealing a boost leak, dropping towing EGTs, or removing the EGR cooler before it fails, the three sections covered here — the up-pipe, the downpipe, and the EGR delete — are where most Duramax owners find the biggest gains and the fewest headaches. Fix the section that is actually broken first, and the rest of the truck will thank you for it.
If you are ready to address one of these common Duramax problems, explore the exhaust up-pipe, the 3" performance downpipe, and the EGR valve cooler delete kit to find the section that matches your symptoms.
Shop These Duramax Upgrades at Seguler
- 6.6L Duramax Exhaust Up-Pipe (SG-DP-0009) — a heavy-duty flex-bellow replacement for the 2001–2016 LB7/LLY/LBZ/LMM/LML generations.
- LML 3" Performance Downpipe (SG-DP-0013) — a mandrel-bent stainless tube for the 2011–2015.5 V-band LML trucks.
- LML EGR Valve Cooler Delete Kit (SG-ER-0031) — a complete cooler removal with a coolant reroute for the 2011–2016 LML.
Browse the full catalog at Seguler.
Featured collection
-
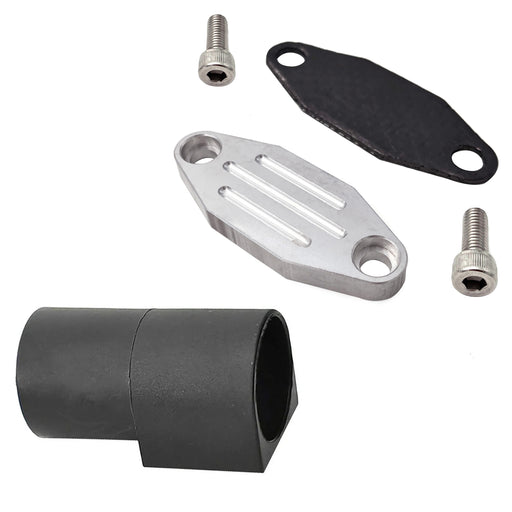
Seguler 1986-1995 Ford F150 F250 F350 Mustang Trucks EGR Simulator Eliminator / Block Off Plate Kit
SEGULEROriginal price $79.99 - Original price $79.99Original price$79.99$79.99 - $79.99Current price $79.99Block Off Plate Material: Aluminum alloy. Easy installation,and convenient to use. Made of CNC milled from aircraft grade Billet aluminum. Will N...
View full details -

Seguler 2011-2023 6.7L Ford Powerstroke Diesel EGR Delete Kit
SEGULEROriginal price $109.99 - Original price $109.99Original price$109.99$109.99 - $109.99Current price $109.99FITMENT 2011-2023 6.7L Ford Powerstroke F-250 F-350 F-450 F-550 Super Duty V8 Diesel. compatible with both standard Pickups and commercial Cab &...
View full details -
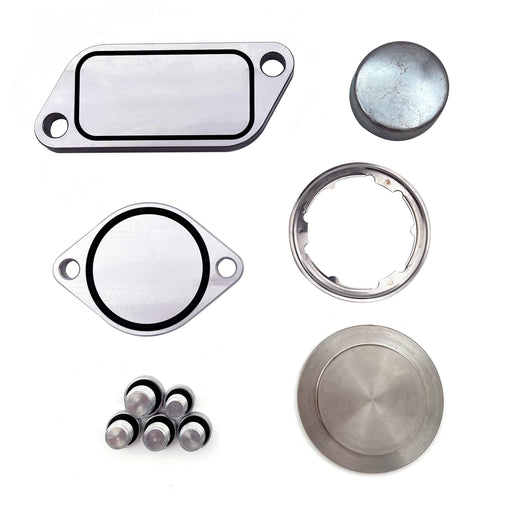
For 2010-Present Stage 2 ISX 15 CM2250 CM2350 EGR Delete Kit
SEGULEROriginal price $59.99 - Original price $59.99Original price$59.99$59.99 - $59.99Current price $59.99FITMENT 2010-Present Cummins Volvo, Peterbilt, Mack, International, Freightliner, Kenworth with the ISX15 CM2250 / CM2350 engines. DESCRIPTION P...
View full details -
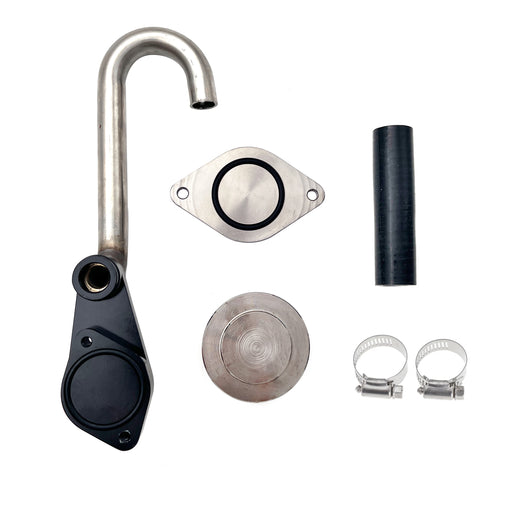
Seguler 2003-2007 6.0L FORD Powerstroke Diesel EGR Cooler Delete Kit
SEGULEROriginal price $56.14 - Original price $56.14Original price$56.14$56.14 - $56.14Current price $56.14FITMENT 2003-2007 6.0L Ford F-250 Ford F-350 F-450 F-550 Super Duty. 2003-2007 6.0L Ford Excursion SUV (Diesel Models Only). 2005-2010 Ford E-Se...
View full details -
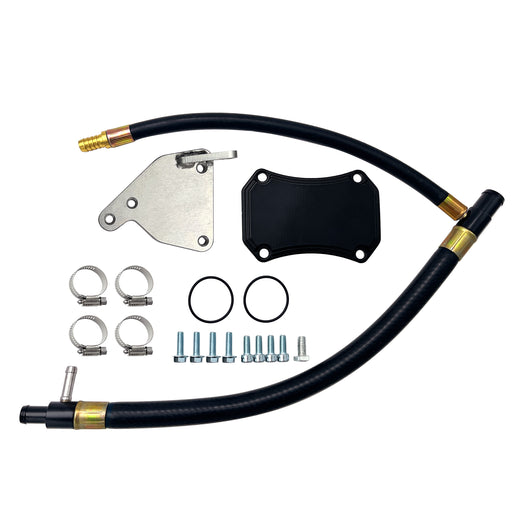
For 2011-2016 6.6L GMC Chevy Duramax Diesel LML EGR Valve Cooler Delete Kit
SEGULEROriginal price $66.49 - Original price $66.49Original price$66.49$66.49 - $66.49Current price $66.49FITMENT 2011-2016 6.6L Chevy GMC Duramax LML 2500 HD 3500 HD Diesel. DESCRIPTION Product Overview The 2011–2016 LML Duramax uses a complex EG...
View full details -
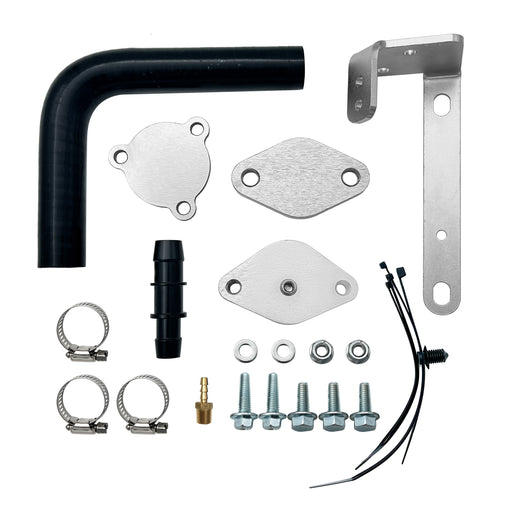
Seguler For 2014-2019 3.0L Dodge Ram 1500 EcoDiesel EGR Valve & Cooler Delete Kit
SEGULEROriginal price $72.99 - Original price $72.99Original price$72.99$72.99 - $72.99Current price $72.99FITMENT 2014-2019 3.0L Dodge Ram 1500 EcoDiesel V6 engine trucks. DESCRIPTION Product Overview Exhaust gas recirculation on 3.0L EcoDiesel V6 ...
View full details -

Seguler 2011-2023 6.7L Ford Powerstroke Diesel EGR Delete Kit
SEGULEROriginal price $85.99 - Original price $85.99Original price$85.99$85.99 - $85.99Current price $85.99FITMENT 2011-2023 6.7L Ford Powerstroke F-250 F-350 F-450 F-550 Super Duty V8 Diesel. compatible with both standard Pickups and commercial Cab &...
View full details -

Seguler 2010-2024 6.7L Dodge Ram Cummins Diesel EGR Valve Cooler Delete Kit
SEGULEROriginal price $89.99 - Original price $89.99Original price$89.99$89.99 - $89.99Current price $89.99FITMENT 2010–2024 6.7L Dodge Ram Cummins 2500 / 3500 Pickup Turbo Diesel. Note: Does NOT fit Chassis Cab 3500 / 4500 / 5500 models. DESCRIPTIO...
View full details -
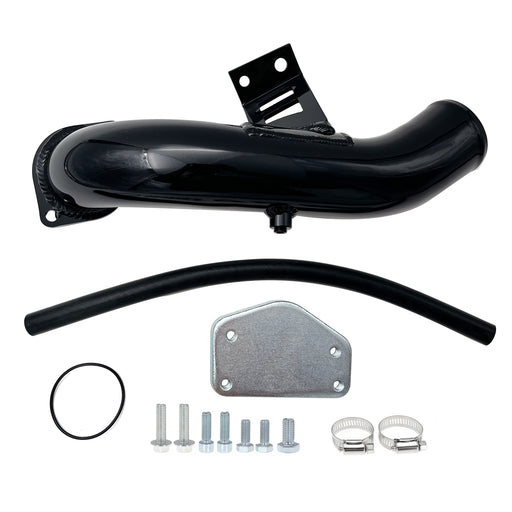
For 2004.5-2005 6.6L Chevy GMC Silverado LLY Duramax Diesel EGR Delete Kit
SEGULEROriginal price $92.99 - Original price $92.99Original price$92.99$92.99 - $92.99Current price $92.99FITMENT 2004.5-2005 6.6L Chevrolet Silverado Duramax LLY 2500HD / 3500 HD. 2004.5-2005 6.6L GMC Sierra Duramax LLY 2500HD / 3500 HD. DESCRIPTION...
View full details -

Seguler 2017-2019 L5P Duramax Diesel 4pcs L5P Can Bus Plugs Connector Replacement
SEGULEROriginal price $75.00 - Original price $75.00Original price$75.00$75.00 - $75.00Current price $75.00FITMENT 2017–2019 Chevrolet Silverado / GMC Sierra Duramax L5P 2500HD & 3500HD Diesel. DESCRIPTION Product Overview Unprotected harness con...
View full details -

Seguler 2020-2023 chevy duramax L5P Diesel Can Bus Plugs Connector
SEGULEROriginal price $80.00 - Original price $80.00Original price$80.00$80.00 - $80.00Current price $80.00FITMENT 2020–2023 Chevrolet Silverado / GMC Sierra Duramax L5P 2500HD & 3500HD Diesel. DESCRIPTION Product Overview Unprotected harness pl...
View full details -
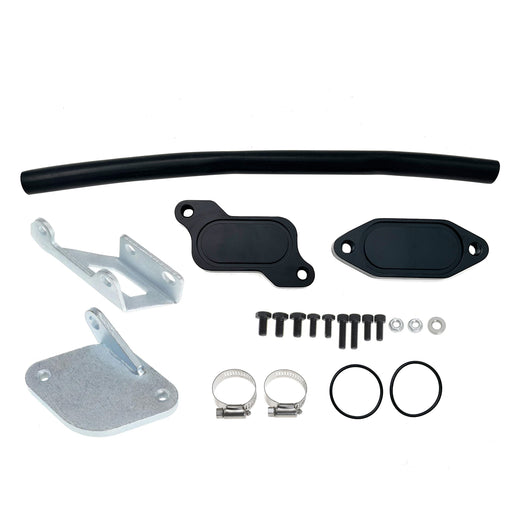
For 2006-2007 6.6L Chevrolet Silverado Classic GMC Duramax LBZ Diesel EGR Valve Cooler Delete Kit
SEGULEROriginal price $63.49 - Original price $63.49Original price$63.49$63.49 - $63.49Current price $63.49FITMENT 2006-2007.4 Chevrolet Silverado Duramax LBZ 2500HD / 3500HD. 2007.4 Chevrolet Silverado Duramax LBZ 2500HD / 3500HD Classic. 2006-2007.4 ...
View full details -
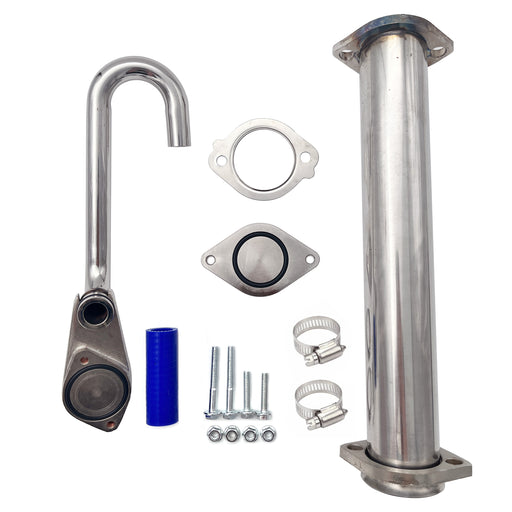
Seguler 2003-2007 6.0L Ford F250 F350 Powerstroke Diesel EGR Basic Cooler Kit
SEGULEROriginal price $79.99 - Original price $79.99Original price$79.99$79.99 - $79.99Current price $79.99FITMENT 2003-2007 6.0L Ford F250 F350 F450 F550 Super Duty Turbo (except 2004 F250 Super Duty). 2003-2005 6.0L Ford Excursion Turbo. 2005 Ford F...
View full details -

Seguler 2011-2023 6.7L Ford F250 F350 F450 F550 Powerstroke Diesel EGR Valve Delete Cooler Delete Kit
SEGULEROriginal price $55.99 - Original price $55.99Original price$55.99$55.99 - $55.99Current price $55.99FITMENT 2011-2023 6.7L Ford Powerstroke F-250 F-350 F-450 F-550 Super Duty V8 Diesel compatible with both standard Pickups and commercial Cab &a...
View full details -
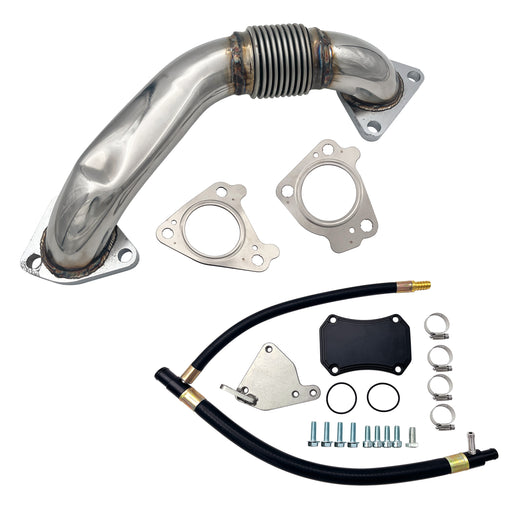
Seguler 2011-2016 6.6L GMC Chevy Duramax Diesel LML Up-Pipe & EGR Valve Cooler Delete Kit
SEGULEROriginal price $173.86 - Original price $173.86Original price$173.86$173.86 - $173.86Current price $173.86FITMENT 2011-2016 6.6L Chevy GMC Duramax LML 2500 HD 3500 HD Diesel. DESCRIPTION Product Overview Direct-injection technology endows GM 5.3L an...
View full details -
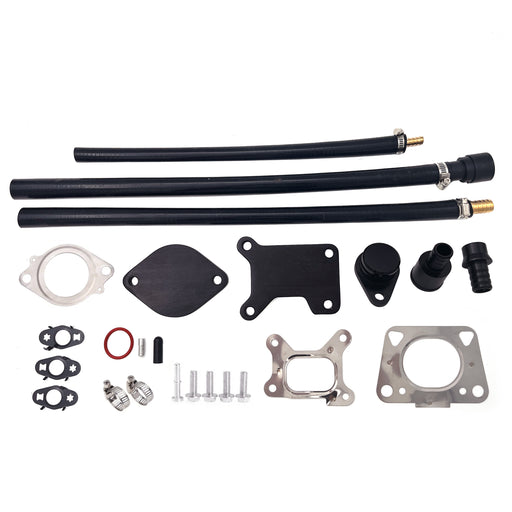
For 2017-2023 6.6L Chevy GMC Duramax L5P diesel EGR Valve Cooler Delete kit
SEGULEROriginal price $131.99 - Original price $131.99Original price$131.99$131.99 - $131.99Current price $131.99FITMENT 2017–2023 6.6L Chevrolet Silverado / GMC Sierra Duramax L5P 2500HD 3500HD Diesel. DESCRIPTION Product Overview Hot soot recirculation ...
View full details -

For 2013-2023 6.7L Dodge Ram Cummins Cab & Chassis EGR Delete Kit Diesel
SEGULEROriginal price $62.99 - Original price $62.99Original price$62.99$62.99 - $62.99Current price $62.99FITMENT 2013–2023 6.7L Ram Cummins 3500 4500 5500 Cab & Chassis / Commercial Trucks. Does NOT fit standard Ram 2500 3500 Pickups. DESCRIPTIO...
View full details -
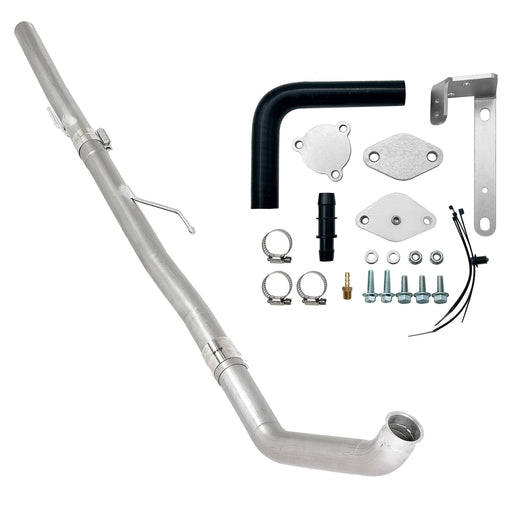
Seguler 3" Ecodiesel DPF Delete Pipe & EGR Delete kit for 2014-2018 3.0L Ram
SEGULEROriginal price $342.00 - Original price $342.00Original price$342.00$342.00 - $342.00Current price $342.00FITMENT 2014–2018 3.0L Dodge Ram 1500 EcoDiesel V6. NOTE: Fit standard Pickup models only (Crew Cab, Quad Cab). Does NOT fit Jeep Grand Cheroke...
View full details -
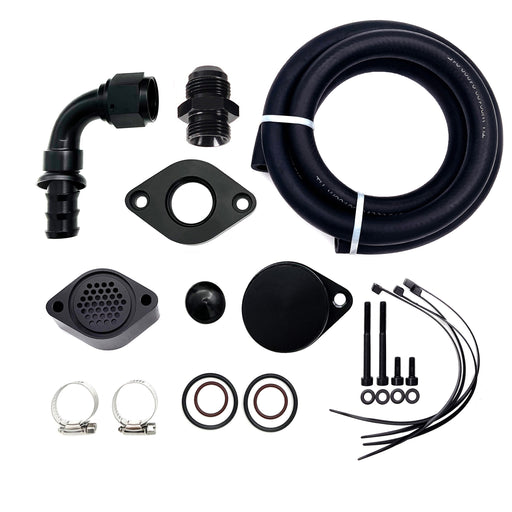
Seguler 2011-2023 6.7L Ford Powerstroke CCV PCV Reroute Engine Ventilation Kit
SEGULEROriginal price $82.99 - Original price $82.99Original price$82.99$82.99 - $82.99Current price $82.99FITMENT 2011-2023 6.7L Ford Powerstroke F-250 F-350 F-450 F-550 Super Duty V8 Diesel. Compatible with both standard Pickups and commercial Cab &...
View full details -
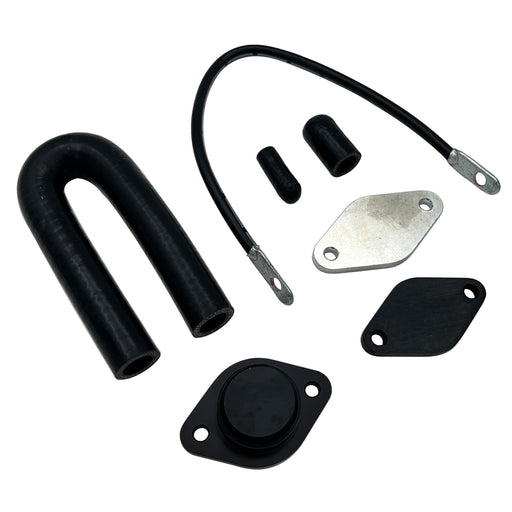
Seguler EGR valve cooler Delete kit for 2020-2022 3.0L Chevy Duramax LM2
SEGULEROriginal price $189.12 - Original price $189.12Original price$189.12$189.12 - $189.12Current price $189.12FITMENT 2020–2022 3.0L Chevrolet Silverado GMC Sierra 1500 LM2 Turbo-Diesel. DESCRIPTION Product Overview Powered by smooth inline-six engine...
View full details -
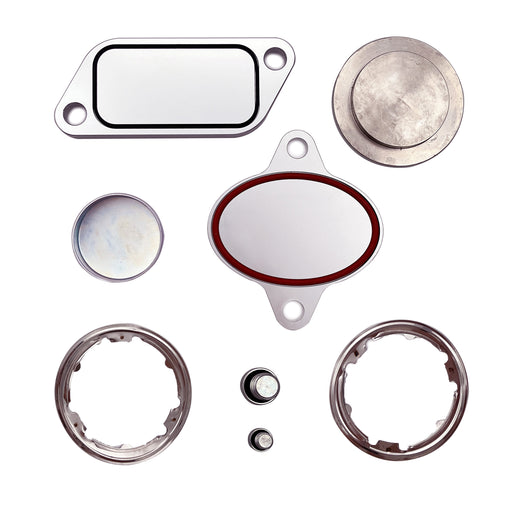
For 2007-2010 Cummins ISX CM871 EGR Plug Kit Stage 2 Plates and Plugs Aluminum
SEGULEROriginal price $67.99 - Original price $67.99Original price$67.99$67.99 - $67.99Current price $67.99FITMENT 2007-2010 Cummins Volvo, Peterbilt, Mack, International, Freightliner, Kenworth with the ISX CM871 Engines. DESCRIPTION Product Overvie...
View full details -
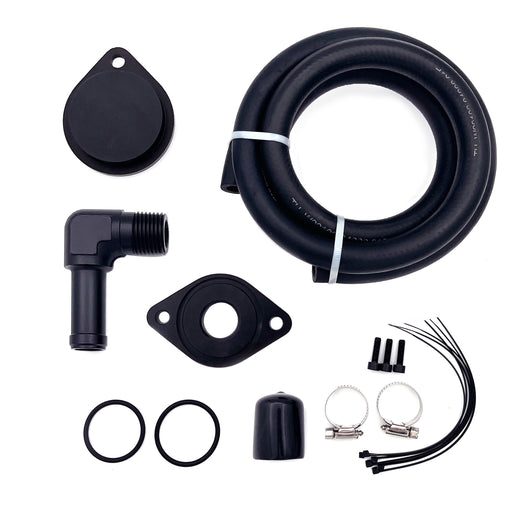
Seguler 2011-2023 Ford 6.7L Powerstroke CCV/PCV Reroute/Delete Engine Ventilation Kit
SEGULEROriginal price $72.00 - Original price $72.00Original price$72.00$72.00 - $72.00Current price $72.00FITMENT 2011-2023 6.7L Ford Powerstroke F-250 F-350 F-450 F-550 Super Duty V8 Diesel. Compatible with both standard Pickups and commercial Cab &...
View full details -
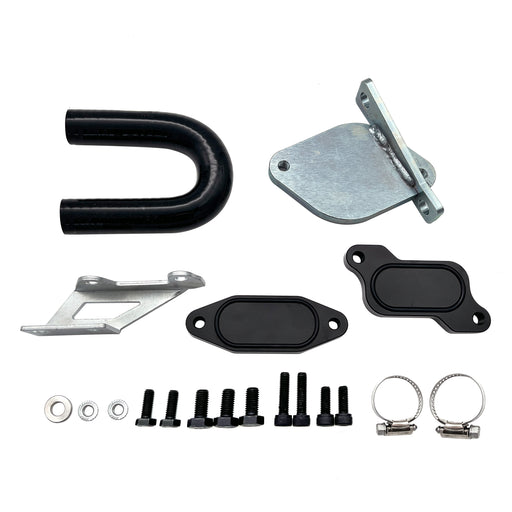
For 2007-2010 6.6L Chevy GMC LMM Duramax EGR Valve Cooler Delete Kit Fit
SEGULEROriginal price $61.99 - Original price $61.99Original price$61.99$61.99 - $61.99Current price $61.99FITMENT 2007.5-2010 6.6L Chevrolet Silverado Duramax LMM 2500HD / 3500HD. 2007.5-2010 6.6L GMC Sierra Duramax LMM 2500HD / 3500HD. Note: Standard...
View full details -
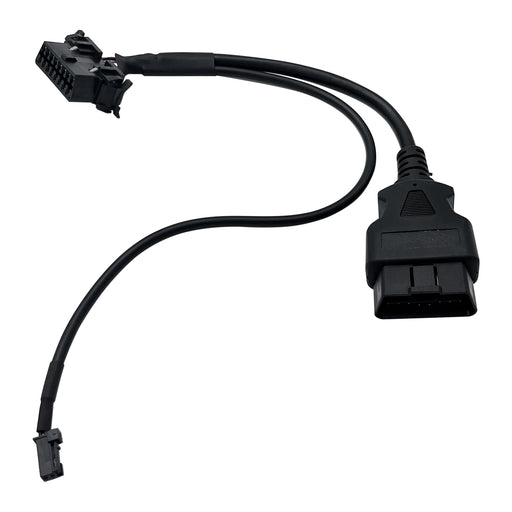
Seguler 2018+ RAM Cummins OBD2 HD Security Gate Bypass Cable
SEGULEROriginal price $45.00 - Original price $45.00Original price$45.00$45.00 - $45.00Current price $45.00FITMENT 2018+ 6.7L Ram Cummins 2500 3500 Turbo Diesel. Designed for Ram pickup trucks equipped with the factory Security Gateway Module. Note: Pl...
View full details -
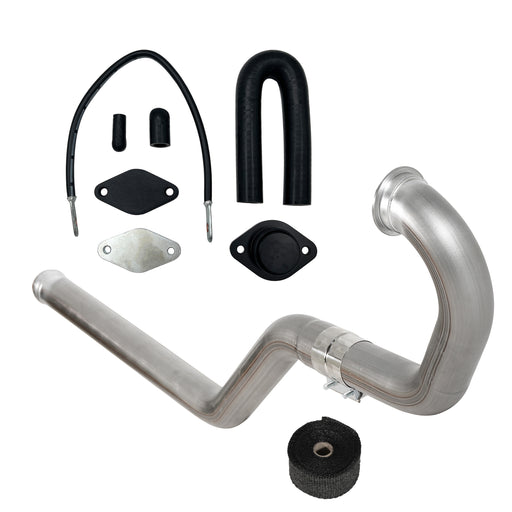
3" Turbo Back DPF & EGR Delete Kit for 2020-2022 GM 3.0L LM2 Duramax
SEGULEROriginal price $550.00 - Original price $550.00Original price$550.00$550.00 - $550.00Current price $550.00FITMENT 2020–2022 3.0L Chevrolet Silverado 1500 LM2 Diesel. 2020–2022 3.0L GMC Sierra 1500 LM2 Diesel. DESCRIPTION Product Overview On the 3.0...
View full details


Leave a comment